· Kitchen Cleaning · 8 min read
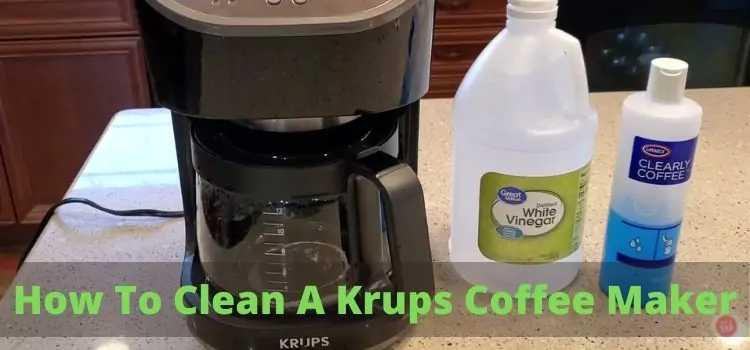
How To Clean A Krups Coffee Maker
If you are a coffee freak like me, you must be familiar with the Krups coffee maker. This particular coffee maker can effectively serve coffee with the utmost quality and in the least bit of time.
However, a problem that many users commonly face while using the Krups coffee maker is that it might accumulate stains in its internal parts over the days of usage.
That’s why you have to clean it every month to continue receiving a quality performance from it.
But, how to clean a Krups coffee maker? Well, you simply have to use a vinegar solution to clean up this coffee maker.
Even so, cleaning up the Krups coffee maker requires further know-how.
Luckily for you, we have thoroughly described how you can easily clean that Krups coffee maker, right in this article. So, stay tuned!!
Do You Have To Clean The Krups Coffee Maker? If So, Why?
If you use the Krups coffee maker on a regular basis, then you must clean the coffee maker once every month.
It’s because, while you use the coffee maker to make coffee, its internal parts (such as the filter basket, water reservoir, coffee brewer, etc) accumulate minerals from the water.
More specifically, minerals such as calcium and magnesium get accumulated in the inner walls of this coffee maker and form solid layers.
As a result, you’ll notice the appearance of a scale-like layer inside this coffee maker over the days of usage.
What’s more, if these stains are not cleaned regularly, your coffee maker will malfunction soon. Consequently, your precious coffee brewing machine may stop working altogether.
On top of that, not cleaning the coffee maker for a long time will make your coffee taste bad as well.
So, if you are using the Krups coffee maker in a commercial space (such as a cafe or coffee shop), your customers will be dissatisfied.
And, that’s exactly why, if you want to keep receiving quality performance from your Krups coffee maker, you’ll need to carefully clean it every month.
How To Clean A Krups Coffee Maker In Easy Steps?
Most models of Krups coffee makers will have a native LED indicator light, which will tell you if the coffee maker needs cleaning or not.
(However, the rule of thumb for using a coffee maker is to provide a thorough clean to it every month.)
Mind you, the manufacturer of Krups coffee maker recommends a special cleaning solution for cleaning the coffee maker. It’s the Krups Descaling Solution.
You may use this solution to clean your Krups coffee maker, or you can also simply use generic white vinegar to clean it as well.
At this point, let’s go over the steps of how to clean a Krups coffee maker:
1. Preparing The Cleaning Solution:
In the first step, you’ll have to prepare a cleaning solution for the Krups coffee maker. If you have the Krups Descaling Solution at your hand, you can skip this step.
However, if you want to do the cleaning up in a DIY manner, you can use white vinegar as the cleaning solution.
That’s to say, you can make a cleaning solution by adding 50% water and 50% white vinegar together.
As a result of mixing white vinegar with water, you’ll have an effective cleaning solution, which is perfectly fit for cleaning or descaling your Krups coffee maker.
2. Taking Apart The Filter
Remember, you must not apply the cleaning solution to the carbon filter of the coffee maker. If the filter is in contact with the cleaning solution, it might cause a malfunction in the future.
That’s why you’ll have to take the filter apart before starting to clean the Krups coffee maker. So, go ahead and detach the carbon filter from your coffee maker.
3. Applying the Cleaning Mixture
At this point, you’ll have to pour the cleaning mixture into the coffee maker. (Pour it where you usually pour water, i.e: the filter basket).
As you continue to pour the cleaning mixture into the coffee maker, you have to stop pouring the cleaning mixture when the coffee maker is half full.
4. Letting The Cleaning Mixture Sit In The Coffee Maker
Once you have poured the cleaning mixture into the coffee maker (and it’s half full), it’s time to let the cleaning solution sit in the coffee maker.
Therefore, let the cleaning solution stay in the coffee maker for about 30 minutes.
This process will make sure that all the internal parts of the coffee maker have been soaked with the cleaning solution.
Consequently, the stains and limescale, which might have accumulated inside the coffee maker, will be dissolved into the cleaning solution.
5. Starting To Brew
After 30 minutes have passed since pouring the cleaning solution into the coffee maker, it’s time to start the brewing process.
In the “brewing” process, you let the coffee maker brew the cleaning solution multiple times. As a result of that, all the internal parts of the coffee machine are totally washed off by the cleaning mixture.
Thanks to that, you can rest assured that all the stains, limescale, and minerals, which have accumulated over the days of usage, will be completely cleaned off.
So, go ahead and press the BREW button on your coffee maker. Or, if your coffee maker has a dedicated CLEAN button, you can tap the CLEAN button as well.
Note: you’ll have to let the coffee maker brew the cleaning solution for another 30 minutes.
6. Draining The Cleaning Solution
After you have brewed the cleaning solution for 30 minutes, it’s time to drain the cleaning mixture liquid out of the coffee maker.
So, go ahead and take all the cleaning solutions in the coffee reservoir. Then, you can detach the coffee reservoir and get rid of the cleaning solution at once.
7. Brewing Only Water
Once you have emptied the water reservoir of the coffee maker, all of your cleaning solutions should be completely drained out of the coffee maker.
Then, you have to pour clean water into the coffee maker. Make sure that you pour clean water into the coffee maker up to the point when it’s completely full.
After that, you should press the BREW button again and let the coffee maker brew the plain water. This step will make sure that no cleaning solution is left in the coffee maker.
Repeat this cycle at least 3 times, so you are 100% certain that the coffee maker is completely rid of the cleaning solution (and the contaminant minerals).
8. Reattaching the Carbon Filter
When you are completely done with the above-mentioned steps, you can reinsert the carbon filter back into the coffee maker.
And, after that, you can take a rest because you just cleaned your Krups coffee maker.
Know More on Be A Cleaner
How To Clean Instant Pot Air Fryer Basket
Easily Clean A Farber Ware Deep Fryer
How To Clean Olive Oil Spill In The Kitchen
Frequently Asked Questions (FAQs)
How Can I Clean the Outer Surface of The Krups Coffee Maker?
In order to clean the outer surface of your Krups coffee maker, you will have to use a soap solution and a plain cloth.
First, you should dip the plain cloth in the soap solution, and then, you can rinse the cloth on the Krups coffee maker.
After that, you should use a dry cloth to wipe the remaining liquid off the surface of the coffee maker.
This procedure should be repeated daily in order to make sure that the exterior appearance of your Krups coffee maker is in its best condition.
Can I Use Bleach to Clean My Krups Coffee Maker?
No, absolutely not. You should note that bleach is a highly hazardous chemical which should never be allowed to enter the human body.
Therefore, it is enormously dangerous to use bleach for cleaning the coffee maker. It’s because bleach residue can sometimes remain in the coffee maker after the cleaning has been done.
So, the possibility of bleach entering into the human body is extremely high in this case. Therefore, you should never use bleach to clean a coffee maker.
When Should I Use 100% Vinegar Solution to Clean My Krups Coffee Maker?
If you haven’t been cleaning your Krups coffee maker for the past 2 to 3 months, you’ll notice that it has accumulated thick layers of scales on its internal surfaces.
And, in this particular case, you’ll have to use 100% vinegar to clean the accumulated minerals and completely descale the coffee maker.
Conclusion
Well, there you have it, people. Now that you’ve got a clear understanding on how to clean a Krups coffee maker. Hopefully, if you follow the aforementioned steps, you’ll be able to do this job with ease.
To sum it all up, since the taste of coffee depends on whether you routinely clean your Krups coffee maker or not, you should never leave the coffee maker uncleaned. Meaning, after every time you use the coffee maker, you should always conduct a normal clean-up with plain water.
Additionally, you should also conduct a thorough cleanup with a cleaning mixture after every 30 days of usage.
If you can continue this cleaning cycle with proper care, you can rest assured that your Krups coffee maker will provide you with constant performance for long years.
Also, you will continue getting amazing coffee from your Krups coffee maker as well.
- Coffee Maker Care
- Krups Maintenance
- Kitchen Appliances