· Kitchen Cleaning · 6 min read
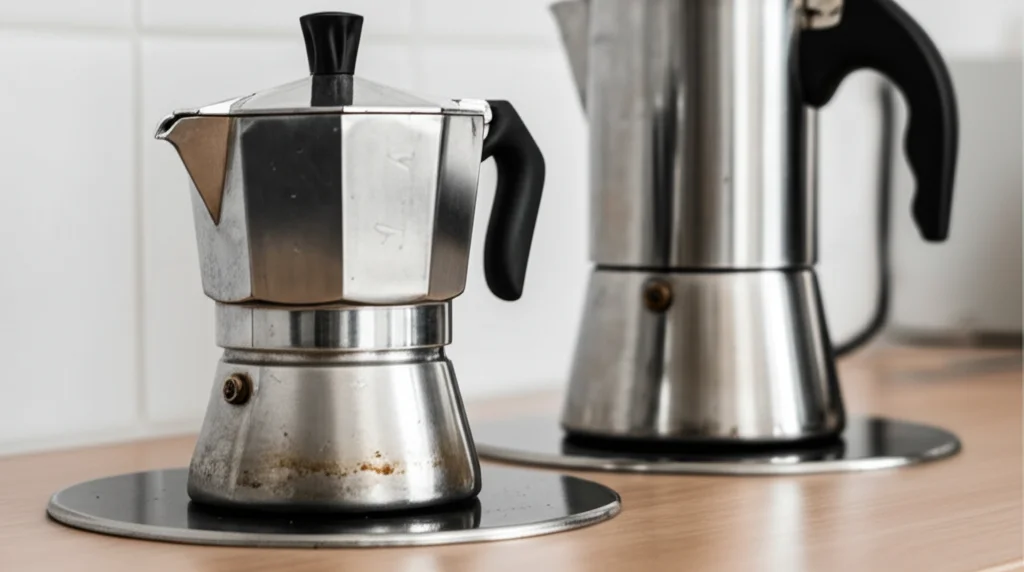
How To Clean A Stainless Steel Stovetop Espresso Maker
Enjoying Espresso? Let’s Talk Cleaning Your Stovetop Maker!
Do you love starting your day with a rich, flavorful espresso brewed on your stovetop? A stainless steel stovetop espresso maker is a fantastic investment, delivering café-quality coffee right in your kitchen. But, like any brewing equipment, it requires regular cleaning to maintain its performance and ensure your espresso always tastes its best. This article will guide you through everything you need to know about how to clean a stainless steel stovetop espresso maker, from daily rinses to deep cleaning routines. We’ll cover everything to keep your maker in top shape for years to come. Let’s dive in and learn how to keep your espresso maker sparkling and brewing delicious coffee!
Takeaway:
- Regular rinsing after each use prevents buildup.
- Deep cleaning monthly removes oils and residue.
- Proper disassembly and reassembly are crucial for longevity.
- Avoid abrasive cleaners that can damage the stainless steel.
Quick Answer:
To clean a stainless steel stovetop espresso maker, disassemble it, rinse all parts with warm water, and scrub gently with a non-abrasive sponge. For deeper cleaning, use a solution of vinegar and water, and ensure everything is completely dry before reassembling.
Why Cleaning Your Espresso Maker Matters
Cleaning isn’t just about aesthetics; it directly impacts the taste of your espresso. Over time, coffee oils and residue build up inside the maker, becoming rancid and affecting the flavor of your brew. This buildup can also clog the filter and valve, reducing the pressure and resulting in weak, underwhelming espresso. Regular cleaning prevents these issues, ensuring a consistently delicious cup every time. Plus, a clean espresso maker lasts longer, protecting your investment.
Daily Maintenance: A Quick Rinse is Key
After each use, a quick rinse is the most important step you can take. Don’t let coffee grounds and oils sit and harden. Immediately after brewing and while the maker is still warm (but cool enough to handle!), disassemble the three main parts: the bottom chamber (boiler), the filter basket, and the top chamber (collector). Rinse each part thoroughly with warm water. Avoid using soap at this stage, as it can leave a residue that affects the taste of your espresso. Simply rinsing removes the majority of the coffee residue.
Deep Cleaning Your Espresso Maker: Monthly Routine
While daily rinsing is essential, a more thorough deep clean is needed monthly. This removes stubborn oils and mineral deposits that accumulate over time. Here’s how to do it:
Disassembling for a Thorough Clean
First, completely disassemble your espresso maker. This includes the bottom chamber, the filter basket, the rubber gasket, and the filter plate. Pay close attention to the rubber gasket, as it can trap a lot of residue. Remove the filter plate from the filter basket. Having all the parts separated makes cleaning much easier and more effective.
The Vinegar and Water Solution
Fill the bottom chamber with a solution of equal parts white vinegar and water. Vinegar is a natural descaler and helps to break down mineral deposits. Reassemble the espresso maker without coffee grounds. Place it on the stovetop and brew as you normally would, but only until the vinegar solution begins to come through the top chamber. Turn off the heat and let it sit for about 15-20 minutes. This allows the vinegar solution to work its magic.
Scrubbing and Rinsing
After the soaking period, disassemble the espresso maker again. Use a non-abrasive sponge or cloth to scrub each part thoroughly. Pay special attention to the filter basket and the inside of the bottom chamber, where residue tends to accumulate. Rinse all parts extremely well with warm water, ensuring all traces of vinegar are removed. Vinegar residue will definitely impact the taste of your next espresso!
Drying and Reassembly
Allow all parts to air dry completely before reassembling. This is crucial to prevent mold and mildew growth. Once dry, reassemble the espresso maker, ensuring the rubber gasket is properly seated and the filter plate is securely in place. If you’re unsure about reassembly, refer to your espresso maker’s instruction manual.
Caring for the Stainless Steel Exterior
The stainless steel exterior of your espresso maker can also benefit from regular cleaning. To remove fingerprints and water spots, use a stainless steel cleaner or a mixture of warm water and a few drops of dish soap. Apply the cleaner to a soft cloth and wipe down the exterior, following the grain of the stainless steel. Rinse with clean water and dry with a clean cloth. Avoid using abrasive cleaners or scouring pads, as they can scratch the surface. You can also find helpful tips on cleaning stainless steel sinks at https://www.beacleaner.com/how-to-clean-stainless-steel-sink-paint-stains/.
Troubleshooting Common Cleaning Issues
Sometimes, you might encounter specific cleaning challenges. Here are a few solutions:
- Stubborn Coffee Stains: For particularly stubborn coffee stains, make a paste of baking soda and water. Apply the paste to the stained area, let it sit for a few minutes, and then scrub gently with a non-abrasive sponge.
- Clogged Filter: If the filter is clogged, soak it in a solution of vinegar and water overnight. This will help to dissolve any buildup.
- Damaged Rubber Gasket: If the rubber gasket is cracked or damaged, it needs to be replaced. You can usually find replacement gaskets online or at kitchen supply stores.
- Mineral Deposits: If you have hard water, you may need to deep clean your espresso maker more frequently to remove mineral deposits.
FAQ: Your Espresso Maker Cleaning Questions Answered
Q: Can I put my espresso maker in the dishwasher?
A: No, it’s generally not recommended to put your espresso maker in the dishwasher. The harsh detergents and high temperatures can damage the aluminum and rubber parts. Hand washing is always the best option.
Q: How often should I replace the rubber gasket?
A: The rubber gasket should be replaced every 6-12 months, or sooner if it becomes cracked, brittle, or damaged. A worn gasket can affect the pressure and quality of your espresso.
Q: What type of cleaner should I avoid using on my espresso maker?
A: Avoid using abrasive cleaners, scouring pads, and harsh chemicals like bleach. These can damage the stainless steel and leave behind harmful residues.
Q: Can I use lemon juice instead of vinegar?
A: Yes, lemon juice can be used as a substitute for vinegar. It has similar descaling properties. Use the same ratio of lemon juice to water as you would with vinegar.
Q: My espresso maker smells like coffee even after cleaning. What can I do?
A: This indicates lingering coffee oils. Repeat the deep cleaning process with a stronger vinegar solution (2 parts vinegar to 1 part water) and ensure a thorough rinse.
Conclusion: A Clean Maker, A Better Brew
Maintaining a clean stainless steel stovetop espresso maker is essential for enjoying consistently delicious espresso. By following these simple steps – daily rinsing, monthly deep cleaning, and proper exterior care – you can keep your maker in top condition for years to come. Remember, how to clean a stainless steel stovetop espresso maker isn’t complicated, but it is important. A little effort goes a long way in preserving the flavor and longevity of your beloved brewing companion. Now, go forth and enjoy many more perfect espressos! If you’re looking for more cleaning tips around the house, check out our guide on https://www.beacleaner.com/how-to-clean-kitchen-floor-without-mop/ for a sparkling clean kitchen.