· Home Maintenance · 15 min read
How To Clean Ac Unit Inside
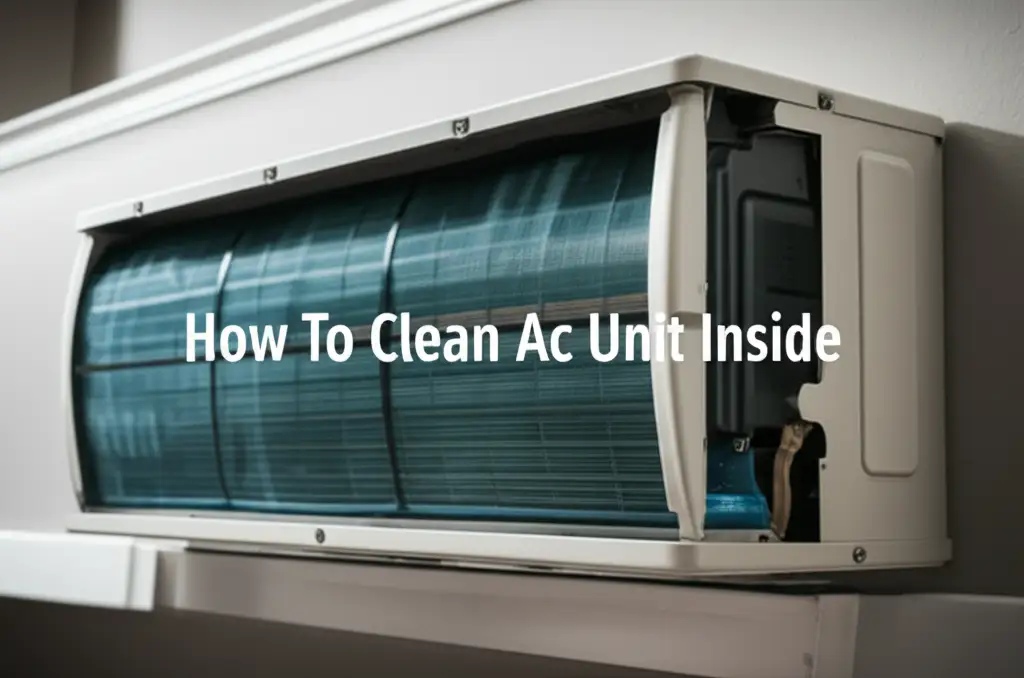
Clean Your AC Unit Inside: A Complete Guide
Summer heat arrives quickly, and your air conditioner works hard. Over time, dust and grime build up inside the unit. This buildup hurts your AC’s performance and affects your indoor air quality. Learning how to clean your AC unit inside is a simple, effective way to keep your home cool and healthy. This guide will walk you through each step, making sure your AC unit runs smoothly. I will share important tips to help you get the best results.
Keeping your AC unit clean is not just about cool air. It also saves energy and extends the life of your system. A clean AC unit does not have to work as hard to cool your home. This means lower energy bills for you. A little effort now prevents bigger problems later. Let us get your AC unit sparkling clean and ready for action. You will feel the difference in your home’s comfort and air freshness.
Takeaway:
- Regularly clean your AC unit’s internal parts, including filters, coils, and the drain pan.
- Dirty AC units use more energy and provide poorer air quality.
- Turn off power to the unit before starting any cleaning.
- Use gentle cleaners and soft brushes to prevent damage.
- Call a professional for complex issues or if unsure about a step.
Clear Answer:
To clean your AC unit inside, first turn off power. Then, remove and wash the air filter. Clean the evaporator coils with a coil cleaner and a soft brush. Clear the drain pan and line of any clogs. Wipe down the unit’s casing and vents.
Why Cleaning Your Inside AC Unit Matters for Health and Efficiency
Many people overlook the importance of cleaning the inside of their AC unit. However, this task is crucial for several reasons. A clean AC unit does not just cool your home better; it also protects your health. Dust, allergens, and even mold can build up inside. When your AC runs, it blows these particles into your home. This can cause allergies or breathing problems.
Think about your AC unit as the lungs of your home. If its lungs are dirty, it cannot breathe properly. This means the air quality in your home suffers. Regular cleaning removes these harmful elements. It ensures you breathe clean, fresh air. Your family’s health depends on it.
Beyond health, a dirty AC unit is very inefficient. When coils and filters are covered in grime, the unit works harder to cool your space. This extra effort means it uses more electricity. More electricity means higher energy bills. In fact, a dirty AC can increase your energy consumption by 5% to 15%. This is a significant amount over a cooling season.
Cleaning your AC unit keeps it running at peak performance. This not only saves you money on electricity but also extends the life of your unit. Preventing breakdowns means fewer costly repairs. A little bit of regular maintenance goes a long way. You are investing in your comfort, health, and finances.
Gathering Your Tools: What You Need to Clean Your AC Unit Inside
Before you start cleaning your AC unit, you need the right tools. Having everything ready makes the job easier and faster. Safety is also very important. Make sure you turn off all power to the unit first. You can do this at the thermostat and at your home’s circuit breaker. This step prevents electric shock.
Here is a list of what you will need for a thorough cleaning:
- Screwdriver: For opening the unit’s casing.
- Vacuum cleaner with a brush attachment: For removing loose dust and debris.
- Soft brush or fin comb: For cleaning delicate coils and fins.
- Coil cleaner (no-rinse type): Specifically designed for AC coils.
- Spray bottle: For water or a mild cleaning solution.
- Mild soap or dish detergent: For cleaning the filter and casing.
- Bucket and rags/towels: For catching water and wiping surfaces.
- Protective gloves and eye protection: To keep you safe from chemicals and dust.
- Wet/dry vacuum (optional): For easily clearing the drain pan.
Gathering these items before you begin saves you time. It ensures you have everything on hand when you need it. This preparation helps you complete the cleaning process safely and effectively. You are now ready to tackle the dust and grime inside your AC unit.
Step-by-Step Guide to Cleaning AC Filters
Cleaning the air filter is perhaps the easiest and most important part of AC maintenance. The filter catches dust, dirt, and allergens before they enter your home or clog your AC’s internal parts. A clogged filter blocks airflow and makes your AC work harder. This reduces efficiency and can even cause the unit to freeze up. Most manufacturers recommend checking filters monthly and cleaning or replacing them every 1-3 months.
First, locate your AC unit’s air filter. For central AC units, the filter is usually in the return air duct or in the indoor air handler. For window units or wall units, the filter is typically behind the front grille. Gently open the grille or access panel to remove the filter. Some filters slide out easily, while others may have clips. If you need help with a specific type, learning how to clean a wall AC unit or a window AC unit filter can provide specific guidance.
Once you have the filter out, inspect it. If it is a disposable filter, simply throw it away and replace it with a new one. If it is a reusable filter, you can clean it. Take it outside and gently tap it to dislodge loose dust. Then, use your vacuum cleaner with a brush attachment to remove as much surface dust as possible. For a deeper clean, wash reusable filters with warm water and a mild detergent. Rinse thoroughly until the water runs clear. Let the filter air dry completely before putting it back. A damp filter can promote mold growth. Ensuring your AC filter is clean is a simple way to improve air quality and unit performance significantly.
Deep Cleaning Evaporator Coils and Fins
The evaporator coils are the part of your AC unit that gets cold and absorbs heat from your home’s air. They are located inside the indoor unit. Over time, these coils can accumulate a layer of dirt, dust, and grime. This buildup acts as an insulator, preventing the coils from properly absorbing heat. When the coils are dirty, your AC unit has to work much harder to cool your home. This leads to higher energy bills and reduced cooling efficiency.
Before you begin, remember to turn off the power to your AC unit at the circuit breaker. Locate the access panel for the evaporator coils. This usually involves removing a few screws. Once the panel is off, you will see a series of metal fins with tubes running through them. These are your evaporator coils. First, use a soft brush or a vacuum cleaner with a brush attachment to gently remove any loose dust or debris from the coil surface and fins. Be very careful, as the fins are delicate and can bend easily. If your AC has a musty smell, you might be dealing with mold. In such cases, knowing how to clean mold from an AC unit is very helpful.
After removing loose debris, apply a no-rinse coil cleaner. These cleaners come in a spray bottle and foam up when applied. The foam penetrates the dirt and grime, breaking it down. Follow the product instructions carefully. Typically, you spray the cleaner generously over the coils and let it sit for 10-15 minutes. The cleaner will drip into the drain pan below. There is no need to rinse it off. For bent fins, you can use a fin comb to gently straighten them, which helps improve airflow. After cleaning, replace the access panel and restore power. Regular cleaning of these coils is vital for keeping your AC unit running efficiently and providing clean, cool air.
Addressing the Drain Pan and Drain Line
The drain pan collects condensation that forms on the evaporator coils. This water then flows out through the drain line, usually to the outside of your home. If the drain pan or drain line gets clogged, water can back up. This can lead to leaks, water damage, and even mold growth inside your home. A clogged drain line is a common cause of AC problems and musty odors. You may also notice your AC unit shutting off frequently.
To clean the drain pan, you first need to locate it. It sits directly under the evaporator coils. You may need to remove a few more screws or a panel to access it fully. Once you see the pan, check for standing water, slime, or debris. Use a wet/dry vacuum to remove any standing water. Then, wipe the pan clean with a cloth. You can use a solution of warm water and a little bleach (about 1 part bleach to 16 parts water) to clean the pan and kill any mold or mildew. Always wear gloves and eye protection when using bleach. For detailed instructions on using bleach for AC drain lines, you can check out how to clean an AC drain line with bleach.
The drain line often clogs with algae, mold, or dirt. To clear it, you can pour a cup of distilled white vinegar down the drain line opening (usually a PVC pipe near the indoor unit). Let it sit for 30 minutes to an hour. The vinegar helps break down the buildup. After that, flush the line with a gallon of clean water to ensure it flows freely. If the line is severely clogged, you might need to use a drain snake or call a professional. Ensuring the drain pan and line are clear prevents water damage and mold issues, keeping your AC unit running smoothly.
Tackling the Blower Motor and Fan
The blower motor and fan are responsible for circulating air throughout your home. The fan pulls warm air from your rooms, blows it over the cold evaporator coils, and then pushes the cooled air back out. Over time, the blades of the blower fan can collect a significant amount of dust and grime. This buildup reduces airflow, makes the motor work harder, and can even cause strange noises. A dirty blower wheel significantly impacts your AC’s efficiency.
Accessing the blower motor and fan can be a bit more challenging than other parts. They are typically located behind another panel, often requiring removal of more screws and sometimes electrical disconnections. Always ensure the power to the unit is off before attempting to access this component. If you are not comfortable with this step, it is best to call a professional. However, if you are, you will find a large, squirrel-cage-shaped fan. For some AC models, you can clean the blower wheel without fully removing it, which is simpler. You can find specific tips on how to clean an AC blower wheel without removing it.
Use a vacuum cleaner with a narrow nozzle or a stiff brush to gently clean the fan blades. Be careful not to bend the blades. For stubborn grime, you can use a damp cloth with a mild detergent. Wipe each blade thoroughly. The motor itself generally does not require cleaning, but ensure its vents are clear of dust. Once clean, reassemble the panels. A clean blower fan ensures your AC delivers strong, consistent airflow. This helps your home stay cool and comfortable, and it keeps your energy bills in check.
Inspecting and Cleaning the AC Unit Casing and Vents
While the internal components are vital, do not forget the visible parts of your AC unit: the casing and the vents. These parts are constantly exposed to household dust and can accumulate grime. Cleaning them improves the appearance of your unit and prevents dust from being drawn back into the system. It also ensures that air flows freely out of the unit and into your rooms.
Start by wiping down the exterior casing of your indoor AC unit. Use a damp cloth with a mild all-purpose cleaner. Gently scrub away any dirt, dust, or fingerprints. Pay attention to the top and sides, where dust often settles. If you have a window AC unit, remember to clean its exterior casing too. Many people also clean their window AC unit without removing it for convenience.
Next, focus on the air vents or grilles. These are the louvers where the cooled air comes out. Dust can easily collect on these, restricting airflow. Use a vacuum cleaner with a brush attachment to remove loose dust. For a deeper clean, you can wipe the individual slats with a damp cloth or a cotton swab. If the vents are removable, you can wash them in a sink with warm, soapy water. Rinse them thoroughly and let them air dry completely before reattaching. Cleaning the casing and vents makes your AC unit look better and helps maintain good airflow, contributing to overall efficiency.
When to Call a Professional for Inside AC Unit Cleaning
While much of your AC unit’s internal cleaning can be a DIY project, there are times when calling a professional is the best choice. Knowing your limits prevents accidental damage to your system and ensures proper maintenance. If you are unsure about any step, especially those involving electrical components or deep internal parts, it is always safer to seek expert help. Professionals have specialized tools and knowledge. They can identify and fix issues that you might miss.
You should consider calling a professional for the following situations:
- Complex Disassembly: If accessing certain components, like the blower motor, requires extensive disassembly or disconnecting wiring you are not familiar with, stop and call an expert. Incorrect reassembly can cause serious damage or safety hazards.
- Persistent Odors or Mold: If, after cleaning, you still notice a strong musty smell or see extensive mold growth, particularly in areas you cannot easily reach, a professional can perform a deeper mold remediation. They have stronger, safer solutions and specialized equipment. Learning how to clean window AC unit mold is helpful, but sometimes professional intervention is necessary.
- System Malfunctions: If your AC unit is making unusual noises, leaking excessively, not cooling properly after cleaning, or frequently shutting off, a professional technician can diagnose the root cause. Cleaning might not be enough if there is an underlying mechanical issue.
- Refrigerant Leaks: Refrigerant leaks require specialized equipment and training to detect and repair. Never attempt to handle refrigerant yourself, as it is harmful to the environment and your health.
- Annual Maintenance: Even if you perform regular DIY cleaning, an annual professional tune-up is highly recommended. Technicians can check refrigerant levels, electrical connections, and overall system performance, ensuring everything is running optimally and safely. This preventive check can catch small problems before they become major repairs.
Investing in professional service ensures your AC unit receives a comprehensive check-up. It gives you peace of mind that your system is clean, safe, and efficient.
FAQ Section
How often should I clean my AC unit inside?
You should clean your AC filter every 1-3 months, depending on use and household conditions. A deeper clean of the coils, drain pan, and blower fan is generally recommended once a year, ideally before the cooling season begins. This regular schedule helps maintain efficiency and air quality.
Can I use bleach to clean my AC unit?
You can use a diluted bleach solution (1 part bleach to 16 parts water) to clean the drain pan and flush the drain line to kill mold and algae. However, never spray bleach directly onto evaporator coils or other metal components, as it can cause corrosion. Always use appropriate safety gear.
What are the signs that my AC unit needs internal cleaning?
Signs include reduced airflow, poor cooling performance, increased energy bills, visible dust or mold on vents, and musty odors coming from the unit. If you notice any of these, it is a strong indicator that your AC unit needs a thorough internal cleaning.
Is it safe to clean my AC unit myself?
Yes, cleaning basic components like the filter and exterior is safe. However, always turn off the power to the unit at the circuit breaker first. For more complex tasks like deep coil or blower fan cleaning, proceed with caution. If unsure, call a professional to avoid damage or injury.
What happens if I don’t clean my AC unit inside?
Neglecting internal AC cleaning leads to several problems. Your unit will use more energy, leading to higher bills. Air quality in your home will worsen due to circulating dust and allergens. The unit’s lifespan may shorten, and it could experience frequent breakdowns, costing you more in repairs.
How do I prevent mold from growing in my AC unit?
Regularly cleaning the drain pan and flushing the drain line helps prevent mold by ensuring water drains properly. Keeping the evaporator coils clean also reduces moisture buildup. Using a dehumidifier in humid environments can further reduce the chances of mold growth in your AC unit.
Conclusion
Taking the time to learn how to clean your AC unit inside is a smart investment. You are not just cleaning a machine; you are improving your home’s air quality, saving money on energy bills, and extending the life of your appliance. We covered everything from simple filter cleaning to tackling the coils, drain pan, and even the blower fan. Each step plays a vital role in keeping your air conditioner running at its best.
Regular maintenance is key to a healthy, efficient AC system. By following these steps, you empower yourself to manage a crucial part of your home’s comfort. Remember to prioritize safety by turning off power before you begin. A clean AC unit means cooler air, lower costs, and a healthier living environment. Make internal AC cleaning a part of your regular home maintenance routine. Your AC unit, and your wallet, will thank you for it.
- AC maintenance
- indoor air quality
- HVAC cleaning
- air conditioner care
- DIY AC cleaning
- evaporator coils
- AC filters