· Kitchen Cleaning · 19 min read
How To Clean Air Fryer Racks
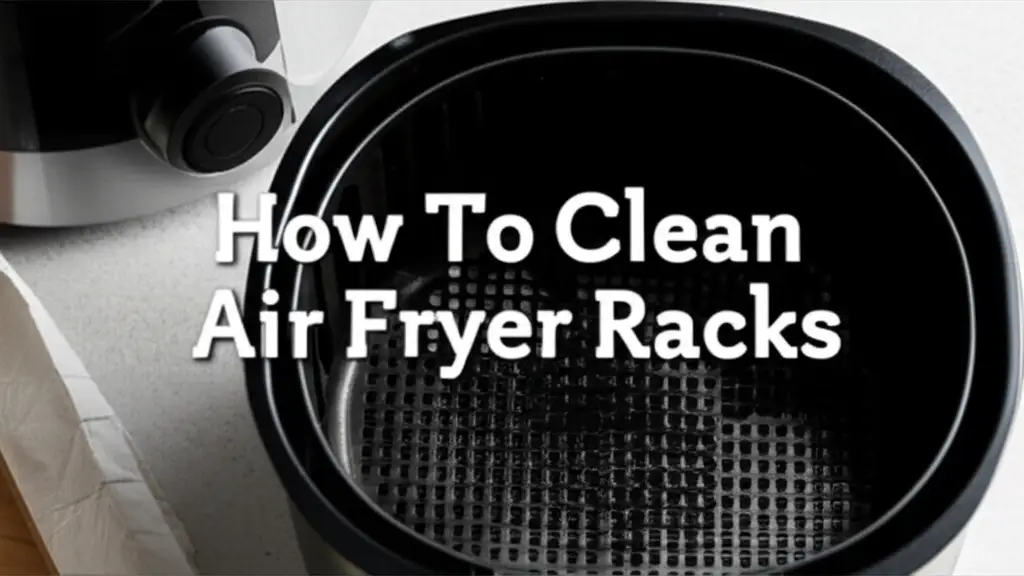
Clean Air Fryer Racks: Your Guide to Spotless Cooking
Your air fryer works hard, creating crispy, delicious meals. But over time, its racks can collect stubborn grease and food residue. Cleaning air fryer racks correctly keeps your appliance working efficiently and your food tasting fresh. Ignoring this task leads to poor performance and unpleasant odors.
I know how frustrating it is to deal with sticky, burnt-on grime. Many people struggle with finding the best way to clean these essential parts. This guide offers practical, easy-to-follow methods to get your air fryer racks sparkling clean again. We will explore gentle daily cleaning, natural remedies for tough spots, and advanced techniques for deep cleaning. You will learn about the tools you need and steps to prevent future buildup. Let’s make your air fryer racks look new again.
Takeaway
- Soak promptly: Loosen food bits and grease right after use.
- Use gentle scrubbers: Protect non-stick coatings and stainless steel.
- Harness natural cleaners: Baking soda and vinegar tackle stubborn grime effectively.
- Dry completely: Prevent rust and water spots before storage.
- Clean regularly: Avoid heavy buildup for easier maintenance.
To clean air fryer racks, first remove them and let them cool. Soak the racks in warm, soapy water to loosen food debris and grease. For stubborn spots, create a paste with baking soda and water, apply it, and let it sit before scrubbing gently. Rinse thoroughly and dry completely to prevent rust.
Understanding Your Air Fryer Racks: Materials and Cleaning Needs
Air fryer racks are crucial components of your appliance. They hold food, allowing hot air to circulate around it. Understanding their material helps you clean them without damage. Most air fryer racks are made from stainless steel, non-stick coated metal, or a combination. Each material requires specific care to maintain its integrity and effectiveness.
Stainless steel racks are durable and resist rust. They can usually handle more vigorous scrubbing. However, abrasive pads can still scratch their surface. Non-stick coated racks prevent food from sticking. They need very gentle cleaning to preserve the coating. Harsh chemicals or metal scrubbers will damage the non-stick layer. Damaged non-stick surfaces cause food to stick more and can release harmful chemicals. Knowing your rack material helps you choose the safest cleaning method. This prevents damage and ensures your air fryer lasts longer.
Why Cleaning is Critical for Performance and Health
Dirty air fryer racks reduce your appliance’s performance. Food particles and grease block airflow. This prevents even cooking and crispy results. Your food may cook unevenly or take longer. Odors from old food can also transfer to fresh meals, affecting taste.
Grease buildup is a fire hazard. Accumulated oil can ignite during high-temperature cooking. Regular cleaning removes this risk. It also promotes better hygiene. Food residue can harbor bacteria if not properly removed. A clean air fryer means safer, healthier meals for your family. Prioritizing rack cleaning maintains your air fryer’s efficiency and extends its lifespan. It also ensures your meals are always delicious and safe.
Essential Tools and Gentle Cleaners for Air Fryer Racks
Cleaning your air fryer racks effectively starts with having the right tools. You do not need a lot of specialized equipment. Common household items work very well. Gathering these supplies before you begin makes the cleaning process smoother. Using the correct tools prevents damage to your racks.
Basic Cleaning Tools:
- Soft Sponge or Microfiber Cloth: Ideal for gentle cleaning of non-stick surfaces.
- Nylon Brush: Great for scrubbing stubborn bits from wire racks without scratching.
- Old Toothbrush: Perfect for reaching tight corners and small crevices.
- Paper Towels or Dish Towel: For drying and initial wipe-downs.
Gentle Cleaning Agents:
- Dish Soap: A basic degreaser suitable for most daily cleaning. It breaks down fresh grease effectively.
- Warm Water: Essential for loosening food and grease. Hot water works best for soaking.
- Baking Soda: A natural abrasive and deodorizer. It helps lift baked-on grime and neutralize odors.
- White Vinegar: An excellent degreaser and disinfectant. Its acidic nature helps dissolve tough residues.
- Lemon Juice (Optional): Adds a fresh scent and mild acidic cleaning power.
Avoid using harsh abrasive cleaners or metal scouring pads. These can scratch non-stick coatings or stainless steel. Scratches make racks harder to clean in the future. They can also degrade the rack material over time. Stick to gentler options for long-term rack health.
The Go-To Method: Dish Soap and Warm Water for Regular Cleaning
This method is your first line of defense against air fryer rack grime. It works well for light grease and fresh food residue. Regular use of this technique prevents major buildup. It keeps your racks looking clean and performing optimally. This simple process is effective and safe for most rack materials.
Step-by-Step Guide for Everyday Cleaning
- Cool Down: Always let your air fryer racks cool completely after use. Handling hot racks is dangerous. It also makes cleaning easier as food particles harden once cool. Do not immerse hot racks in water. This can warp them or damage coatings.
- Remove Excess Food: Gently wipe off any loose food crumbs or large debris. Use a paper towel or a soft cloth. This prevents clogging your sink. It also makes the subsequent washing steps more efficient.
- Prepare a Soak: Fill your sink or a large basin with warm water. Add a few drops of dish soap. Make sure the water is warm, not scalding hot. The soap needs to create a good amount of suds. This helps in breaking down grease.
- Soak the Racks: Place your air fryer racks into the soapy water. Ensure they are fully submerged. Let them soak for at least 15-30 minutes. For slightly tougher spots, a longer soak, even an hour, can be beneficial. Soaking softens baked-on food and grease, making them easier to remove. This pre-treatment step is key to effective cleaning.
- Scrub Gently: After soaking, use a soft sponge, nylon brush, or old toothbrush. Gently scrub the racks. Focus on areas with visible food residue or grease. The softened grime should come off with minimal effort. Be careful not to scrub too hard, especially on non-stick coatings. You want to lift the dirt, not strip the surface.
- Rinse Thoroughly: Rinse the racks under running warm water. Make sure to remove all soap residue. Soap left on the racks can burn onto them during the next use. This leaves behind a sticky film. Check all crevices for any remaining soap or debris.
- Dry Completely: Dry the racks immediately with a clean dish towel or paper towel. Air drying can lead to water spots or even rust, especially on stainless steel. Ensure every part is dry before putting them back into your air fryer or storing them. This step prevents corrosion and keeps your racks hygienic.
This basic dish soap and water method forms the foundation of air fryer rack care. It is a quick and efficient way to maintain cleanliness after each use. Consistent application of this method will significantly reduce the need for more intensive cleaning processes. For those moments when grease proves particularly stubborn, you may need a more robust approach. Learn more about effective strategies for removing grease from your appliance in our guide on how to clean grease from air fryer.
Tackling Stubborn Grease with Baking Soda and Vinegar
Sometimes, simple dish soap is not enough for baked-on grease. This is when baking soda and vinegar become your best friends. These natural powerhouses create a powerful reaction. This reaction helps break down even the most stubborn grime. They are safe, non-toxic, and readily available. This method is highly effective for heavy grease.
Baking Soda Paste Method
Baking soda acts as a mild abrasive and a powerful deodorizer. It helps lift away caked-on food and absorbs odors.
- Prepare the Paste: Mix baking soda with a small amount of water. Aim for a thick, spreadable paste consistency. It should resemble toothpaste. Do not make it too watery, or it will run off the racks.
- Apply the Paste: Spread the baking soda paste generously over the greasy or soiled areas of the air fryer racks. Make sure to cover all the stubborn spots. Push it into the crevices using your fingers or an old brush.
- Let it Sit: Allow the paste to sit on the racks for at least 30 minutes to an hour. For very stubborn, baked-on grease, you can leave it overnight. The longer it sits, the more time it has to work on breaking down the grime. This waiting period is crucial for its effectiveness.
- Scrub Gently: After the sitting time, use a non-abrasive sponge or a nylon brush. Gently scrub the areas with the paste. The baking soda will provide a mild abrasive action. It helps lift the loosened grime. You should see the grime starting to come off easily.
- Rinse: Rinse the racks thoroughly under warm running water. Ensure all baking soda residue and loosened grime are washed away. You may need to use your fingers to wipe off any lingering paste.
Vinegar Soak Method
White vinegar is an excellent degreaser and natural disinfectant. Its acidity helps dissolve tough, greasy residues.
- Prepare the Solution: Fill your sink or a large container with warm water. Add an equal amount of white vinegar. For example, if you use 2 cups of water, add 2 cups of vinegar. You can add a few drops of dish soap for extra degreasing power.
- Submerge Racks: Place your air fryer racks into the vinegar and water solution. Ensure they are completely submerged. If the racks float, you can use a plate or a small bowl to weigh them down.
- Soak: Let the racks soak for at least 1-2 hours. For very heavy buildup, an overnight soak works wonders. The vinegar slowly breaks down the grease and helps loosen baked-on food. You will notice the water changing color as grime dissolves.
- Scrub and Rinse: Remove the racks from the vinegar solution. Use a soft sponge or a nylon brush to scrub away any remaining residue. The grime should be much easier to remove now. Rinse the racks thoroughly under warm water. Make sure no vinegar smell or residue remains.
- Dry Completely: As always, dry the racks thoroughly with a clean cloth. This prevents water spots and potential rust formation.
For even tougher situations, you can combine these two methods. Apply the baking soda paste first. Then, after it has sat for a while, spray it with white vinegar. This creates a fizzing reaction. The reaction helps lift and break down the most stubborn grime. Just be ready for the fizz! This powerful combination is often the ultimate solution for heavily soiled racks. It helps you maintain your kitchen appliances, including those similar to air fryers, like air fryer toaster ovens. Learn more about their cleaning needs in our guide on how to clean air fryer toaster oven.
Advanced Cleaning Techniques for Heavily Soiled Racks
Sometimes, even baking soda and vinegar might not fully conquer the most persistent, baked-on grime. For these challenging situations, you might need to bring out the big guns. These advanced techniques involve stronger cleaning agents or methods. They are typically reserved for deep cleaning. Use them cautiously and follow all safety instructions.
Using Commercial Oven Cleaner (with caution)
Commercial oven cleaners are very powerful degreasers. They can dissolve extreme baked-on food and grease. However, they contain strong chemicals. These chemicals can be harsh on non-stick coatings and can be irritating if not handled properly.
- Read Instructions Carefully: Always read the specific product’s instructions. Different brands have different recommendations for use and safety.
- Work in a Well-Ventilated Area: Oven cleaner fumes are strong. Open windows and doors. Consider working outdoors if possible. Wear gloves and eye protection.
- Protect Surfaces: Lay down old newspapers or a thick layer of cardboard. This protects your countertops or floors from the strong chemicals.
- Apply Cleaner: Spray or apply the oven cleaner directly onto the soiled air fryer racks. Ensure even coverage. Do not use too much, just enough to cover the grime.
- Allow to Sit: Let the cleaner sit for the recommended time. This is usually 15-30 minutes, but check the product label. The cleaner works by breaking down the tough residue during this time.
- Scrub and Rinse: Using a stiff nylon brush or a non-metallic scrubber, gently scrub the racks. The grime should now be much easier to remove. Rinse the racks thoroughly under very hot water. Rinse several times to ensure all chemical residue is gone.
- Dry Completely: Dry the racks immediately and completely. This prevents any spots or potential rust.
Important Note: Never use oven cleaner on non-stick coated racks. It will strip the coating. This method is best for bare stainless steel or chrome-plated racks. Always test a small, inconspicuous area first if unsure.
Dishwasher Tablets for Deep Soaking
Dishwasher tablets are designed to break down tough food and grease in dishwashers. They can be surprisingly effective for soaking air fryer racks.
- Fill Basin: Find a large basin or your sink. Fill it with very hot water. The hotter the water, the better the tablet will dissolve and activate.
- Add Tablet: Drop one or two dishwasher tablets into the hot water. Allow them to fully dissolve. Stir the water to help the dissolution process.
- Soak Racks: Carefully place your air fryer racks into the solution. Ensure they are fully submerged. Let them soak for several hours or even overnight. The enzymes and cleaning agents in the tablet will work on the grime.
- Scrub and Rinse: After soaking, remove the racks. Use a sponge or brush to easily wipe away the loosened grease and food. Rinse the racks thoroughly under warm water. Ensure no residue remains.
- Dry: Dry the racks immediately and completely to prevent water spots and rust.
This method is generally safer than commercial oven cleaner for various rack types. It is still wise to avoid it on very delicate non-stick coatings, or use a shorter soak time. For extensive cleaning needs, especially with heavily soiled cooking surfaces, consider researching more robust cleaning methods for other kitchen essentials. For instance, methods for cleaning conventional oven racks can sometimes offer parallel solutions for stubborn grime, even if the scale differs. Explore options like how to clean oven racks without bathtub for similar challenges.
Preventative Measures: Keeping Your Air Fryer Racks Cleaner Longer
Prevention is key to easy cleaning. Taking a few simple steps after each use can significantly reduce buildup. This means less scrubbing for you in the long run. Good habits extend the life of your air fryer racks. They also keep your air fryer working its best.
Simple Habits for Cleaner Racks
- Clean After Every Use: This is the most crucial step. As soon as the racks cool down, wipe them with a damp, soapy sponge. Fresh grease and food are much easier to remove than dried, baked-on grime. This routine takes only a minute or two. It prevents serious cleaning sessions later.
- Use Parchment Paper or Liners: For messy foods, use air fryer-specific parchment paper liners or silicone mats. These catch drips and crumbs, protecting the racks from direct contact with food. This makes cleanup almost effortless. Ensure the liners do not block airflow too much. Never use them without food on top, as they can fly up and hit the heating element.
- Spray Racks with Non-Stick Cooking Spray: Before placing food on the racks, lightly spray them with cooking oil. This creates a barrier. It makes food less likely to stick and burn onto the surface. This works especially well for sticky marinades or breaded items.
- Avoid Overfilling: Do not overcrowd your air fryer. Overfilling means food sits directly on the racks, instead of slightly above them. This can lead to more food sticking and more drippings. Leave enough space for air to circulate properly.
- Pre-Soak Immediately: If you notice significant food stuck to the racks after cooking, give them a quick pre-soak. Place them in warm, soapy water while you eat. This softens the debris before it hardens. It makes the actual cleaning much quicker.
- Regular Deep Cleaning Schedule: Even with daily wiping, some buildup might occur. Plan for a deeper clean every few weeks or once a month. This ensures hidden grime does not accumulate. It keeps your air fryer in top condition.
By adopting these preventative measures, you minimize the effort needed for cleaning. You also ensure your air fryer remains a reliable kitchen companion. These small actions make a big difference in maintaining cleanliness and performance. Your air fryer racks will thank you for the consistent care.
Drying and Storage: Final Steps for Clean Racks
Cleaning your air fryer racks is only half the battle. Proper drying and storage are just as important. These final steps prevent issues like rust and bacterial growth. They also ensure your racks are ready for the next cooking session. Skipping these steps can undo all your hard cleaning work.
The Importance of Thorough Drying
Water, even in small amounts, can cause problems if left on air fryer racks.
- Preventing Rust: Most air fryer racks are stainless steel or have a protective coating. However, prolonged exposure to water, especially in crevices, can still lead to rust. Rust not only looks bad but also degrades the material. It can eventually affect cooking performance and hygiene.
- Avoiding Water Spots: Hard water can leave unsightly mineral deposits or water spots. These spots may not affect performance, but they make your racks look dirty. Thorough drying removes these minerals before they can settle.
- Inhibiting Bacterial Growth: Moisture creates a breeding ground for bacteria and mold. Ensuring racks are completely dry eliminates this risk. This maintains a hygienic cooking environment.
How to Dry Effectively:
- Immediate Drying: As soon as you finish rinsing, dry the racks with a clean, lint-free dish towel or microfiber cloth. Pay special attention to corners and joints where water tends to collect.
- Air Drying (Optional but cautious): If you choose to air dry, place the racks in a well-ventilated area. Ensure they are positioned so water can drip off. This is best done in a drying rack. Do not place them back into the air fryer until you are absolutely certain they are bone dry. You can also place them near a fan to speed up the process. However, manual drying is always preferred for complete dryness.
Proper Storage for Longevity
Once your air fryer racks are sparkling clean and perfectly dry, proper storage is vital.
- Store Inside the Air Fryer (If Applicable): If your air fryer is designed for the racks to remain inside when not in use, this is the most convenient option. Ensure the entire air fryer unit is also clean and dry.
- Separate Storage: If you remove the racks for storage, find a clean, dry place. A dedicated drawer or cabinet is ideal. Avoid storing them where they can get scratched by other metal items. Placing a soft cloth between stacked racks can offer protection.
- Avoid Damp Environments: Never store racks in damp or humid areas. This significantly increases the risk of rust and mold growth. A dry pantry or kitchen cabinet is perfect.
By dedicating a few extra moments to thorough drying and proper storage, you protect your investment. Your air fryer racks will remain in excellent condition, ready for your next culinary adventure. This simple attention to detail ensures they perform flawlessly every time.
FAQ Section
How often should I clean my air fryer racks?
Clean your air fryer racks after every use for light grime. This prevents buildup. For a deeper clean, address stubborn spots weekly or bi-weekly. Regular cleaning maintains performance and hygiene. It also makes subsequent cleaning jobs much easier.
Can I put air fryer racks in the dishwasher?
Many air fryer racks are dishwasher safe. Check your air fryer’s manual first to confirm. If they are, place them on the top rack to avoid extreme heat. Dishwashers may not remove heavy, baked-on grease completely. Manual scrubbing might still be needed sometimes.
What should I do if food is really stuck on the racks?
For truly stuck-on food, soak the racks overnight in warm, soapy water. Alternatively, use a baking soda paste. Apply the paste, let it sit for several hours, then scrub gently. A vinegar soak can also help break down stubborn residues. Avoid metal scrubbers.
Are there any natural cleaning alternatives for tough grease?
Yes, baking soda and white vinegar are excellent natural alternatives. Combine them to create a fizzing reaction that lifts grease. A paste of baking soda and water can be applied. Then, spray with vinegar to activate it. This method works well for chemical-free cleaning.
How do I prevent my air fryer racks from rusting?
Prevent rust by always drying your air fryer racks completely after washing. Do not let them air dry where water can pool. Store them in a dry environment. Promptly remove any scratches or damage that could expose bare metal.
Can I use abrasive cleaners on air fryer racks?
Avoid abrasive cleaners or metal scouring pads, especially on non-stick coated racks. These can scratch or strip the coating. This makes food stick more and can damage the rack. Stick to soft sponges, nylon brushes, or natural pastes for safety.
Conclusion
Cleaning your air fryer racks is a simple yet vital task. It ensures your appliance works at its best. Regular cleaning keeps your food safe and tasty. It also extends the life of your air fryer. We explored everything from quick daily wipes to tackling stubborn, baked-on grease.
Remember to cool your racks before cleaning. Use gentle tools and effective cleaners like dish soap, baking soda, and vinegar. For very tough spots, specialized methods are available with caution. Always dry your racks completely to prevent rust. Store them properly for longevity. By following these steps, you will enjoy perfectly cooked meals every time. A clean air fryer is a happy air fryer. Make cleaning air fryer racks a regular part of your kitchen routine. You will notice the difference in performance and hygiene. Keep your air fryer pristine and ready for your next delicious creation.
```json
{
  "publishDate": "2025-07-11T00:00:00Z",
  "title": "How To Clean Air Fryer Racks",
  "excerpt": "Learn how to clean air fryer racks easily and effectively. Discover simple methods, essential tools, and tips for sparkling, hygienic racks.",
  "image": "https://res.cloudinary.com/dky6urpy2/image/upload/v1752172448/blog_image_1752172447_nioyc4.webp",
  "category": "Kitchen Cleaning",
  "tags": [
    "air fryer cleaning",
    "appliance maintenance",
    "kitchen cleaning tips",
    "grease removal",
    "rack care"
  ],
  "metadata": {
    "canonical": "https://www.beacleaner.com/how-to-clean-air-fryer-racks"
  }
}- air fryer cleaning
- appliance maintenance
- kitchen cleaning tips
- grease removal
- rack care