· Appliance Maintenance · 21 min read
How To Clean Bissell Revolution Pet Pro
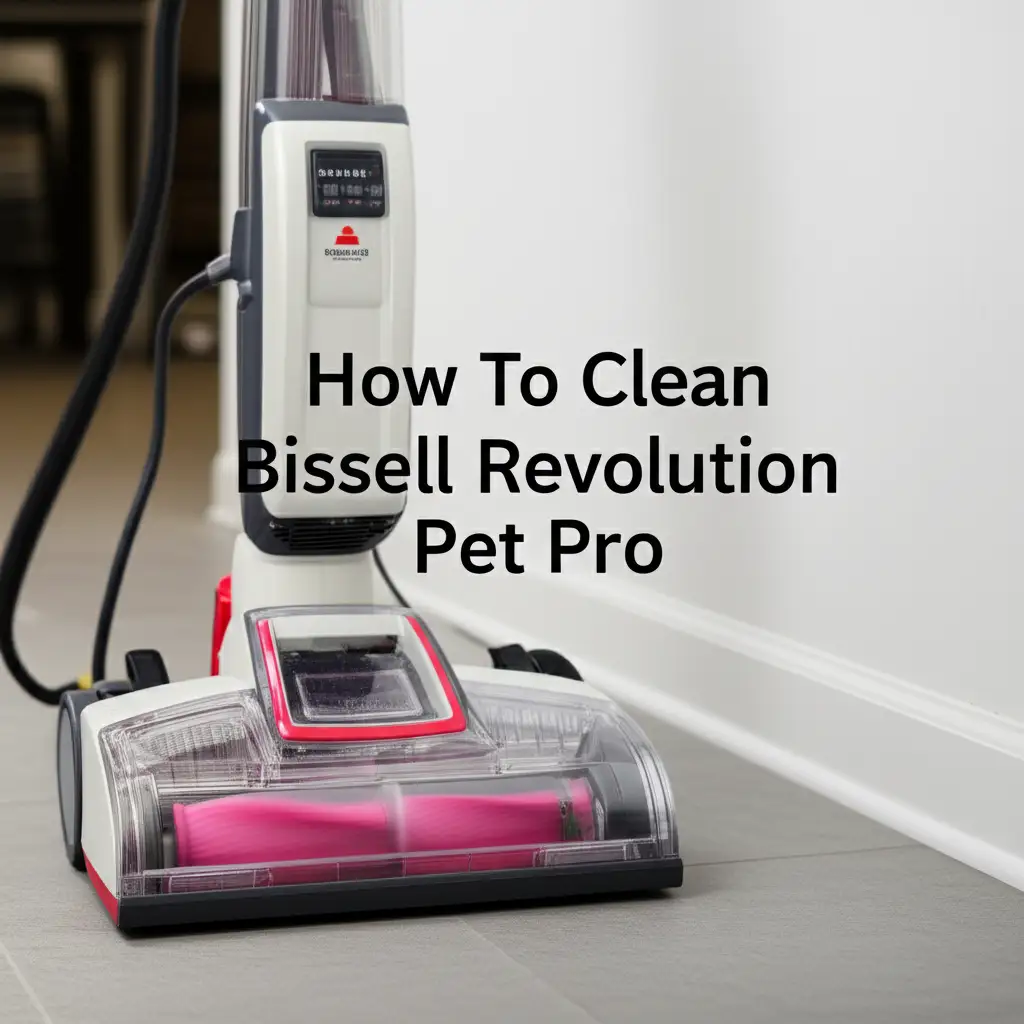
Effortless Cleaning: How To Clean Your Bissell Revolution Pet Pro
My Bissell Revolution Pet Pro is a true hero in my home. It handles pet messes like a champion. However, even heroes need a little care. Learning how to clean Bissell Revolution Pet Pro machine is crucial for its long life. A dirty deep cleaner cannot properly clean your carpets. In fact, it can even spread odors and grime. This guide will walk you through each step. We will cover everything from emptying tanks to deep cleaning brushes. You will soon have your Bissell machine performing its best.
Takeaway:
- Regularly empty and rinse both clean and dirty water tanks after each use.
- Remove and thoroughly clean the brush rolls and nozzle plate to prevent clogs and odors.
- Clean the hose and any attachments by rinsing them with warm water.
- Check and clean filters to maintain proper suction and airflow.
- Wipe down the exterior of the machine to keep it looking fresh.
To clean your Bissell Revolution Pet Pro, first empty and rinse all tanks. Next, remove and clean the brush rolls, nozzle, and filters. Rinse the hose and attachments. Finally, wipe down the exterior of the machine. This process removes dirt and residue. It ensures your deep cleaner works effectively every time.
Why Regular Cleaning Matters for Your Bissell Pet Pro
Taking care of your Bissell Revolution Pet Pro deep cleaner extends its life. This simple act saves you money over time. A clean machine also works more effectively. It removes more dirt and odors from your carpets. I always make sure to clean mine after every use.
When dirt and hair build up inside, your cleaner loses suction. It might even start leaving dirty streaks on your floors. This defeats the purpose of cleaning. Think of it like trying to wash dishes with a dirty sponge. It just does not work well. Keeping your Bissell clean prevents these problems. It ensures fresh, truly clean results every time. This maintenance protects your investment.
Benefits of a Clean Machine
A clean Bissell Revolution Pet Pro offers many advantages. First, it ensures maximum cleaning performance. The brushes spin freely. The suction path remains clear. This means better dirt and stain removal. Second, it prevents foul odors. Pet hair, dirt, and old cleaning solution can smell bad. Cleaning eliminates these odor sources. Your home will smell fresh, not like stale carpet water.
Third, it extends the lifespan of your appliance. Dirt and debris can wear down internal parts. Regular cleaning keeps components running smoothly. This avoids costly repairs or early replacement. Lastly, it promotes better hygiene in your home. You do not want to spread old dirt around. A clean machine applies clean water and removes dirty water efficiently. This makes your carpet truly clean.
Consequences of Neglecting Cleaning
Ignoring the cleaning of your Bissell Revolution Pet Pro can lead to several issues. The most common problem is reduced suction power. Dirt and hair clog the air pathways. This makes the machine less effective at pulling up dirty water. Your carpets will stay wetter. They might also look less clean. Another issue is foul odors. Bacteria and mold can grow in damp, dirty tanks and hoses. This creates a musty or sour smell. Your carpet might even smell worse after cleaning.
Clogged brush rolls can stop spinning correctly. This affects the scrubbing action. It leaves stains behind. Over time, neglected buildup can cause parts to break down. Hoses might clog completely. Motors might overheat due to strain. These problems can lead to expensive repairs. In the worst case, you might need to buy a new machine. Regular care prevents these frustrations.
Essential Tools and Supplies for Cleaning Your Bissell
Before you start cleaning your Bissell Revolution Pet Pro, gather your supplies. This makes the process much smoother. You likely have most of these items around your house already. I always keep these things handy after using my machine. Having everything ready saves time and effort. It ensures you complete the cleaning thoroughly.
You will need a few simple tools and cleaning agents. These items help you reach all parts of the machine. They also ensure you remove all dirt and grime effectively. Using the right supplies protects your machine’s components. It helps maintain its efficiency for years to come. Do not skip this preparation step.
What You Will Need
Prepare a small collection of essential items for the cleaning process. These tools make the job easier and more effective.
- Gloves: Protect your hands from dirty water and cleaning solutions.
- Microfiber Cloths or Old Towels: For wiping down surfaces and drying parts.
- Small Brush (e.g., old toothbrush or cleaning brush): Perfect for scrubbing tight spots and removing tangled hair from brushes.
- Sink or Bathtub: For rinsing tanks and components with water.
- Warm Water: Essential for rinsing and dissolving residue.
- Mild Dish Soap or All-Purpose Cleaner: A small amount helps cut through grime and sanitize parts. Avoid harsh chemicals.
- Scissors or Hair Removal Tool: For cutting tangled hair from the brush rolls. Some Bissell models include a tool for this.
These simple items are all you need. They will help you keep your Bissell Revolution Pet Pro in top condition.
Step-by-Step Guide to Cleaning the Dirty Water Tank
The dirty water tank is where all the extracted grime collects. This tank needs immediate attention after every use. Neglecting it is the fastest way to create bad odors. I always make cleaning this tank my first priority. It prevents unpleasant smells from lingering.
Cleaning this tank thoroughly also ensures proper suction for your next cleaning session. If it is clogged, your machine cannot pull up water efficiently. This leaves carpets too wet. A clean tank means a more effective clean. It helps your Bissell perform its job beautifully.
Removing, Emptying, and Rinsing
After you finish cleaning your carpets, the first step is to remove the dirty water tank. Press the release button located on the top of the tank. Lift the tank straight up and off the machine. Take it to a utility sink or toilet. Unlatch the pour spout or remove the lid, depending on your model. Carefully pour out all the dirty water. You will be surprised by how much grime it collects.
Once empty, rinse the tank thoroughly with warm water. Swish the water around inside. Make sure to rinse the inside of the lid or spout as well. Look for any debris or hair stuck inside. Repeat the rinse process until the water runs clear. This removes loose dirt and prevents buildup.
Cleaning the Tank Components
Beyond just rinsing, you need to clean the internal parts of the dirty water tank. Pay close attention to the filter screen. This screen prevents large debris from entering the motor. Use a small brush or old toothbrush to gently scrub the screen. Remove any trapped hair, lint, or dirt. Rinse it under running water until clean.
Some dirty water tanks have a float mechanism. This mechanism tells the machine when the tank is full. Ensure this float is free of debris. Gently clean around it with your brush. If possible, remove and clean the lid separately. Some lids have small channels or seals where gunk can accumulate. A little mild dish soap can help here. Mix a few drops with warm water. Use this solution to scrub stubborn areas. Then rinse everything very well. For a deeper clean and to kill odor-causing bacteria, consider a solution of vinegar and water. This is a simple, effective method for sanitizing. You can learn more about general cleaning with these household items by reading about how to clean with vinegar and baking soda.
Drying and Reassembling the Tank
After cleaning, let all parts of the dirty water tank air dry completely. This is a critical step to prevent mold and mildew growth. Place the tank and its lid upside down. Allow air to circulate inside. You can also use a clean cloth to wipe down the exterior and interior surfaces. Ensure no standing water remains.
Once dry, reassemble the tank components. Make sure the filter screen is securely in place. Snap the lid or pour spout back on tightly. Now the dirty water tank is ready for its next use. A dry, clean tank will prevent odors and maintain your machine’s performance. Store the tank separately from the machine if possible, to allow continued air circulation.
Keeping the Clean Water Tank and Formula System Spotless
The clean water tank holds your cleaning solution. It might seem like it stays clean because it only holds fresh water. However, residue from cleaning formulas can build up. This can lead to clogs in the spray nozzles. I make sure to rinse this tank often. It keeps my cleaning solution flowing freely.
Maintaining the clean water tank is simple but important. It ensures your cleaning solution disperses evenly. This helps your Bissell clean effectively. A clear path for the solution means better stain removal. It also extends the life of your machine’s internal pumping system.
Emptying and Rinsing the Clean Water Tank
After each use, empty any remaining cleaning solution from the clean water tank. Do not leave solution standing in the tank. Old solution can become stale or leave residue. Press the release button and remove the tank from the machine. Pour out any unused formula. Take the tank to a sink.
Rinse the tank thoroughly with warm water. Swirl the water around inside. Make sure to rinse the small cap or opening where you fill it. Look for any cloudy residue. If you see buildup, add a small amount of warm water and a drop of mild dish soap. Shake the tank gently. Then rinse repeatedly until all soap and residue are gone. Ensure the tank is completely clear.
Cleaning the Formula System and Nozzles
The formula system includes the small tubes and nozzles that spray the cleaning solution onto your carpet. While you cannot easily access all internal tubes, you can clean the accessible parts. After rinsing the clean water tank, refill it with plain warm water. Place the tank back on the machine. Turn on the machine and press the spray trigger. Spray plain water for about 30 seconds. This flushes out any remaining formula from the lines and nozzles.
Periodically, you might notice spray patterns becoming uneven. This indicates a clogged nozzle. Use a thin wire or a straightened paper clip to gently clear the nozzle openings. Do this while the machine is off and unplugged. Be very gentle to avoid damage. This step ensures an even distribution of cleaning solution. It makes your carpet cleaning more effective.
Preventing Buildup and Storing Properly
To prevent future buildup in the clean water tank and formula system, always use the recommended Bissell formulas. Avoid using harsh chemicals or non-Bissell solutions. These can cause clogs or damage internal components. After each use, always empty the tank completely. Rinse it with warm water. Do not store the machine with cleaning solution in the tank.
When storing your Bissell, ensure the clean water tank is dry. You can leave the cap off for a while to allow air circulation. Store the tank separate from the machine if space permits. This helps prevent any lingering moisture from causing issues. Proper storage ensures your clean water system stays pristine and ready for the next task.
Maintaining the Brush Rolls and Nozzle for Optimal Performance
The brush rolls are the heart of your Bissell Revolution Pet Pro’s cleaning power. They scrub the carpet fibers. They lift embedded dirt and pet hair. If these brushes are matted with hair or grime, they cannot do their job properly. I pay extra attention to my brush rolls. Clean brushes make a huge difference in cleaning results.
The nozzle plate is equally important. This clear cover creates the suction path. It allows the machine to pull dirty water from your carpet. A clogged or dirty nozzle means poor suction. Keeping both these parts clean is essential for effective deep cleaning. It ensures your machine delivers spotless carpets every time.
Removing and Cleaning the Brush Rolls
To clean the brush rolls, first turn off and unplug your Bissell Revolution Pet Pro. This is a crucial safety step. Lay the machine down on its back. Locate the brush roll cover. This is usually a clear or gray plastic piece held by a few screws or latches. Unscrew or unlatch the cover. Carefully remove the brush rolls. They might have a belt attached, so be gentle.
Once removed, you will likely see a significant amount of tangled hair, lint, and debris. Use scissors or a hair removal tool to carefully cut and remove all tangled material. Be careful not to cut the brush bristles. Rinse the brush rolls under warm running water. Use your small brush to scrub the bristles. Remove any caked-on dirt. Ensure the bristles are free and clear. Let them air dry completely before reassembling. This ensures they are fully functional for your next cleaning job.
Cleaning the Nozzle Plate
The nozzle plate is the clear front part that hovers over the carpet. It is designed to channel the dirty water into the recovery tank. With the machine still unplugged and on its back, examine the nozzle plate. You will often find hair, lint, and pet fur stuck to the underside. Remove any large pieces of debris by hand.
Use your small brush to scrub the crevices and openings of the nozzle plate. Rinse it under warm running water. Ensure all suction channels are clear. A clogged nozzle drastically reduces suction. You might even see residue from old dirty water. A quick scrub and rinse will clear this up. Sometimes, dried formula can block the small spray openings on the nozzle. Use a pin or straightened paper clip to gently clear these if needed. This step makes sure your Bissell picks up all the dirty water.
Reinstalling and Routine Checks
Once the brush rolls and nozzle plate are clean and dry, it is time to reinstall them. Carefully place the brush rolls back into their housing. Make sure the belt is properly aligned if your model has one. Then, reattach the brush roll cover. Ensure it clicks or screws securely into place. Turn the machine upright.
Before your next use, always perform a quick visual check. Look at the brush rolls to ensure they spin freely. Check the nozzle plate for any visible clogs. This quick check takes seconds. It can save you from a frustrating cleaning session. Regular checks, combined with thorough cleaning, keep your Bissell Revolution Pet Pro in prime working order. For more tips on maintaining Bissell cleaning tools, you might find similar steps apply to other models like the Bissell Little Green. This highlights the common care needs across Bissell products.
Cleaning the Hose, Tools, and Other Attachments
Your Bissell Revolution Pet Pro comes with various attachments. These tools help you clean upholstery, stairs, and tight spots. Just like the main unit, these attachments can harbor dirt and odors. The hose, in particular, collects a lot of dirty water and debris. I always make sure to clean these accessories. It is easy to forget them.
Cleaning these parts ensures versatility and hygiene. A dirty hose can spread old grime. Dirty attachments cannot clean effectively. Taking a few extra minutes to clean them means your entire cleaning system stays fresh. It also extends their functional life.
Rinsing the Hose After Use
The hose is critical for spot cleaning and upholstery work. After using the hose attachment, always flush it out. First, disconnect the hose from the machine. Take it to a sink or bathtub. Hold one end of the hose under warm running water. Let the water run through the entire length of the hose. You will see dirty water and debris come out the other end. Continue flushing until the water runs clear.
For a more thorough clean, you can add a small amount of clean water with a capful of Bissell formula to the hose. Shake it gently to agitate. Then flush again with plain warm water. This helps break down any sticky residue inside. Hang the hose vertically to allow all water to drain out. Air drying is crucial to prevent mildew growth. Ensure it is completely dry before storing it away. This ensures your hose stays free of odors and clogs.
Cleaning Specialty Tools and Attachments
Your Bissell Revolution Pet Pro likely includes specialized tools. These might be a stair tool, upholstery tool, or crevice tool. Each of these tools has its own suction path and bristles. After each use, disconnect them from the hose. Take them to a sink.
Rinse each tool thoroughly under warm running water. Use a small brush or old toothbrush to clean any bristles or suction openings. Remove any trapped hair or debris. Pay attention to the clear plastic covers on some tools; these can get cloudy with dried dirt. Use a mild soap solution if needed to scrub stubborn grime. Rinse thoroughly. Allow all attachments to air dry completely before storing them. Proper care for these tools maintains their effectiveness. It also prevents cross-contamination.
Maintaining the Tool Caddy and Storage
Some Bissell Revolution Pet Pro models come with a tool caddy. This keeps your attachments organized. Even the caddy needs occasional cleaning. Wipe it down with a damp cloth to remove dust and dirt. Ensure it is dry before placing cleaned tools back into it.
Proper storage is key for all components. Make sure the hose is completely dry before coiling it for storage. Store attachments in a clean, dry place. Avoid storing them in damp areas. This helps prevent mildew and preserves the materials. A well-maintained set of tools is always ready for your next cleaning challenge. Keeping your machine clean prevents issues. Similarly, keeping other cleaning appliances clean is important. For example, knowing how to clean a Bissell PowerFresh steam mop also ensures efficient cleaning throughout your home.
Filter Care and Exterior Wipe-Down
Beyond the tanks and brushes, your Bissell Revolution Pet Pro has filters. These filters protect the motor from debris. They also help maintain powerful suction. A clogged filter will reduce your machine’s performance. It can also put a strain on the motor. I make it a point to check my filters regularly. It is an easy step that makes a big difference.
The exterior of your machine also needs attention. Dust, pet hair, and dirty water splashes can make it look dingy. A quick wipe-down keeps your deep cleaner looking fresh. It shows that you care for your tools. This also prevents dirt from transferring back to your hands or floors.
Locating and Cleaning Filters
Your Bissell Revolution Pet Pro typically has one or more filters. The most common filter is located on the dirty water tank. This is usually a mesh screen that prevents large debris from entering the motor. Another filter, often a post-motor filter, may be found near the exhaust vent. Check your machine’s user manual for exact filter locations.
To clean the dirty water tank filter: remove the dirty water tank. The filter is often integrated into the lid or sits within the tank opening. Remove any visible hair or lint. Rinse the filter thoroughly under warm running water. Use a small brush to dislodge stubborn debris. Let it air dry completely before putting it back. For post-motor filters, these are usually not washable. You might need to gently tap them to remove dust or replace them periodically. Follow your manual’s specific instructions for each filter type. A clean filter maintains proper airflow and suction.
Wiping Down the Machine’s Exterior
After cleaning the internal components, do not forget the outside of your Bissell. Dust, pet hair, and splashes of dirty water can accumulate on the casing. This makes the machine look neglected. It can also transfer dirt to your hands.
Use a clean, damp microfiber cloth to wipe down all exterior surfaces. Pay attention to the base, handle, and around the tanks. If there are stubborn spots, a small amount of mild all-purpose cleaner on your cloth can help. Avoid spraying cleaner directly onto the machine. This prevents moisture from entering sensitive electrical components. Wipe dry with another clean cloth. A clean exterior contributes to the overall freshness of your machine. It also makes it more pleasant to use.
Cord Care and Storage Tips
The power cord of your Bissell Revolution Pet Pro also needs attention. Before storing the machine, inspect the cord for any cuts or damage. Do not use a machine with a damaged cord. Wrap the cord neatly around the designated cord wraps on the machine. This prevents tangling and damage. Do not wrap it too tightly.
When storing your clean Bissell, choose a dry, cool place. Ensure all tanks and components are completely dry. Storing a damp machine can lead to mold and mildew. Keep it upright. This prevents any remaining moisture from settling in internal parts. Proper cord care and storage protect your machine. It ensures it is ready for your next carpet cleaning job.
Troubleshooting Common Cleaning Issues
Even after regular cleaning, you might encounter minor issues with your Bissell Revolution Pet Pro. Sometimes, a part might still be clogged. Other times, the machine might not perform as expected. Knowing how to quickly troubleshoot these common problems saves time. It prevents unnecessary frustration. I have learned a few tricks over the years.
Most issues relate directly to cleaning or maintenance. Addressing them promptly keeps your machine working efficiently. It also extends its lifespan. Do not immediately assume a major breakdown. Often, a simple cleaning step fixes the problem.
Loss of Suction
If your Bissell Revolution Pet Pro is no longer picking up dirty water effectively, it usually indicates a suction issue. This is often due to a blockage or an improperly seated component. First, check the dirty water tank. Ensure it is not overfilled. Also, make sure the float assembly is clean and moves freely. If the float gets stuck, the machine thinks the tank is full.
Next, inspect the nozzle plate. This clear part can get clogged with hair or debris. Remove the nozzle. Clean it thoroughly. Check the brush roll area for any large obstructions. Ensure the brush roll cover is correctly latched or screwed down. An incomplete seal here causes suction loss. Lastly, check your filters. A dirty filter can restrict airflow significantly. Clean or replace filters as needed. A clear path for air and water ensures strong suction.
Uneven Spray or No Spray
If your machine is not spraying cleaning solution evenly, or not spraying at all, the clean water system has an issue. First, check the clean water tank. Ensure it has enough solution and is seated properly. Make sure the cap is secure. Next, inspect the spray nozzles on the machine’s base or the tools. These small openings can become clogged with dried formula residue.
Use a small pin or a straightened paper clip to gently clear the nozzle openings. Do this while the machine is off and unplugged. Flush the clean water system by running plain warm water through it. Refill the clean water tank with plain water. Run the machine for a minute, holding down the spray trigger. This often clears minor blockages in the internal lines. If using concentrated formula, ensure it is properly diluted. Thick formula can cause clogs.
Foul Odors from the Machine
Foul odors coming from your Bissell are a clear sign of mildew or bacteria growth. This happens when dirty water or damp debris is left inside. The primary culprits are the dirty water tank and the brush rolls. Empty and thoroughly rinse the dirty water tank immediately after each use. Pay special attention to the filter screen. Allow all parts to air dry completely before reassembling.
Remove and clean the brush rolls often. Cut away all tangled hair and rinse them well. Ensure they dry completely before putting them back. Also, flush out the hose and attachments after every use. Let them air dry. For persistent odors, consider using a solution of equal parts white vinegar and warm water to rinse the dirty water tank and flush the hose. Vinegar helps kill odor-causing bacteria. Never use bleach or harsh chemicals. Maintaining cleanliness prevents these unpleasant smells.
Conclusion
Keeping your Bissell Revolution Pet Pro clean is not just about aesthetics. It is about ensuring your machine performs at its peak. Regular maintenance extends its lifespan. It also guarantees truly clean carpets. You invest in this powerful machine to tackle tough pet messes. Taking the time to clean Bissell Revolution Pet Pro components after each use makes that investment worthwhile. It transforms a powerful tool into a lasting one.
By following these simple steps, you prevent common issues. You stop odors before they start. You maintain powerful suction and effective scrubbing. Remember, a clean machine means a clean home. Make this routine a habit. Your Bissell will thank you with years of powerful, odor-free deep cleaning. So, grab your gloves and keep your Bissell ready for anything.
- Bissell Revolution Pet Pro cleaning
- Pet carpet cleaner maintenance
- Deep cleaner care
- Bissell cleaning tips
- How to clean carpet cleaner
- Appliance maintenance

