· Outdoor Cleaning · 16 min read
How To Clean Driveway Pavers
Transform Your Exterior: How to Clean Driveway Pavers
Driveway pavers add beauty and function to your home. They create a welcoming path for guests and a durable surface for vehicles. Over time, dirt, grime, and environmental elements make pavers look dull. Rain washes dirt onto them. Car fluids leave unsightly stains. Weeds grow in the cracks. This normal wear takes away from your home’s curb appeal.
Cleaning driveway pavers is important. It keeps them looking new. Regular cleaning also helps pavers last longer. It removes substances that can break down the paver material. You can make your driveway shine again. This guide provides clear steps to clean your pavers. We cover tools, methods, and stain removal tips. Get ready to revitalize your driveway.
Takeaway
- Gather tools: Get a broom, hose, pressure washer, and cleaning solutions.
- Sweep first: Remove loose dirt and debris from the surface.
- Apply cleaner: Use appropriate solutions for general grime or specific stains.
- Rinse thoroughly: Wash away all cleaning agents and lifted dirt.
- Protect surfaces: Consider sealing pavers after cleaning for lasting results.
How do you effectively clean driveway pavers?
To clean driveway pavers, first sweep away loose debris. Then, apply a suitable cleaning solution, such as a mix of water and dish soap, or a specialized paver cleaner. Scrub the surface with a stiff brush. Rinse the pavers thoroughly with a garden hose or a pressure washer. This process removes dirt, grime, and restores their appearance.
Understanding Your Pavers: Types and Their Cleaning Needs
Your driveway pavers come in many types. Each type responds well to a general cleaning approach. Common materials include concrete, brick, and natural stone. Concrete pavers are popular and very durable. Brick pavers offer a classic, warm look. Natural stone pavers, like bluestone or travertine, provide a unique texture. All these materials collect dirt and stains from daily use.
Surface texture also matters for cleaning. Smooth pavers are easier to wipe clean. Textured pavers can trap more dirt. The gaps between pavers often fill with sand. Weeds also grow in these gaps. You need to consider these gaps when cleaning. The cleaning methods we discuss work for most paver types. You can adjust the cleaning solution based on the paver material if you have a special stone. Always test new cleaners in a small, hidden spot first.
Gathering Your Cleaning Arsenal: Essential Tools and Supplies
Before you start cleaning, get your tools ready. Having everything organized makes the job easier. You will need basic items that most homeowners own. Consider investing in a few specialized tools for better results. This section lists what you need to prepare.
Here are the essential tools and supplies:
- Broom: A stiff-bristled broom helps sweep away loose debris.
- Garden Hose: A standard garden hose with a spray nozzle is good for rinsing.
- Pressure Washer: A pressure washer deep cleans pavers. It removes tough dirt faster. Using a pressure washer is often the most effective method for large areas.
- Stiff Bristle Brush: This brush helps scrub tough spots. It works well with cleaning solutions.
- Bucket: You will use a bucket to mix cleaning solutions.
- Cleaning Solutions:
- Dish Soap: Simple dish soap mixed with water is good for general dirt.
- Specialized Paver Cleaner: These cleaners target specific paver issues. Look for products designed for concrete or natural stone.
- White Vinegar: Vinegar is an eco-friendly option for light stains and moss. You can learn more about how to clean pavers with vinegar.
- Safety Gear:
- Gloves: Protect your hands from cleaning chemicals.
- Eye Protection: Safety glasses shield your eyes from splashes and debris.
- Long Pants and Closed-Toe Shoes: Protect your skin and feet.
- Weed Puller or Weed Killer: For removing weeds from paver joints.
- Jointing Sand: You will need this to refill paver joints after deep cleaning.
Gathering these items before you start saves time. It also ensures you have the right tools for every step. Proper tools lead to better cleaning results.
Step-by-Step Guide to Basic Driveway Paver Cleaning
Cleaning your driveway pavers is a straightforward process. Following these steps helps ensure a thorough clean. You will remove dirt and grime effectively. This basic cleaning routine is good for regular maintenance. It also prepares your driveway for tackling tougher stains.
Step 1: Clear the Area
First, move all items off your driveway. This includes cars, bikes, and planters. You need a clear surface to work on. Next, use your stiff broom to sweep away loose dirt. Remove leaves, twigs, and any other debris. A leaf blower also works well for this step. This clears the top layer of grime. It makes the next steps more effective.
Step 2: Tackle Weeds and Moss
Weeds and moss often grow in paver joints. They make your driveway look messy. Use a weed puller to remove larger weeds by hand. For smaller weeds or moss, you can apply a specialized weed killer. Alternatively, a solution of white vinegar and water can work for moss. This natural option is good for small areas. Learn more about how to clean moss off pavers. Allow any applied solution to sit according to product directions.
Step 3: Pre-wet the Pavers
Use your garden hose to thoroughly wet the entire driveway. This step is important. It prevents cleaning solutions from drying too quickly. It also helps loosen embedded dirt. Ensure all pavers are uniformly damp before moving on. This pre-wetting makes the cleaner work better.
Step 4: Apply Cleaning Solution
Mix your chosen cleaning solution in a bucket. For general cleaning, a simple mix of warm water and dish soap works. Apply the solution evenly across the pavers. Use a garden sprayer or a watering can. For tougher dirt, use a specialized paver cleaner. Follow the product instructions for mixing and application. Let the solution sit for the recommended time. This allows it to break down dirt and grime.
Step 5: Scrub the Pavers
Use a stiff-bristle brush to scrub the pavers. Work in small sections. Apply firm pressure to loosen dirt. Pay extra attention to stained areas. The scrubbing action helps the cleaning solution penetrate. It lifts embedded grime from the paver surface. Rinse your brush often to keep it clean.
Step 6: Rinse Thoroughly
After scrubbing, rinse the pavers completely with your garden hose. Start from the highest point of your driveway. Work your way down. Ensure all soap residue and loosened dirt wash away. Do not let the cleaning solution dry on the pavers. This prevents new stains or film from forming. A thorough rinse is key to a clean finish.
Step 7: Allow to Dry
Let your driveway pavers dry completely. Sunlight and air circulation help. Once dry, you can assess the results. If some areas need more attention, repeat the cleaning process. This basic routine leaves your driveway looking much cleaner.
Tackling Tough Stains: Specific Solutions for Common Driveway Paver Issues
Some stains need more than basic cleaning. Driveways often get specific types of marks. Car fluids, rust, and efflorescence are common. Each stain requires a targeted approach. Using the right cleaner makes stain removal easier.
Oil and Grease Stains
Oil and grease are common on driveways. Cars drip fluids. These stains look dark and are hard to remove. Act fast for fresh oil spills. Blot up as much as you can with paper towels. For set-in stains, use a degreaser. Apply the degreaser directly to the stain. Let it sit for the recommended time. Scrub with a stiff brush. Rinse thoroughly with water. You can also try a poultice method. Mix an absorbent material like cat litter with a solvent. Apply the paste and let it dry. Then, scrape it away. For detailed steps on removing oil, see our guide on how to clean oil off pavers. For antifreeze, another common driveway spill, we also have specific advice on how to clean antifreeze off driveway.
Rust Stains
Rust stains often come from metal furniture or car parts. They leave an orange-brown mark. Rust is difficult to remove. Use a specialized rust remover for pavers. Apply the product carefully. Follow instructions. Some rust removers contain strong acids. Wear protective gear. Test the product in a hidden area first. Rinse the area completely after treatment. Do not let the product sit for too long.
Efflorescence
Efflorescence is a white, powdery residue. It happens when minerals rise to the surface of pavers. Water evaporates, leaving the minerals behind. It looks like a dusty film. Efflorescence usually goes away on its own over time. For faster removal, use a stiff brush and water. For stubborn efflorescence, use an efflorescence cleaner. These cleaners are acidic. They dissolve the mineral deposits. Always follow product directions carefully. Rinse well after use.
Tire Marks and Scuff Marks
Tire marks are black streaks on pavers. They come from vehicle tires. Use a heavy-duty degreaser or a tire mark remover. Apply the cleaner to the marks. Scrub with a stiff brush. Pressure washing often helps remove these marks too. For lighter scuff marks, general paver cleaner and scrubbing may be enough.
Pressure Washing Driveway Pavers: When and How to Do It Safely
Pressure washing is a powerful way to clean pavers. It uses high-pressure water to remove dirt. This method is fast and effective for large areas. It can make your driveway look new again. However, using a pressure washer needs care. Incorrect use can damage pavers or joints.
When to Use a Pressure Washer
Use a pressure washer for deep cleaning. It works well on heavy dirt, stubborn stains, and widespread moss. If your pavers have not been cleaned in a long time, a pressure washer is ideal. It is also good for preparing pavers before sealing. Cleaning before sealing helps the sealer adhere better. Learn more about how to clean pavers before sealing.
Choosing the Right Pressure Washer and Nozzle
Not all pressure washers are the same. For pavers, a pressure washer between 1500-2500 PSI is usually enough. Higher PSI can be too strong. Choose the right nozzle.
- Fan Tip (25-degree or 40-degree): These tips spread the water. They are good for general cleaning. They reduce the risk of damage.
- Turbo Nozzle: This nozzle spins the water. It provides strong cleaning power. Use it carefully and keep it moving.
Avoid zero-degree (red) nozzles. They create a very narrow, powerful stream. This stream can chip pavers or blast out jointing sand.
Safe Pressure Washing Technique
- Clear the Area: Remove all loose debris first. Sweep or blow leaves and dirt away.
- Wear Safety Gear: Always wear eye protection and closed-toe shoes. Gloves are also a good idea.
- Start with Low Pressure: Begin with a wider fan tip (e.g., 40-degree) and hold the wand further from the paver. Work your way closer if needed.
- Keep Moving: Do not hold the nozzle in one spot. Move the wand in sweeping motions. Overlapping strokes ensure even cleaning.
- Maintain Distance: Keep the nozzle 6-12 inches away from the paver surface. Too close can damage the paver or remove jointing sand.
- Work in Sections: Clean one section at a time. This helps you manage the water and dirt.
- Rinse Thoroughly: After pressure washing, rinse the entire area with a regular garden hose. This washes away loosened dirt and residue.
- Be Aware of Jointing Sand: Pressure washing can remove sand from paver joints. You may need to re-sand the joints after cleaning.
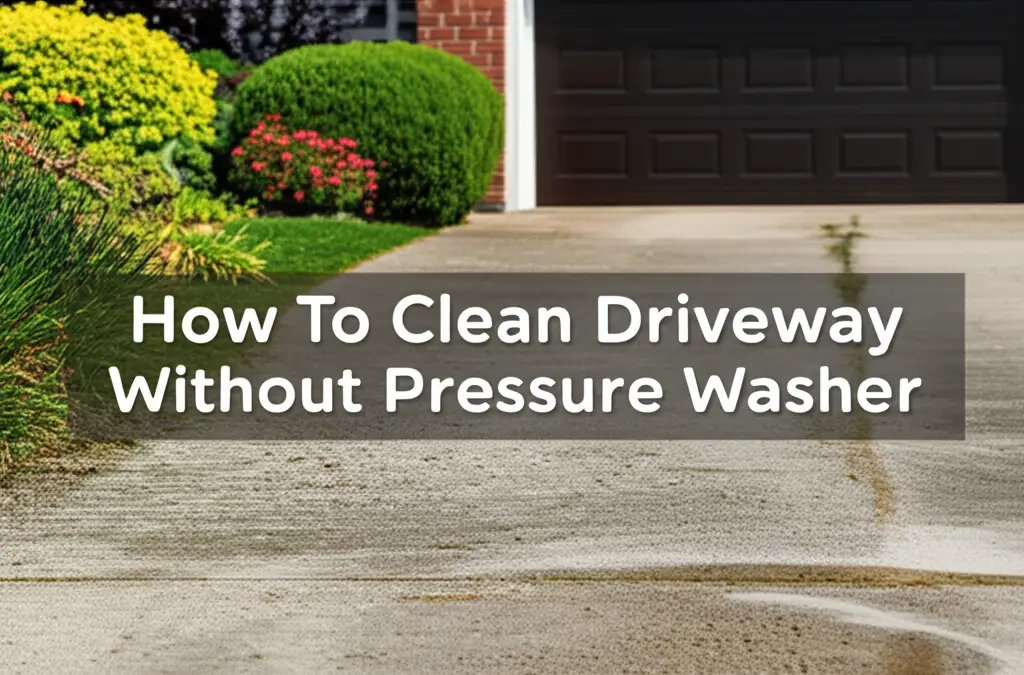
- Consider Alternatives: If you do not have a pressure washer, or prefer not to use one, you can still achieve a clean driveway. Explore methods on how to clean driveway without pressure washer.
Pressure washing makes paver cleaning efficient. Use it wisely and safely for the best results. Your pavers will look much cleaner.
Preventative Measures: Keeping Your Driveway Pavers Cleaner for Longer
Cleaning your pavers is a big job. You want that clean look to last. Taking preventative steps helps extend the time between deep cleans. Simple habits can keep your driveway looking good. These actions protect your investment.
Regular Sweeping and Blowing
Make sweeping your driveway a routine. Sweep away loose dirt, leaves, and debris weekly. Use a broom or a leaf blower. This prevents organic matter from breaking down. It stops dirt from settling into the paver’s surface. Regular sweeping also removes seeds that could grow into weeds. A clean surface means less grime builds up over time.
Immediate Spill Cleanup
Act quickly when spills happen. Oil, grease, or paint spills can stain pavers permanently. Keep absorbent materials nearby. Use kitty litter or sawdust for oil spills. Blot the spill, do not rub it. Then, apply a suitable cleaner. Cleaning fresh spills prevents them from soaking in. This saves you from tough stain removal later.
Weed Control and Management
Weeds growing in paver joints are unsightly. They also create places for dirt to collect. Apply a pre-emergent weed killer in spring. This stops weed seeds from sprouting. Pull any small weeds as soon as you see them. Use a weeding tool designed for paver joints. Regular weed control keeps your driveway tidy. It also protects the integrity of your paver system.
Sealing Your Driveway Pavers
Sealing is a key preventative measure. A paver sealer creates a protective barrier. This barrier makes pavers less porous. It repels water, oil, and other stains. Sealing also reduces fading from UV rays. It makes cleaning easier in the future. Most sealers need reapplication every 3-5 years. Always clean your pavers thoroughly before applying sealer. This ensures the sealer bonds correctly.
Post-Cleaning Care: Re-sanding and Sealing Your Pavers
After a deep clean, your driveway pavers look fantastic. However, the cleaning process, especially pressure washing, can affect the jointing sand. This sand is important. It locks the pavers in place. It also prevents weed growth and protects edges. Replacing lost sand and then sealing are crucial final steps.
Re-sanding Paver Joints
Pressure washing often washes away some of the sand in paver joints. This is normal. It creates gaps between the pavers. These gaps allow movement. They also invite weeds to grow. You must replace this sand.
- Ensure Dryness: Make sure your pavers are completely dry. Moisture can make the sand clump.
- Use Polymeric Sand: Polymeric sand is best for joints. It contains additives that harden when wet. This creates a strong, flexible bond. It resists weed growth and insect activity.
- Spread the Sand: Pour the polymeric sand over the dry pavers. Use a broom to spread it evenly. Sweep it into all the joints.
- Vibrate the Sand: Use a plate compactor or a hand tamper. Run it over the pavers. This vibrates the sand down into the joints. Sweep more sand into any areas that look low. Repeat until joints are full.
- Remove Excess: Carefully sweep all excess sand from the paver surface. Do not leave any sand on top. This prevents haze later.
- Mist with Water: Lightly mist the pavers with water using a garden hose. Do not flood them. This activates the polymers in the sand. Allow the sand to cure according to product instructions. This usually takes 24-48 hours.
Re-sanding ensures your pavers remain stable and well-protected.
Sealing Your Pavers for Lasting Protection
Sealing your pavers offers long-term protection. It enhances their color and prevents stains. A good sealer reduces efflorescence and weed growth. It makes future cleaning much easier.
- Ensure Pavers are Clean and Dry: This is vital. The sealer needs to bond to a clean surface. Any dirt or moisture will prevent proper adhesion. Ensure you have properly cleaned your pavers beforehand.
- Choose the Right Sealer: Paver sealers come in different types. Some create a wet look. Others provide a natural finish. Some are water-based, others solvent-based. Read reviews and product descriptions. Choose a sealer suitable for your paver material and climate.
- Apply Evenly: Use a roller, sprayer, or brush to apply the sealer. Work in small sections. Apply thin, even coats. Avoid puddling. Puddles can dry into shiny spots.
- Follow Manufacturer’s Instructions: Pay close attention to drying times between coats. Also note the total curing time. Do not drive on your driveway until the sealer is fully cured. This can take several days.
- Reapply as Needed: Most sealers last 3-5 years. Check your pavers yearly. If water no longer beads on the surface, it is time to reseal.
These post-cleaning steps maximize the lifespan and beauty of your driveway pavers. Your hard work will pay off with a stunning and protected driveway.
FAQ Section
How often should I clean my driveway pavers?
Clean your driveway pavers at least once a year. For driveways in high-traffic areas, or those exposed to heavy dirt, cleaning every six months is better. Regular sweeping helps reduce the need for deep cleaning. This prevents dirt from building up and keeps pavers looking good.
Can I use bleach to clean my driveway pavers?
Using bleach on driveway pavers is generally not recommended. Bleach can damage some paver materials. It can also strip color from dyed pavers. Bleach harms plants and the environment. Use specialized paver cleaners or natural alternatives like white vinegar instead. These options are safer for both your pavers and surrounding landscape.
What is the best way to remove weeds from paver joints?
The best way to remove weeds from paver joints is a combination approach. First, pull larger weeds by hand or use a weeding tool. For smaller weeds, apply an herbicide or a natural weed killer like strong vinegar solution. After cleaning, fill the joints with polymeric sand. This sand hardens and stops new weed growth.
How do I prevent moss from growing on my driveway pavers?
Prevent moss by ensuring good drainage. Moss thrives in damp, shaded areas. Trim nearby trees or bushes to increase sunlight. Apply an anti-moss cleaner periodically. After cleaning, apply a paver sealer. This creates a barrier against moisture, making it harder for moss to grow. Regular sweeping also helps remove early moss spores.
Is sealing pavers after cleaning really necessary?
Sealing pavers after cleaning is highly recommended. It creates a protective layer. This layer repels water, oil, and other stains. Sealing also prevents UV damage and color fading. It makes future cleaning much easier. While not strictly “necessary” for function, sealing greatly improves paver appearance and longevity.
Conclusion
Cleaning your driveway pavers can transform your home’s exterior. It is a rewarding task. A clean driveway instantly boosts curb appeal. We have covered the essential steps. You know which tools to use. You also understand how to tackle different types of stains. Remember to prepare the area. Use the right cleaning solutions. Follow safe pressure washing practices.
Taking care of your pavers goes beyond just cleaning. Regular sweeping prevents dirt buildup. Promptly cleaning spills saves trouble later. Re-sanding joints after a deep clean provides stability. Sealing your pavers offers long-lasting protection. It helps your driveway stay cleaner for much longer. Your efforts will keep your driveway pavers looking beautiful for years to come. Start your paver cleaning project today. Enjoy a clean, inviting entrance to your home.
- driveway cleaning
- paver maintenance
- outdoor cleaning
- stain removal
- pressure washing