· Home Improvement · 12 min read
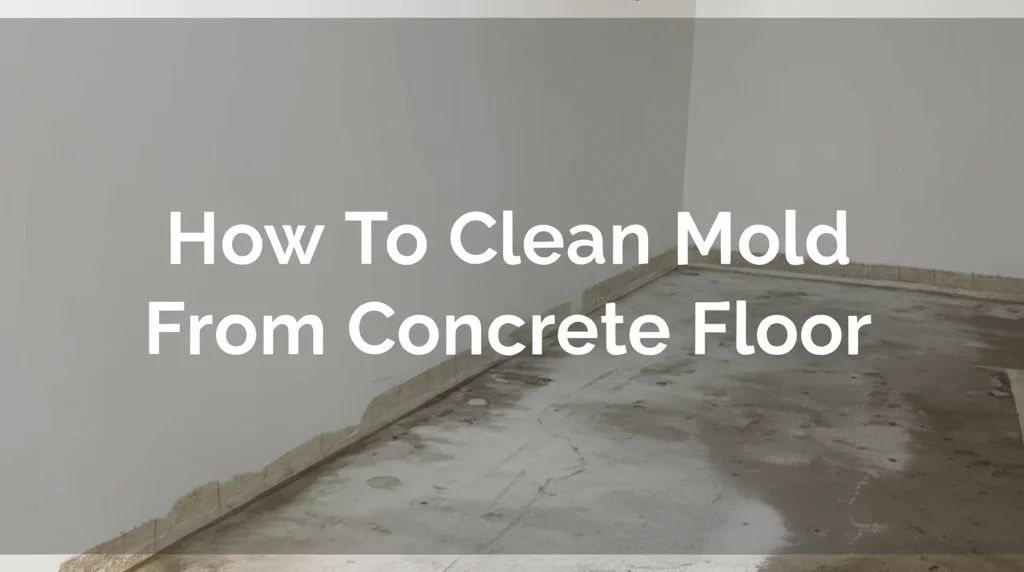
How To Clean Dust From Tile Removal
How to Clean Dust From Tile Removal: The Complete Guide
Cleaning dust from tile removal is a crucial step in any renovation project. The fine particles created during tile demolition can spread throughout your home, causing respiratory issues and creating a mess that’s difficult to clean.
This comprehensive guide provides effective strategies for managing and cleaning dust from tile removal projects to maintain a healthy living environment.
Quick Takeaway:
- Prepare your space before tile removal with plastic sheeting and tape
- Use dust containment systems or wet removal methods to minimize airborne particles
- Clean thoroughly with HEPA vacuums and microfiber cloths
- Follow a systematic post-removal cleaning process for all surfaces
- Consider professional help for large-scale projects
Understanding Tile Removal Dust and Its Challenges
Tile removal creates a unique type of dust that presents several challenges when cleaning. This dust consists primarily of ceramic or porcelain particles, adhesive residue, and old grout material. The dust particles are extremely fine, often measuring less than 10 microns, which allows them to remain airborne for extended periods and penetrate deep into porous surfaces.
The silica content in tile dust makes it particularly concerning from a health perspective. When inhaled, silica dust can cause respiratory issues and, with prolonged exposure, more serious conditions like silicosis. This is why proper containment, protective equipment, and thorough cleaning are essential during and after tile removal projects.
Unlike regular household dust, tile removal dust tends to be more abrasive and can damage surfaces if not cleaned properly. It often has a static charge that makes it cling to walls, furniture, and electronics, requiring specialized cleaning techniques beyond standard dusting methods.
Understanding these characteristics will help you approach the cleaning process with appropriate tools and techniques to ensure thorough removal of potentially harmful dust particles.
Preparation Before Tile Removal to Minimize Dust
Taking preventative measures before starting your tile removal project can significantly reduce the amount of dust you’ll need to clean afterward. Proper preparation not only makes cleanup easier but also protects your health and home from excessive dust exposure.
Creating Effective Dust Barriers
Start by sealing off the work area completely from the rest of your home:
- Use heavy-duty plastic sheeting (minimum 4-mil thickness) to cover doorways, vents, and any openings to adjacent rooms
- Secure plastic sheets with painter’s tape, ensuring all edges are completely sealed
- Consider creating a double barrier system for high-dust projects: one at the immediate work area and another at connecting hallways
- Install zipper doors in plastic barriers if you need frequent access to the work area
- Cover fixed furniture and fixtures that cannot be removed with plastic sheeting
Essential Protective Equipment
Protect yourself with appropriate safety gear:
- N95 or P100 respirator mask (not just a standard dust mask)
- Safety goggles with side protection
- Disposable coveralls or dedicated work clothes
- Rubber gloves
- Shoe covers or dedicated work shoes that remain in the work area
This preparation phase is critical for minimizing the spread of dust throughout your home. Taking the time to properly contain the work area will save you hours of cleaning and reduce potential health risks associated with tile dust exposure.
Professional vs. DIY Dust-Free Tile Removal Methods
When tackling a tile removal project, you have two main approaches to consider: professional dust-free removal services or DIY methods with dust minimization techniques. Each has its advantages depending on your project size, budget, and personal circumstances.
Professional Dust-Free Tile Removal
Professional services use specialized equipment specifically designed to capture dust at the source:
- HEPA-filtered dust extraction systems that connect directly to demolition tools
- Negative air pressure machines that create controlled airflow, preventing dust from escaping the work area
- Dustless grinding and cutting tools with built-in vacuum attachments
- Water-based dust suppression systems for larger projects
Professional services typically cost between $3-$8 per square foot but can save you significant cleanup time and reduce health risks. These services are particularly valuable for large areas, homes with family members who have respiratory conditions, or when you need to continue living in the space during renovation.
DIY Dust Minimization Techniques
If you’re handling the project yourself, consider these approaches to reduce dust:
- Rent a dust-free tile removal machine from home improvement stores (typically $75-150 per day)
- Use a wet removal method by keeping tiles and adhesive damp during removal
- Work in small sections, cleaning as you go rather than leaving all cleanup until the end
- Consider using chemical adhesive removers that soften the bonding material, reducing the need for aggressive scraping
- Schedule your project when the space can be isolated and unoccupied for several days
DIY approaches require more personal protective equipment and careful preparation but can be cost-effective for smaller projects like bathroom renovations. Whichever method you choose, having a systematic cleaning plan in place will ensure you effectively manage the inevitable dust that comes with tile removal.
Essential Tools and Products for Cleaning Tile Removal Dust
Having the right equipment makes a significant difference in effectively cleaning tile removal dust. These specialized tools are designed to capture the fine particles that standard cleaning equipment might miss.
High-Efficiency Cleaning Equipment
Invest in or rent these key tools for effective dust removal:
- HEPA vacuum cleaner with multiple attachments (crucial for capturing the finest dust particles)
- Microfiber cloths and mops (superior to cotton or paper products for dust capture)
- Spray bottles for dampening surfaces before cleaning
- Electrostatic dusting tools for walls and ceilings
- Air purifier with HEPA filtration to capture lingering airborne particles
Recommended Cleaning Solutions
The right cleaning solutions help remove dust without causing damage:
- Simple water with a drop of dish soap for initial wipe-downs
- White vinegar solution (1:4 ratio with water) for removing stubborn dust film
- Commercial dust control sprays for treating surfaces before dusting
- Specialized floor cleaners compatible with your substrate (concrete, wood, etc.)
- Avoid bleach-based products which can react with dust components
Where to Find Specialized Equipment
- Home improvement stores like Home Depot and Lowe’s offer rental programs for HEPA vacuums and air scrubbers
- Professional cleaning supply stores provide commercial-grade equipment and solutions
- Online retailers offer competitive prices on HEPA vacuum cleaners and air purifiers
- Check this guide on cleaning discolored vinyl flooring for more information on specialized cleaning equipment
Having these tools ready before you begin cleaning will make the process more efficient and effective. Remember that standard household vacuums without HEPA filtration can actually make the problem worse by blowing the finest dust particles back into the air.
Step-by-Step Process for Cleaning After Tile Removal
Following a systematic approach ensures you capture dust thoroughly without redistributing it throughout your home. This methodical cleaning process should begin as soon as the tile removal is complete.
Initial Dust Removal Phase
- Allow dust to settle for 1-2 hours after tile removal is complete
- Wearing your protective gear, use a HEPA vacuum with a brush attachment to clean:
- Walls (working top to bottom)
- Window frames and sills
- Door frames and baseboards
- Any remaining furniture
- Use the vacuum crevice tool for corners and tight spaces
- Replace vacuum bags/empty containers outdoors to prevent dust from re-entering the space
Deep Cleaning Techniques
After the initial vacuuming:
- Prepare a bucket with warm water and mild detergent
- Dampen (not soak) microfiber cloths and wipe all hard surfaces
- Change your cleaning water frequently as it becomes cloudy
- For textured surfaces, use a soft brush to loosen dust before wiping
- Clean from top to bottom: ceilings → walls → floors
- Pay special attention to light fixtures, ceiling fans, and vents
Addressing Specific Surfaces
Different surfaces require specific approaches:
- For floor substrates: Use a damp microfiber mop, changing the water frequently
- For woodwork: Wipe with a barely damp cloth, followed by a dry cloth
- For electronics: Use compressed air first, then specialized electronic cleaning wipes
- For fabric items: HEPA vacuum thoroughly, then clean according to fabric specifications
For particularly challenging bathroom tile dust, you might find these tips on cleaning bathroom floors without a mop helpful for tight spaces and fixtures.
How to Clean Construction Dust from Tile Floors
If you’re dealing with new tile floors that have construction dust on them, or adjacent tile floors affected by your removal project, these specific techniques will help restore their shine without causing damage.
Safe Cleaning Methods for New and Existing Tile
Start with a dry cleaning approach:
- Sweep with a soft-bristled broom or microfiber dust mop
- Avoid stiff bristles that can scratch tile surfaces
- Remove larger debris and dust piles carefully
Follow with wet cleaning:
- Use a pH-neutral tile cleaner diluted according to instructions
- Apply with a microfiber mop, not a sponge mop which can push dirty water into grout lines
- Work in small sections, rinsing the mop frequently
- Avoid excess water which can seep under tiles or into grout
Address grout lines separately:
- Use a soft brush specifically for grout
- Apply a mixture of hydrogen peroxide and baking soda for stubborn grout dust
- Rinse thoroughly with clean water
Dealing with Haze and Residue
Construction dust often leaves a haze on tile surfaces that standard cleaning doesn’t remove:
- For ceramic and porcelain tiles, use a specialized haze remover product
- For natural stone tiles, use only stone-safe cleaners to prevent etching
- Apply with a soft cloth in a circular motion
- Buff dry with a clean microfiber cloth
- For persistent haze, consider a commercial grout haze remover
For more detailed information on maintaining different types of tile floors, check out what is the best cleaning solution for ceramic tile floors.
Natural and Eco-Friendly Dust Cleaning Methods
If you prefer to avoid harsh chemicals, several effective natural alternatives can help clean tile removal dust safely and effectively.
DIY Natural Cleaning Solutions
Create these simple solutions using household ingredients:
All-Purpose Dust Cleaner
- 1 cup water
- 1/4 cup white vinegar
- 2 tablespoons olive oil (helps attract dust)
- 3-5 drops essential oil (tea tree or eucalyptus have additional antimicrobial properties)
Natural Dust-Removing Paste
- 1/4 cup baking soda
- Enough water to form a thick paste
- Apply to stubborn dust areas, let sit for 15 minutes, then wipe clean
Electrostatic Dust Remover
- 1 cup water
- 2 tablespoons vinegar
- 1 tablespoon fabric softener
- Spray lightly on microfiber cloth (not directly on surfaces)
Plant-Based Solutions for Dust Management
Some plants naturally help filter dust from the air:
- Peace lilies and spider plants can help capture airborne particles
- Aloe vera not only filters air but indicates air quality through leaf spots
- Place plants strategically in rooms adjacent to the renovation area
For persistent dust in grout lines, you might find this guide on what is the best homemade tile grout cleaner particularly helpful.
These natural methods are especially beneficial in homes with children, pets, or individuals with chemical sensitivities. While they may require slightly more elbow grease than chemical cleaners, they avoid introducing additional toxins into your newly renovated space.
Long-Term Dust Management After Tile Projects
Even after thorough initial cleaning, fine dust particles can continue to settle for days or weeks following a tile removal project. Implementing these strategies will help manage residual dust and maintain air quality.
Ongoing Cleaning Schedule
Develop a systematic approach for the weeks following your project:
- Day 1-3: Deep clean all surfaces as outlined in previous sections
- Day 4-7: Daily HEPA vacuuming of floors and horizontal surfaces
- Week 2: Clean with damp microfiber cloths every other day
- Week 3-4: Return to normal cleaning routine but with special attention to areas where dust tends to accumulate
Air Quality Improvement Strategies
Maintain healthy air quality with these approaches:
- Run HEPA air purifiers continuously for at least two weeks following the project
- Replace HVAC filters with high-efficiency versions rated for construction dust
- Clean or replace HVAC vent covers after dust has fully settled
- Consider professional air duct cleaning if the dust spread extensively
- Keep windows open when weather permits to increase air circulation
Preventing Future Dust Issues
For ongoing renovations or maintenance:
- Establish clean zones and work zones if you’re completing renovation projects in phases
- Use door mats at entrances to work areas to capture dust from shoes
- Consider applying dust control sprays to subfloors before installing new flooring
- Install temporary floor protection such as Ram Board on newly cleaned areas if work is continuing nearby
For additional guidance on keeping your floors clean during and after construction projects, check out how to clean the floor after painting.
Frequently Asked Questions About Tile Removal Dust
How long does tile dust stay in the air?
The finest particles from tile removal can remain airborne for 24-48 hours in still air conditions. Using air purifiers, ventilation, and HEPA filtration can significantly reduce this time. Complete settling may take up to a week, which is why continued cleaning is important after the initial deep clean.
Can you vacuum tile dust?
Yes, but only with a vacuum equipped with a HEPA filter. Standard vacuums can blow the finest particles back into the air. Use a vacuum with sealed system design specifically rated for construction dust. Empty collection containers outdoors and replace filters more frequently during cleanup periods.
How to clean tile cutting dust?
For tile cutting dust, use wet cleaning methods whenever possible. Dampen the area first to prevent particles from becoming airborne, then use a HEPA vacuum followed by damp wiping with microfiber cloths. For tools and work surfaces, wipe down with damp cloths and dispose of dust-laden water properly.
Does removing tile cause a lot of dust?
Yes, tile removal typically generates significant dust, particularly when removing ceramic or porcelain tiles with thinset mortar. The amount varies based on removal method, with mechanical methods creating more dust than manual methods. Dust-free removal systems can reduce dust by up to 90% but cannot eliminate it entirely.
What is the dust from cutting tiles?
Tile cutting dust contains silica, ceramic or stone particles, and sometimes adhesive residue. Silica dust is particularly concerning as it can cause respiratory issues and, with long-term exposure, silicosis. This dust is classified as respirable crystalline silica and is regulated by OSHA for professional workers due to its health risks.
What is the best way to clean dust?
The most effective approach combines HEPA vacuuming with damp wiping using microfiber cloths. Always clean from top to bottom, change cleaning solutions frequently, and work systematically through your space. For tile removal dust specifically, addressing both airborne particles and settled dust is essential for complete removal.
Final Thoughts on Managing Tile Removal Dust
Cleaning dust from tile removal is a challenging but manageable process when approached systematically. By implementing proper preparation, using appropriate equipment, and following a thorough cleaning protocol, you can minimize health risks and restore your space quickly after renovation.
Remember that the finest dust particles are invisible to the naked eye but can cause the most significant health issues if not properly addressed. Taking the time to clean thoroughly after tile removal protects not only your immediate comfort but also your long-term respiratory health.
For large-scale renovations, consider budgeting for professional dust-free removal services or at minimum, renting specialized equipment like HEPA air scrubbers. The additional expense often pays for itself in reduced cleaning time and less wear on your household items from abrasive dust particles.
Whether you’re renovating a small bathroom or undertaking a complete home renovation, these strategies for cleaning dust from tile removal will help ensure your project concludes with a clean, healthy living environment. For more specialized cleaning advice, explore our other guides on how to clean drywall dust from hardwood floors and how to clean construction dust from tile floors.