· Home Cleaning · 20 min read
How To Clean Ice Maker With Vinegar
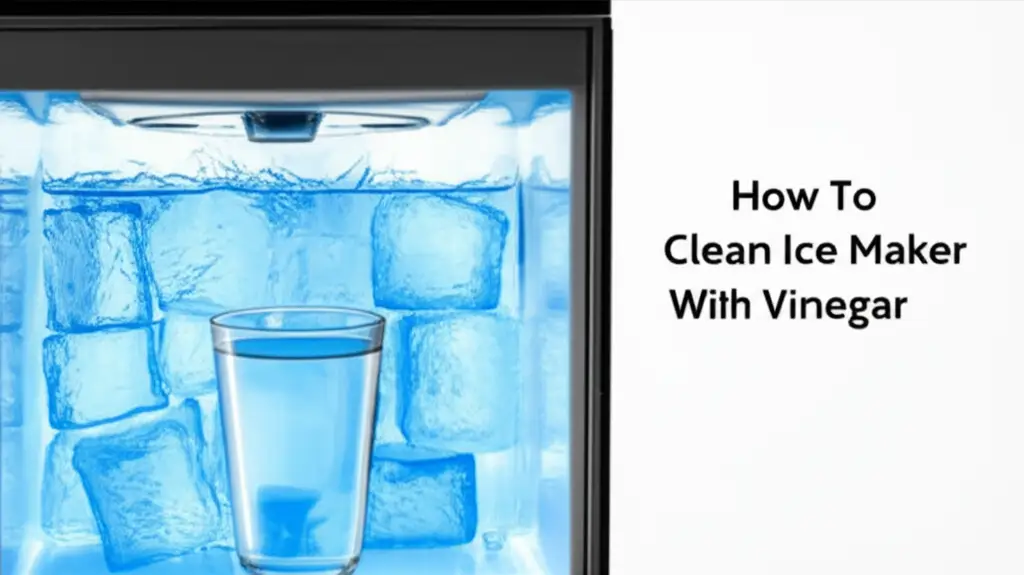
Clean Your Ice Maker with Vinegar: A Complete Guide
Having fresh, clear ice is essential for many homes. Yet, ice makers can get dirty over time. Mineral deposits, mold, and mildew often build up inside. This affects ice quality and the machine’s life. Cleaning your ice maker regularly keeps it working well. It also ensures your ice tastes great. Many people wonder about the best way to clean these appliances. I have found that natural methods often work best.
One highly effective and safe method involves using white vinegar. Vinegar is a common household item. It cleans and disinfects surfaces well. It breaks down mineral buildup and kills germs. This article will show you how to clean an ice maker with vinegar. We will cover preparation, the cleaning steps, and helpful maintenance tips. You will learn how to keep your ice maker clean and efficient. Get ready to enjoy crystal-clear ice once again.
Takeaway
- Use white vinegar to clean and sanitize your ice maker effectively.
- Always unplug the ice maker and remove old ice before cleaning.
- Run vinegar solution through the system to descale and disinfect.
- Thoroughly rinse the ice maker multiple times to remove all vinegar traces.
- Clean external parts and the ice bin by hand for a complete clean.
- Regular maintenance prevents buildup and ensures clean, fresh ice.
You can clean an ice maker with vinegar. First, empty the ice maker. Then, fill its reservoir with a mix of water and white vinegar. Run several cleaning cycles. This removes mineral buildup and kills germs. Finally, flush the system with clean water to rinse it thoroughly.
Why Vinegar is Your Best Friend for Ice Maker Cleaning
Cleaning appliances requires safe and effective agents. Vinegar is a top choice for ice makers. It works wonders on common ice maker problems. It also offers a natural cleaning solution. This avoids harsh chemicals near your food.
Vinegar is acetic acid. This acid helps dissolve mineral deposits. These deposits often come from hard water. Calcium and limescale build up in your ice maker. They can block water lines and reduce ice production. Vinegar breaks down these deposits. This keeps water flowing freely.
Using vinegar helps remove mold and bacteria. These can grow in damp, dark places. Your ice maker’s interior is a prime spot for this. Mold can make ice taste bad. It also poses health risks. Vinegar kills many types of mold and bacteria. This keeps your ice fresh and safe. It provides a natural disinfectant.
Many commercial cleaners use strong chemicals. These chemicals can leave residues. You do not want these near your ice. Vinegar is food-safe and leaves no harmful residue. It naturally evaporates. A quick rinse removes any lingering vinegar smell. This makes it ideal for food-contact surfaces. You can trust vinegar to clean your ice maker without worry. It is also an affordable and widely available cleaner. This makes it a smart choice for regular maintenance.
Understanding Mineral Buildup in Ice Makers
Mineral buildup is a common issue. Hard water contains dissolved minerals. These include calcium and magnesium. When water freezes, these minerals can settle. They stick to surfaces inside your ice maker. This forms a scale layer. This scale can be white or off-white.
Mineral deposits can cause many problems. They can clog water lines. They can coat the ice-making plate. This slows down ice production. It also makes your ice cloudy. The machine has to work harder. This uses more energy. It also shortens the ice maker’s lifespan.
Over time, these deposits become thick. They are hard to remove. Regular cleaning prevents this buildup. Vinegar acts as a natural descaler. It reacts with the minerals. This breaks them down. They then wash away easily. This keeps your ice maker working efficiently. It ensures your ice stays clear and tasty.
The Benefits of Natural Cleaning Agents
Natural cleaning agents offer many advantages. They are safer for your home. They protect your family and pets. They also help the environment. Vinegar is a prime example of a natural cleaner. It does not contain harsh chemicals. It produces no toxic fumes.
Using natural products reduces chemical exposure. Some commercial cleaners can cause skin irritation. They can also affect breathing. Vinegar is gentle on surfaces and people. It cleans effectively without these risks. You can feel good about using it in your kitchen.
Natural cleaning supports a healthier home. It prevents chemical residues on surfaces. This is especially important for food contact appliances. Ice makers fall into this category. Choosing vinegar helps you maintain a clean home naturally. It promotes wellness in your living space.
Essential Supplies for Cleaning Your Ice Maker
Before you begin cleaning, gather your tools. Having everything ready saves time. It makes the cleaning process smooth. You will need a few simple items. Most are likely already in your home. This list ensures you have all necessities.
First, you will need white distilled vinegar. This is the star of our cleaning process. Do not use apple cider vinegar or balsamic vinegar. They can leave stains or residues. Distilled white vinegar is clear and pure. It works best for cleaning. I always keep a large bottle on hand for various cleaning tasks.
Next, get some clean, soft cloths or sponges. These are for wiping surfaces. They help scrub away grime. Make sure they are non-abrasive. You do not want to scratch your ice maker’s parts. Microfiber cloths work very well. You might also need a soft-bristled brush. This helps reach small crevices.
Have a large bucket or sink ready. This is for soaking removable parts. A measuring cup helps with vinegar ratios. You will also need dish soap. This is for hand-washing certain components. Finally, keep some paper towels nearby for drying. This list covers all you need for a thorough clean.
Gathering Your Cleaning Tools
Make sure your workspace is clear. You will need space to disassemble some parts. Prepare a clean area for drying components. This prevents re-contamination. Lay down an old towel if working on a countertop. This catches spills and protects surfaces.
Ensure all tools are clean. A dirty cloth can spread grime. Wash sponges and brushes before use. This simple step makes a difference. It ensures an effective cleaning process. I always give my cleaning tools a quick rinse.
Consider wearing rubber gloves. This protects your hands from prolonged contact with vinegar. While vinegar is mild, it can dry out skin. Gloves also provide better grip. They are a good habit for any cleaning task. Having everything organized makes cleaning easier. You will move through the steps efficiently. This approach gets the job done right.
Step-by-Step Guide to Cleaning Your Ice Maker with Vinegar
Cleaning an ice maker with vinegar involves several stages. Each stage is important for a complete clean. Follow these steps carefully. You will ensure a sparkling clean appliance. This process works for most types of ice makers. This includes countertop models and refrigerator units.
Preparation is Key for Safe Cleaning
Before touching your ice maker, safety comes first. Always unplug the appliance from the power outlet. This prevents electrical shocks. It stops the machine from starting cycles accidentally. This step is crucial.
Next, remove all ice from the ice bin. Discard this ice. It may contain existing buildup or mold spores. You do not want to clean over it. Empty the water reservoir too. Pour out any remaining water. Wipe the reservoir dry with a clean cloth.
Remove any removable parts. These include the ice bin, scoop, and water filter. Consult your ice maker’s manual for specific instructions. Some parts detach easily. Others may require a bit more effort. Set these parts aside for separate cleaning. I usually put them in my kitchen sink.
Wipe down the exterior of the ice maker. Use a damp cloth. This removes dust and spills. A clean exterior is a good start. This initial preparation makes the deep cleaning more effective. It gets your machine ready for the vinegar solution.
The Vinegar Cleaning Cycle
Now it is time to use the vinegar. For most ice makers, mix white vinegar with water. A common ratio is one part vinegar to two parts water. For example, use one cup of vinegar for two cups of water. For a heavy buildup, you can use a stronger solution. Some people use equal parts water and vinegar. Check your ice maker manual for specific recommendations. Some manufacturers advise against strong solutions.
Pour the vinegar and water mixture into the ice maker’s water reservoir. Do not add too much. Fill it to the maximum fill line. Close the reservoir lid. Turn on the ice maker. Allow it to run a full ice-making cycle. The vinegar solution will circulate through the system. This dissolves mineral deposits and sanitizes internal components. It reaches areas you cannot scrub by hand.
When the cycle finishes, discard all ice produced during this cycle. Do not consume this ice. It contains vinegar and loosened debris. Repeat this vinegar cycle one or two more times. This ensures a thorough clean. The number of cycles depends on how dirty your machine is. For a very dirty machine, I run three cycles. After the last cycle, empty the reservoir again. This completes the cleaning phase.
Deep Cleaning Removable Parts
While the vinegar cycles run, clean the removable parts. Take the ice bin and scoop. Wash them with warm water and dish soap. Use a soft sponge or cloth. Scrub away any grime, mold, or sticky residues. Pay attention to corners and crevices. These areas can trap dirt.
For stubborn stains or heavy mineral buildup, soak the parts. Fill a sink or a large bucket with a solution of equal parts warm water and white vinegar. Submerge the ice bin and scoop. Let them soak for 30 minutes to an hour. This helps loosen tough deposits.
After soaking, scrub the parts again. The buildup should be easier to remove now. Rinse everything thoroughly with clean water. Make sure no soap residue remains. Dry all parts completely with a clean towel. Air drying is also a good option. Ensure they are bone dry before putting them back. This prevents new mold growth.
You can clean other parts using vinegar, like a shower head or faucet head. For example, how to clean shower head with vinegar uses similar principles for mineral removal. For specific items such as a coffee maker, you might also find that vinegar is effective. You can learn how to clean mold out of coffee maker using similar methods.
Rinsing and Sanitizing for Fresh Ice
After the vinegar cleaning cycles and hand-washing, rinsing is essential. This step removes all traces of vinegar. It also flushes away any remaining loosened debris. A proper rinse ensures your ice tastes fresh and clean.
Fill the water reservoir with fresh, clean water. Do not add any vinegar. Run the ice maker for a full cycle. This will produce a batch of ice. Discard this ice immediately. Do not use it. It might still contain small amounts of vinegar.
Repeat this rinsing cycle at least two more times. For very thorough cleaning, run three or four rinse cycles. Each time, discard the ice and refill the reservoir with fresh water. You want to be sure no vinegar taste or smell remains. This ensures the ice is pure.
After the final rinse cycle, empty the reservoir one last time. Wipe the interior dry with a clean cloth. Reassemble all the clean, dry parts. Plug your ice maker back into the power outlet. Your ice maker is now clean and ready to make fresh, clear ice. You will notice a big difference in ice quality.
Tackling Specific Ice Maker Issues
While general cleaning with vinegar is effective, some issues need extra attention. Mold, mildew, and stubborn mineral deposits are common challenges. Vinegar can help with these specific problems. Knowing how to target them ensures a complete clean.
Sometimes, you might deal with a portable ice maker. These often have similar cleaning needs. The principles remain the same. You can find more detailed information on how to clean a table top ice maker if you own one. The cleaning methods for different types of ice makers are often quite similar in their approach to vinegar use.
Removing Mold and Mildew
Mold and mildew often appear as black, green, or pink slimy patches. They thrive in damp, dark environments. Ice makers provide ideal conditions for their growth. Seeing mold means your ice maker needs immediate attention. Ignoring it can lead to health issues. Mold also makes ice taste bad.
Vinegar is a natural fungicide and bactericide. It effectively kills many mold species. For visible mold, increase the vinegar concentration. Use undiluted white vinegar for targeted cleaning. Dip a clean cloth or a soft brush into vinegar. Scrub the moldy areas directly. Focus on crevices and corners. These are common spots for mold.
If mold is in the water lines, run stronger vinegar cycles. Use a 1:1 ratio of vinegar to water. Let the solution sit in the system for 20-30 minutes before running cycles. This allows the vinegar to work longer. Always ensure proper rinsing afterward. This flushes mold spores and vinegar out. For stubborn mold in portable units, you might need specific steps. Refer to how to clean mold from portable ice maker for detailed guidance.
After removing mold, prevent its return. Keep the ice maker dry when not in use for extended periods. Leave the lid open slightly. This allows air circulation. Regular cleaning with vinegar also stops mold from forming again. My own experience shows this works very well.
Descaling Stubborn Mineral Deposits
Stubborn mineral deposits feel rough and look chalky. They are tough to remove. They often appear on the water tray and ice-making components. Standard vinegar cycles might not fully remove them. These deposits can damage the machine long term.
For very thick scale, use undiluted white vinegar. For removable parts, soak them longer. Submerge them in pure vinegar for several hours. You can even leave them overnight. The longer contact time helps break down the hard scale. Use a soft brush to scrub after soaking. The scale should chip away easier.
For internal parts, use a stronger vinegar solution. A 1:1 vinegar to water ratio is good. Run this solution through several cycles. After running the cycles, let the solution sit in the reservoir for an hour. This allows the vinegar to dissolve more minerals. You might need to repeat this process if the scale is very severe.
After descaling, always rinse multiple times. This removes all the loosened mineral fragments and vinegar. Proper rinsing is crucial. It prevents re-depositing minerals and ensures pure ice. Regular descaling saves your machine. It also improves ice clarity and taste. You can apply similar descaling principles to other appliances. For instance, you can use vinegar to clean your water heater. More tips are available on how to clean hot water heater with vinegar. This shows how versatile vinegar is.
Maintenance Tips for a Spotless Ice Maker
Cleaning your ice maker with vinegar is effective. But proper maintenance keeps it clean longer. A regular schedule prevents grime and buildup. It ensures your ice maker performs its best. These simple tips save you effort in the long run. They also extend the life of your appliance.
The best defense against a dirty ice maker is consistency. Do not wait for visible problems. Regular, light cleaning is easier than deep cleaning. It prevents mold and mineral issues before they start. I recommend a consistent schedule.
Consider using a water filter if your water is hard. This reduces mineral content in the water used for ice. Less minerals mean less buildup. Many ice makers have built-in filters. If yours does not, an external filter can help. This small investment saves much cleaning time.
Always keep the ice maker’s exterior clean. Wipe up spills immediately. Dust and debris can get into the system. A clean exterior also looks better. These practices make a big difference in maintaining your ice maker.
Regular Cleaning Schedule
A consistent cleaning schedule is vital. How often you clean depends on usage and water hardness. For average use with soft water, clean your ice maker every 3 to 6 months. This prevents most buildup. For heavy use or hard water, clean it every 1 to 3 months. I personally clean mine every three months.
Mark your calendar. Set reminders on your phone. Make it part of your routine. This proactive approach saves you from big cleaning jobs. It ensures you always have clean, fresh ice. This also helps your machine last longer.
Between full cleaning cycles, do mini-maintenance. Wipe the ice bin and scoop weekly. This removes small residues. Check the water reservoir for any slime. Clean it if needed. Small efforts often prevent large problems. This consistency makes ice maker care easy.
Preventing Future Buildup
Preventing buildup is easier than removing it. One key step is using filtered water. Hard water is the main cause of mineral deposits. A good water filter reduces these minerals. This keeps your ice maker cleaner. It also improves ice clarity.
Ensure the ice maker is well-ventilated. Proper airflow reduces moisture. Less moisture means less mold growth. Do not block vents. Keep the area around the ice maker clear. This helps air circulate freely.
When you go on vacation, empty and dry the ice maker. Unplug it. Leave the lid slightly ajar. This prevents stagnant water and mold. Returning to a fresh machine is always better. This simple step protects your ice maker from major issues. It keeps it ready for immediate use.
Remember to change water filters regularly. Follow manufacturer guidelines. A clogged filter is not effective. It lets minerals pass through. Fresh filters mean cleaner water. This is an important part of ice maker maintenance.
Safety Measures and Important Considerations
Cleaning appliances requires attention to safety. While vinegar is natural, basic precautions protect you. Knowing what to do and what to avoid is important. This ensures a safe and effective cleaning experience. Always read your appliance manual first.
Wear protective gloves when handling cleaning solutions. Vinegar can dry out skin. Gloves also give you a better grip. They are a good general safety practice. Ensure good ventilation in your cleaning area. Open windows or turn on a fan. While vinegar fumes are not toxic, they can be strong. Good airflow makes the process more comfortable.
Do not mix vinegar with other cleaning agents. Especially avoid mixing it with bleach. Mixing vinegar and bleach creates toxic chlorine gas. This gas is very dangerous to breathe. Always use vinegar alone for cleaning your ice maker. Stick to one cleaning method at a time.
Be gentle when cleaning internal parts. Do not force anything. Avoid abrasive scrubbers. They can scratch surfaces. Scratches can harbor bacteria or make future cleaning harder. Use soft cloths and brushes only.
Ventilation and Personal Protection
Proper ventilation is key when cleaning. Open windows wide. If you have a kitchen fan, turn it on. This moves air and dissipates odors. Vinegar has a strong smell. Good ventilation makes it easier to work. It also prevents the smell from lingering.
Wear eye protection if you are sensitive. Safety glasses protect your eyes from splashes. While vinegar is mild, splashes can cause irritation. This is a good habit for any cleaning task. Your safety is important.
If you have sensitive skin, choose sturdy rubber gloves. Long gloves offer more protection. They prevent direct contact with the vinegar solution. This keeps your hands from drying out. They also protect against any grime.
Always keep children and pets away from the cleaning area. Cleaning solutions are not for consumption. Disassembled parts can be choking hazards. Ensure they are in a safe place. Safety measures are simple steps. They prevent accidents.
When to Seek Professional Help
Most ice maker cleaning jobs are DIY friendly. However, some situations require professional help. If your ice maker stops working after cleaning, consult a technician. Sometimes, deeper issues exist. They may not be cleaning-related.
If you see mold growing on electrical components, call a professional. Water and electricity are a dangerous mix. Do not attempt to clean these areas yourself. A technician can safely address such problems.
If unusual noises come from your ice maker, seek help. This could signal mechanical issues. Cleaning might not fix it. A professional can diagnose and repair it. Early action can prevent bigger problems.
If strong, persistent odors remain after cleaning, get professional advice. This could mean a hidden problem. It might be mold in inaccessible areas. Professionals have specialized tools. They can reach tough spots. They ensure your ice maker is truly clean and safe.
FAQ Section
Q1: Can I use apple cider vinegar to clean my ice maker?
A1: No, you should only use white distilled vinegar. Apple cider vinegar can leave behind a brownish residue or stain surfaces. It also has a distinct odor that is harder to rinse away. White vinegar is clear, pure, and works effectively without unwanted side effects for your ice maker.
Q2: How often should I clean my ice maker with vinegar?
A2: The frequency depends on your usage and water hardness. For typical use and soft water, clean your ice maker every three to six months. If you have hard water or use the ice maker frequently, aim to clean it every one to three months to prevent mineral buildup and mold growth.
Q3: What if my ice maker still tastes like vinegar after rinsing?
A3: If a vinegar taste remains, you need to rinse more thoroughly. Fill the reservoir with fresh water and run several more ice-making cycles. Discard all ice from these cycles. Repeat until no vinegar taste is detectable. Ensure all removable parts are also rinsed completely.
Q4: Can vinegar damage my ice maker?
A4: When used correctly, vinegar will not damage your ice maker. It is a mild acid that effectively dissolves minerals and kills germs. However, always use diluted vinegar for internal cycles unless tackling severe buildup. Do not use abrasive scrubbers, as they can scratch surfaces.
Q5: Is it safe to drink ice made after cleaning with vinegar?
A5: No, you should not drink ice made during the vinegar cleaning cycles or the first few rinse cycles. The ice will contain vinegar and loosened debris. Always discard this ice. Only consume ice made after you have performed several thorough fresh water rinse cycles and confirmed no vinegar taste remains.
Q6: Can I put vinegar in my refrigerator ice maker’s water line?
A6: You can use vinegar to clean the main reservoir and internal parts of a refrigerator ice maker. For the water supply line itself, cleaning is more complex and often requires special kits or professional help to flush it effectively. If you’re looking to clean your refrigerator ice maker’s water line, it’s best to check your appliance manual for specific instructions or consult an expert. You can find more information on how to clean refrigerator ice maker water line.
Conclusion
Cleaning your ice maker with vinegar is a simple and powerful way to keep it fresh. We covered all the steps from preparation to maintenance. You now know why vinegar is an excellent, natural choice. It tackles mineral buildup and kills germs effectively. Regular cleaning ensures your ice maker provides clear, taste-free ice. It also extends the life of your appliance.
Remember to unplug the unit first. Always remove old ice and clean removable parts separately. Run vinegar solutions through the system, then rinse thoroughly. Consistent maintenance prevents future problems. By following these steps, you safeguard your machine and your health. Enjoy sparkling clean ice every day. Make ice maker cleaning a regular part of your home routine. Your taste buds will thank you.
- ice maker cleaning
- vinegar cleaning
- appliance maintenance