· Art & Cleaning · 12 min read
How To Clean Kneadable Eraser

How to Clean Kneadable Eraser: Complete Care & Maintenance Guide
Quick Takeaway
- Kneadable erasers can be cleaned by repeatedly stretching and folding
- Persistent dirt requires dividing the eraser into smaller sections for targeted cleaning
- Hard erasers can be revitalized with warm hands or mild heat treatments
- Proper storage in airtight containers extends eraser lifespan
- Regular maintenance prevents hardening and ensures optimal performance
Simply put: Kneadable erasers are self-cleaning tools that require regular kneading to redistribute graphite and maintain their elasticity. When your eraser becomes saturated with pigment, stretch and fold it repeatedly to expose fresh material or use the targeted cleaning methods outlined below.
What Are Kneadable Erasers and How Do They Work?
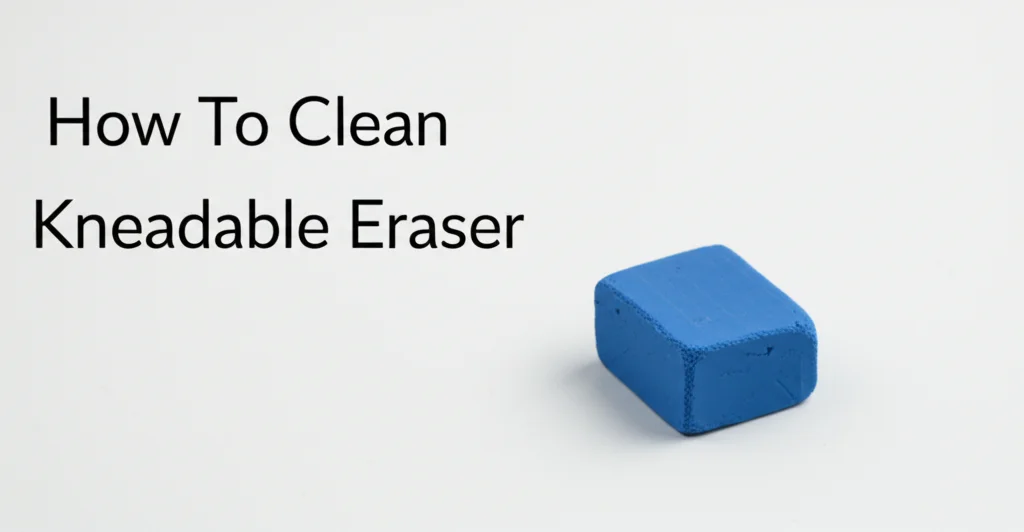
Kneadable erasers, also known as putty erasers, are pliable, clay-like art tools primarily used by artists and drafters for precision erasing and highlighting. Unlike traditional rubber erasers that wear down and leave shavings, kneadable erasers work through absorption. When you press a kneadable eraser against graphite, charcoal, or other media, the material adheres to the eraser’s surface and becomes embedded within it.
The unique property of kneadable erasers is their self-cleaning mechanism. Through the process of kneading—stretching and folding the material—artists can move absorbed particles from the surface to the interior of the eraser, effectively “refreshing” the working surface. This property makes kneadable erasers particularly valuable for detailed work where precision is required.
Kneadable erasers come in various colors, typically gray, blue, or white, depending on the manufacturer. They’re composed of a specialized elastomer compound with viscoelastic properties, allowing them to be shaped into points or edges for detailed erasing work. Their gentle erasing action makes them ideal for delicate papers and artistic techniques requiring subtle lightening rather than complete erasure.
When properly maintained, a single kneadable eraser can last significantly longer than conventional erasers, making them both environmentally and economically beneficial for frequent users.
Basic Cleaning Method: Stretching and Folding
The primary cleaning method for kneadable erasers utilizes their inherent property of redistributing absorbed material through mechanical manipulation. This process requires no additional tools or cleaning agents and can be performed anywhere.
To clean your kneadable eraser using the basic stretching and folding method:
- Hold the eraser between your fingers and thumbs of both hands.
- Gently pull the eraser to stretch it into a longer shape.
- Fold the stretched eraser back onto itself.
- Rotate the eraser 90 degrees and repeat the stretching and folding process.
- Continue this sequence for 1-2 minutes, or until you notice the eraser becoming more uniform in color.
This technique works because each time you stretch and fold the eraser, the material redistributes, moving the concentrated surface dirt into the interior and bringing cleaner material to the surface. For optimal results, perform this cleaning process after each use or whenever you notice your eraser becoming saturated with pigment.
For artists working with multiple media types, it’s beneficial to designate separate kneadable erasers for different materials. Using one eraser exclusively for graphite and another for charcoal prevents cross-contamination and extends the functional life of each eraser.
If your kneadable eraser feels sticky or overly soft during this process, allow it to rest for 10-15 minutes before continuing, as excessive manipulation can temporarily alter its consistency.
Advanced Cleaning Techniques for Heavily Soiled Erasers
When your kneadable eraser becomes heavily saturated with graphite, charcoal, or other media, basic kneading may not be sufficient. For these situations, try these advanced cleaning techniques to restore your eraser to a usable condition.
Sectioning Method
One effective approach for heavily soiled erasers is the sectioning method:
- Tear your eraser into several smaller pieces.
- Examine each piece and identify those with less contamination.
- Work with these cleaner sections first, kneading them thoroughly to ensure they’re as clean as possible.
- Gradually incorporate small portions of the dirtier sections into your cleaner material.
- Knead thoroughly after each addition until the material is fully integrated.
- Discard any extremely soiled sections that would contaminate your cleaned eraser.
This method allows you to salvage the usable portions of your eraser while eliminating the most heavily soiled sections that would otherwise compromise the entire eraser.
Pressure Point Cleaning
For erasers with concentrated areas of contamination:
- Identify the cleanest area of your eraser.
- Form this area into a flat surface.
- Press the dirty portion of the eraser against this clean surface repeatedly.
- The cleaner material will gradually absorb pigment from the soiled section.
- Knead the entire eraser to redistribute the transferred pigment.
This technique is particularly useful for erasers that have been used extensively on dark media and have developed concentrated areas of contamination.
While some artists experiment with cleaning discolored vinyl flooring techniques for their art tools, it’s important to note that kneadable erasers require specific care methods due to their unique composition.
Addressing Common Kneadable Eraser Problems
Why Is My Kneaded Eraser Hard?
A hard kneadable eraser typically indicates aging or improper storage. When kneadable erasers are exposed to air for extended periods, they gradually lose moisture and elasticity. Similarly, extreme temperatures can accelerate this hardening process.
To soften a hardened kneadable eraser:
- Warm the eraser by holding it in your hands for several minutes, allowing your body heat to soften the material.
- Once slightly softened, attempt to break it into smaller pieces.
- Work each piece individually, applying gentle pressure to gradually restore flexibility.
- As the eraser becomes more pliable, begin the normal kneading process.
For severely hardened erasers, you might consider placing the eraser in a sealed plastic bag and submerging it in warm (not hot) water for 3-5 minutes before attempting to knead it. The indirect heat can help restore some elasticity without damaging the material.
Why Is My Kneaded Eraser Crumbling?
Crumbling indicates your eraser has become too dry or has been exposed to environmental factors that have degraded its cohesive properties. This commonly happens when:
- The eraser has been stored in extremely dry conditions
- It has been exposed to direct sunlight or heat sources
- The eraser has exceeded its usable lifespan
To address a crumbling kneadable eraser:
- Gather all crumbled pieces onto a clean surface.
- Press the pieces together firmly with your fingers.
- Once they begin to adhere to each other, gently knead the reconstituted eraser.
- If the eraser remains crumbly after these attempts, it may be beyond restoration and require replacement.
For preventative maintenance, similar to how you might clean bathroom floors without a mop, keeping your art supplies properly stored will extend their usable life.
Why Is My Kneaded Eraser Sticky?
A sticky kneadable eraser usually results from one of three causes:
- Excessive heat exposure causing partial melting of the polymer structure
- Contamination with oils from your hands or other art materials
- Chemical reaction with certain surfaces or storage containers
To address stickiness:
- Place the eraser on a clean, absorbent paper surface for 24 hours to draw out excess oils.
- Dust the eraser lightly with a small amount of cornstarch or talcum powder, then knead thoroughly to incorporate.
- Store the eraser in a cool location away from direct sunlight to allow it to stabilize.
Avoid storing kneadable erasers near oil-based art supplies or in plastic containers that might leach plasticizers into the eraser material.
Can You Clean a Kneaded Eraser With Water?
The question of whether water can be used to clean kneadable erasers generates considerable debate among artists. Here’s what you need to know about water and kneadable erasers:
Generally speaking, kneadable erasers are not designed to be cleaned with water. Unlike cleaning approaches for waterproof laminate floors, direct water exposure can damage the chemical structure of your eraser.
When kneadable erasers are exposed to water:
- They can absorb moisture, becoming temporarily softer
- The water may interfere with the eraser’s ability to absorb graphite and other media
- Drying may lead to cracking or inconsistent texture
- Some water-soluble media (like certain colored pencils) may actually spread when moisture is introduced
If you’re determined to experiment with water cleaning as a last resort for a heavily soiled eraser:
- Use only a minimal amount of moisture—dampen your fingertips rather than wetting the eraser directly.
- Work with a small test section of the eraser first.
- Immediately knead the eraser thoroughly after any water exposure to distribute the moisture.
- Allow the eraser to air dry completely for 24-48 hours before using or storing.
Most professional artists recommend replacing a heavily soiled kneadable eraser rather than attempting water cleaning, as new erasers are relatively inexpensive and water cleaning risks compromising the eraser’s functionality.
Proper Storage and Maintenance Tips
Proper storage significantly extends the lifespan of your kneadable eraser and maintains its optimal performance. Unlike rubber erasers, kneadable erasers require specific storage conditions to prevent hardening, crumbling, or contamination.
Ideal Storage Containers
The best storage options for kneadable erasers include:
- Original packaging: Many kneadable erasers come in plastic cases designed specifically for their protection.
- Small plastic containers with airtight seals: These prevent air exposure that leads to hardening.
- Wax paper wrapping: This creates a protective barrier without sticking to the eraser.
- Metal tins: These protect erasers from being accidentally compressed in art boxes.
Avoid storing kneadable erasers:
- In open air where they will dry out quickly
- In direct sunlight or near heat sources
- In close proximity to oil-based art supplies that might cause contamination
- Pressed against paper that may bond with the eraser over time
Routine Maintenance Schedule
To maximize your kneadable eraser’s lifespan:
- After each use, spend 30 seconds kneading the eraser to distribute any absorbed media.
- Weekly, perform a more thorough cleaning session using the stretching and folding method.
- Monthly, inspect your eraser for hardened sections and address them as needed.
- Quarterly, consider rotating your eraser supply, bringing older erasers into active use while resting newer ones.
Many artists find that implementing a rotation system similar to how they might clean and shine damaged hardwood floors helps extend the life of all their tools.
Temperature Considerations
Kneadable erasers are sensitive to temperature extremes:
- Cold temperatures cause erasers to harden and lose pliability
- Excessive heat causes erasers to become too soft or potentially melt
- Temperature fluctuations can create inconsistent texture
For optimal performance, store your kneadable erasers at room temperature (65-75°F / 18-24°C) and avoid leaving them in environments with extreme temperatures, such as cars during summer or winter months.
When to Replace Your Kneadable Eraser
Even with proper care and maintenance, kneadable erasers have a finite lifespan. Recognizing when replacement is necessary saves frustration and ensures your artwork isn’t compromised by an ineffective tool.
Signs your kneadable eraser needs replacement include:
- Inability to absorb additional media despite thorough cleaning
- Persistent hardness that cannot be remedied through kneading or warming
- Crumbling that continues despite attempts at reconstitution
- Development of a slick surface that smears rather than lifts media
- Discoloration that transfers to your artwork during use
Most professional artists replace their kneadable erasers every 3-6 months with regular use, though this timeframe varies based on frequency of use and care practices. Rather than discarding old erasers entirely, consider keeping them for less critical applications or rough drafts, similar to how you might repurpose old materials when cleaning up after painting.
When purchasing replacement erasers, examine them for freshness by gently pressing to ensure they have the proper consistency before purchase.
Creative Uses Beyond Cleaning
Kneadable erasers have applications beyond their primary erasing function that make them versatile tools in an artist’s arsenal:
- Texture creation: Press a shaped kneadable eraser into wet media to create unique patterns and textures.
- Highlighting: Use the pointed edge of a kneadable eraser to create precise highlights in drawings.
- Blending: Gently dab areas of your drawing with a clean kneadable eraser to create subtle blending effects.
- Detail work: Shape the eraser into a fine point for removing graphite in extremely small areas.
- Lifting technique: Rather than erasing completely, lightly touch the kneadable eraser to paper to reduce pigment intensity gradually.
These creative applications give kneadable erasers extended utility in your artistic practice and can actually help maintain the eraser by distributing wear more evenly across its surface.
Similar to how you might use specialized techniques when cleaning the couch with baking soda, developing different approaches with your kneadable eraser can yield impressive artistic results while maintaining tool longevity.
FAQ About Kneadable Erasers
How do you mold a kneaded eraser?
Molding a kneaded eraser involves warming the material in your hands for 15-30 seconds, then using your fingers to shape it into your desired form. For precision work, pinch one end into a point or edge. For broader erasing, flatten the eraser into a paddle shape. The eraser will hold its form until you reshape it, allowing for versatile application techniques.
How do you soften a hard eraser?
To soften a hard kneadable eraser, first warm it between your palms for several minutes. If still rigid, break it into smaller pieces and work each section individually with firm pressure. For severely hardened erasers, place in a sealed plastic bag and warm it indirectly with a hair dryer on low setting for 30 seconds, then attempt kneading. Never microwave or directly heat erasers.
How to clean an eraser?
Regular rubber erasers can be cleaned by rubbing them on clean paper until marks disappear or using a fine-grit sandpaper to remove the soiled surface layer. For kneadable erasers, clean by repeatedly stretching and folding to redistribute pigment internally. Vinyl erasers can be washed with mild soap and water, then thoroughly dried before use.
Why does my kneaded eraser get dirty so quickly?
Kneaded erasers get dirty quickly when used on heavily applied media, when pressed too firmly into the paper, or when not kneaded between uses. Working with graphite or charcoal that has been sprayed with fixative can accelerate contamination. Additionally, using the same small section of the eraser repeatedly rather than rotating the working surface speeds up saturation.
Final Words: Maintaining Your Art Tools for Better Results
Properly maintaining your kneadable eraser is more than just a matter of cleanliness—it’s about preserving the functionality of a versatile art tool that enables precision and control in your artwork. Through regular kneading, proper storage, and understanding when to replace your eraser, you can ensure this essential tool remains ready whenever artistic inspiration strikes.
Remember that cleaning a kneadable eraser is primarily about redistribution rather than removal of absorbed media. The graphite, charcoal, or other pigments your eraser collects become integrated into its structure, which is why eventual replacement becomes necessary despite your best maintenance efforts.
As with any art supply, quality matters. Investing in higher-quality kneadable erasers from reputable art supply manufacturers often results in better performance and longevity, ultimately providing better value despite a potentially higher initial cost.
By implementing the cleaning and maintenance techniques outlined in this guide, you’ll extend the useful life of your kneadable erasers and ensure they perform optimally for your artistic needs. Just as artists take care in selecting the perfect paper, pencils, and other materials, giving proper attention to your erasers completes the circle of artistic tool maintenance.
What cleaning techniques have worked best for your kneadable erasers? Share your experiences and continue developing your artistic practice with well-maintained tools.


