· Home & Garden · 15 min read
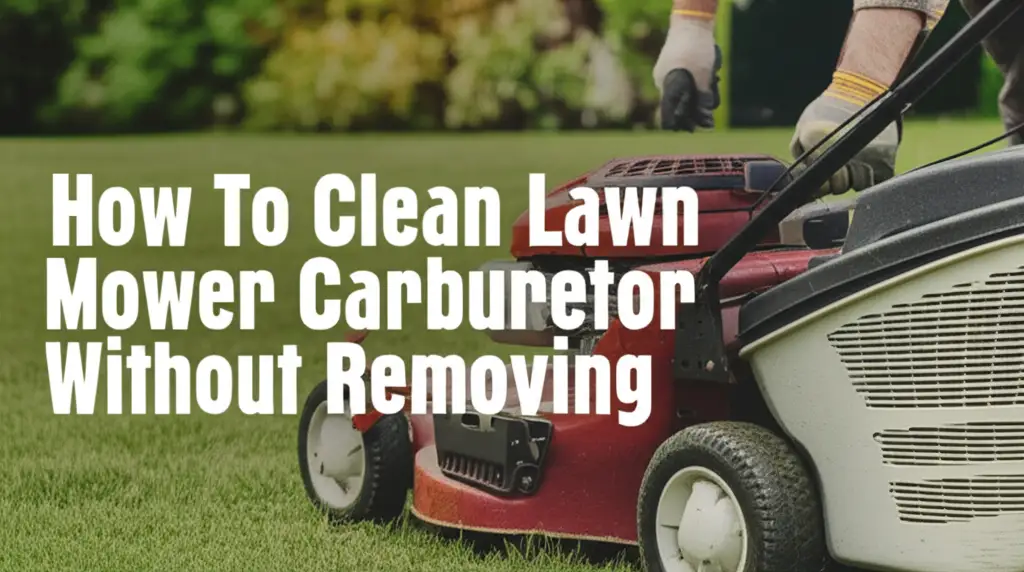
How To Clean Lawn Mower Carburetor Without Removing
Quick Guide: How To Clean Your Lawn Mower Carburetor Without Removing It
Imagine a beautiful Saturday. The sun shines, and your lawn needs a trim. You pull the start cord on your lawn mower, but nothing happens. Or perhaps it sputters, coughs, and then dies. A dirty carburetor often causes these issues. Before you think about a costly repair shop visit or a full carburetor disassembly, consider cleaning it in place.
Learning how to clean a lawn mower carburetor without removing it saves you time and money. This simple process can revive a sputtering engine. It avoids the fuss of taking the entire carburetor apart. I will show you the exact steps needed. We will cover necessary tools, the cleaning methods, and how to prevent future problems. Get ready to get your lawn mower running smoothly again.
Takeaway
- Quick Fix: Clean your lawn mower carburetor without removal for common engine problems.
- Save Money: Avoid professional repair costs and expensive replacement parts.
- Easy Steps: Follow simple instructions using common tools and cleaner.
- Prevent Issues: Learn how to keep your carburetor clean for longer engine life.
How do you clean a lawn mower carburetor without removing it?
You can clean a lawn mower carburetor without removing it by spraying carburetor cleaner into the air intake and fuel system. Run the engine to circulate the cleaner. This method helps dissolve fuel deposits and clear minor clogs. It restores proper fuel flow.
Understanding Why Your Carburetor Needs Cleaning
Your lawn mower’s engine relies on a steady mix of fuel and air. The carburetor manages this crucial mixture. Over time, fuel leaves behind sticky deposits. This residue clogs small passages inside the carburetor. Stale gasoline is the main culprit. It breaks down and creates varnish-like substances.
Debris also enters the fuel system. Dust or dirt from old fuel tanks can cause blockages. These issues make your engine run poorly. A dirty carburetor shows specific signs. Your mower might be hard to start. It may run rough or stall frequently. Sometimes, it hunts for speed, moving up and down.
These symptoms mean the carburetor is not providing the correct fuel-air ratio. Cleaning it addresses these problems directly. You can restore smooth engine operation. Regular care prevents these issues from worsening. It extends the life of your lawn mower.
Essential Tools and Materials for Non-Removal Cleaning
Cleaning your carburetor in place requires specific items. You likely have many of these already. Having them ready makes the job easier. Safety is important, so start with proper gear.
You will need eye protection. Safety glasses or goggles keep chemicals out of your eyes. Gloves protect your skin from harsh cleaners. Wear old clothes. Carburetor cleaner can stain fabric.
Here is a list of tools and materials:
- Carburetor Cleaner: This is a strong solvent. It dissolves fuel deposits effectively. Choose a brand specifically for carburetors.
- Fuel Stabilizer: This prevents gasoline from breaking down. It is essential for future prevention.
- Screwdrivers or Wrenches: You might need these to remove the air filter housing. A small flathead screwdriver is often useful.
- Shop Rags or Old Towels: These catch spills and help wipe away grime.
- A Wire Brush (small, soft bristles): This can help clean external buildup.
- Compressed Air (optional): A can of compressed air helps blow out loose debris. A small air compressor works even better.
You need these items to perform the cleaning safely and effectively. Using the right tools ensures you do not damage delicate parts. Gathering everything beforehand saves you time. It helps you focus on the task at hand. Remember, preparation is key for any maintenance job.
Step-by-Step Guide: Cleaning Your Carburetor Externally
Cleaning your carburetor externally is often the first step to fix issues. This method attacks visible gunk and helps clear minor clogs. I find this simple process highly effective for many common problems. Always prioritize safety before you begin.
Step 1: Prepare Your Lawn Mower and Ensure Safety
First, make sure the engine is cool. Never work on a hot engine. Disconnect the spark plug wire. This prevents the engine from accidentally starting. You do not want the mower to kick on while you are working near moving parts. Place it in a well-ventilated area. Carbon Monoxide fumes from running the engine can be dangerous. Wear your safety glasses and gloves.
Step 2: Locate the Carburetor and Access the Air Intake
The carburetor sits between the air filter and the engine. It is usually a metal component with fuel lines attached. You will see the air filter housing covering it. Carefully remove the air filter housing. This often involves unscrewing a few bolts or clips. Take out the air filter itself. Set it aside or replace it if it is dirty. You now have access to the carburetor’s air intake opening. This opening leads directly to the throttle plate.
Step 3: Apply Carburetor Cleaner to the Air Intake
With the air filter removed, you can see the throttle plate. This is a flap that opens and closes inside the carburetor throat. Spray a generous amount of carburetor cleaner directly into this opening. Focus on the throttle plate and surrounding areas. This helps dissolve built-up varnish and carbon deposits. For clearing stubborn blockages, remember techniques for how to clean gunk out of bathroom sink drain. The principle of dissolving deposits applies here.
Step 4: Run the Engine Briefly and Repeat
After spraying, try to start the engine. It might be hard to start at first. It may also run rough due to the cleaner. Let it run for about 10-15 seconds. If it stalls, restart it. The cleaner circulates through the system as the engine runs. This helps break down internal deposits. Repeat this spray-and-run process a few times. You should notice the engine running smoother with each cycle.
Step 5: Clean External Surfaces and Reassemble
While the engine is off, use a small wire brush or a shop rag. Clean any visible grime on the outside of the carburetor. Wipe away excess cleaner. Once done, replace the air filter. Make sure it is clean. Put the air filter housing back in place. Reconnect the spark plug wire. Test your mower. You should notice a significant improvement in performance. This external cleaning often resolves many common running issues.
Using Fuel Additives to Clean Internally
External cleaning helps, but a carburetor also has tiny internal passages. These passages get clogged by fuel deposits. Fuel additives provide an easy way to clean these internal parts. They work by dissolving the varnish and gum that build up inside your fuel system. This method is especially good for reaching areas you cannot access without disassembling the carburetor.
Choosing the Right Fuel Additive
Many types of fuel system cleaners exist. Look for products specifically designed for small engines. They often contain strong detergents. These detergents break down carbon deposits and varnish. Some popular brands offer excellent carburetor cleaners that you simply add to your fuel tank. Read the product label carefully. It will tell you if it is safe for your type of engine. Avoid products that are too harsh or not recommended for small engines.
Application Steps: Adding to the Fuel Tank
The process is very straightforward. First, make sure your fuel tank is at least half full, or better yet, full. This allows the additive to mix properly with the gasoline. Next, pour the recommended amount of fuel additive directly into the gas tank. The product label will specify the correct ratio or amount. Do not overfill the tank. This simple step begins the internal cleaning process. Think of it like using a cleaning solution for an appliance, similar to how to clean a dishwasher with vinegar and baking soda. Both involve introducing a cleaner into a system for internal maintenance.
Running the Engine to Circulate the Cleaner
Once the additive is in the fuel tank, you need to run the engine. Start your lawn mower as usual. Let it run for at least 15-30 minutes. Running the engine circulates the treated fuel throughout the entire fuel system. This includes the fuel lines, fuel filter, and, most importantly, the carburetor. The detergents in the additive will slowly dissolve the internal deposits. For best results, use the mower for a full mowing session. This gives the cleaner enough time to work its magic. You might need to repeat this treatment for a few tanks of gas, especially if the carburetor is very dirty. This method is a gentle but effective way to clean the carburetor’s hidden parts without any disassembly.
Addressing Specific Carburetor Issues Without Disassembly
Sometimes, your lawn mower might have very specific carburetor problems. These can include issues with the pilot jet or the float bowl. While full disassembly fixes these best, some non-removal tricks can help. We can try to clear these with focused cleaning efforts.
Pilot Jet Issues: Often Respond to Fuel Additives
The pilot jet is a tiny opening. It controls fuel flow at idle and low speeds. If your mower idles rough or stalls when not under load, the pilot jet is likely dirty. Since it’s deep inside the carburetor, you cannot reach it directly without taking things apart. However, consistent use of a high-quality fuel system cleaner can often resolve this. The additive-treated fuel flows through this jet. Over time, it dissolves the tiny clogs. You might need several hours of engine run time with the treated fuel for significant improvement. Be patient; these tiny passages take time to clear.
Float Bowl Draining: For Stale Fuel and Sediment
The float bowl is a small reservoir at the bottom of the carburetor. It holds a small amount of fuel ready for the engine. Old, stale fuel often sits here. This old fuel forms deposits that can cause problems. Many carburetors have a drain screw on the bottom of the float bowl. Loosening this screw allows you to drain the old fuel and any settled sediment. Place a container underneath to catch the drained fuel. Tighten the screw once the fuel stops draining. Refill the tank with fresh gas. This simple step removes a common source of carburetor contamination without any complex work.
Troubleshooting if It Still Runs Poorly
If your mower still struggles after cleaning, check other simple things. The spark plug might be dirty or worn out. Remove it, clean it with a wire brush, or replace it. A clogged fuel filter also causes similar symptoms. Check your fuel filter, usually located in the fuel line. Replace it if it looks dirty. Sometimes, fuel lines themselves can be cracked or blocked. Inspect them for damage. Using a strong cleaner to clear debris from a line is like clearing a blocked pipe, much like techniques for how to clean dryer vent from outside with drill might involve clearing out tough blockages. These external checks are quick and often solve problems that seem carburetor-related.
Preventative Measures for a Healthy Carburetor
Cleaning a carburetor without removing it is a great skill. However, preventing the problem in the first place is even better. Regular maintenance stops deposits from forming. It keeps your lawn mower running smoothly for years. I find that a few simple habits make a big difference.
Using Fresh Fuel
Gasoline begins to degrade quickly. Modern ethanol-blended fuels are especially problematic. They attract moisture and break down faster. Use only fresh gasoline in your lawn mower. Do not store gasoline for more than 30 days without treatment. Buy only the amount you will use in a month or two. This simple step drastically reduces carburetor issues. Fresh fuel burns cleaner and leaves fewer deposits. Always fill your mower with fuel from a reliable source.
The Importance of Fuel Stabilizer
Fuel stabilizer is your carburetor’s best friend. It prevents gasoline from breaking down and forming varnish. Add fuel stabilizer to every tank of gas, especially if the mower will sit for more than a few weeks. It is crucial for off-season storage. A small amount of stabilizer goes a long way. Follow the product’s directions for the correct mixing ratio. This keeps the fuel fresh and prevents sticky residues from building up. Using stabilizer is like performing preventative maintenance on a system, similar to how one might consider steps for how to clean a water inlet valve on a washing machine to ensure proper function over time. Both actions extend the life and efficiency of a critical component by preventing common issues.
Regular Engine Run-Time
Letting your lawn mower sit idle for long periods is bad for the carburetor. Fuel evaporates, leaving behind heavier deposits. Try to run your mower regularly, even if it is just for a few minutes. Starting and running the engine every few weeks circulates fresh fuel. This helps flush out any minor build-up before it becomes a major clog. This practice is especially important during off-peak seasons when the mower is used less frequently.
Proper Winterization
Winterization is key for long-term storage. Before storing your mower for winter, you have two options for the fuel system. You can drain all the fuel from the tank and run the engine until it stops. This ensures the carburetor is completely dry. Alternatively, fill the fuel tank completely and add fuel stabilizer. Running the engine for a few minutes with the stabilized fuel ensures it reaches the carburetor. Both methods prevent stale fuel problems. Choose the method that fits your comfort level. Proper winterization saves you many headaches in the spring.
When Non-Removal Cleaning Is Not Enough
Sometimes, despite your best efforts, your lawn mower carburetor might still misbehave. While cleaning without removal works for many common issues, it cannot fix everything. There are situations when a deeper intervention is necessary. Understanding these limits saves you time and frustration.
Signs That a Full Rebuild or Replacement Is Needed
If your mower still struggles after multiple non-removal cleanings, look for more serious signs. These include:
- Persistent Stalling: The engine starts but immediately dies, even after cleaning.
- No Start at All: The engine will not fire up, regardless of how much cleaner you use.
- Fuel Leaks: Fuel drips from the carburetor. This indicates a bad gasket or a stuck float. No amount of spray cleaner will fix this.
- Backfiring: The engine makes loud popping sounds from the exhaust or carburetor. This signals severe fuel mixture problems.
- Visible Damage: Cracked carburetor housing or broken parts mean replacement.
These symptoms often mean internal components are severely clogged, corroded, or broken. A full disassembly allows you to inspect all jets, passages, and gaskets. You can then replace faulty parts or clean them thoroughly.
When to Seek Professional Help
If you are uncomfortable with disassembling the carburetor, a professional mechanic is your best option. Carburetors have many small parts. Putting them back together incorrectly causes more problems. Small engine repair shops have the tools and expertise. They can diagnose problems quickly. They also have access to specific repair kits or replacement carburetors.
Seeking professional help is also wise if you suspect a problem beyond the carburetor. Sometimes, engine issues like a bad spark plug, coil, or even internal engine damage can mimic carburetor problems. A mechanic can properly diagnose the true cause. Do not force anything if you encounter resistance. You can cause more harm than good. A professional can ensure your mower is safe and ready for use. It is an investment in your equipment’s longevity.
FAQ Section
How often should I clean my lawn mower carburetor?
You should clean your lawn mower carburetor when it shows signs of trouble. These signs include hard starting, rough idling, or stalling. For prevention, use fuel stabilizer with every fill-up. This helps reduce the need for frequent cleanings. A thorough cleaning, even without removal, might be needed once every year or two, depending on usage.
Can I use gasoline to clean my carburetor?
No, you should not use gasoline to clean your carburetor. Gasoline is a poor cleaning agent for deposits and varnish. It is also highly flammable and dangerous. Always use a dedicated carburetor cleaner. These products contain solvents specifically designed to dissolve fuel residues effectively and safely.
What are the signs of a completely clogged carburetor?
A completely clogged carburetor usually prevents the engine from starting. You might hear the engine crank, but it will not fire up. If it does start, it might run for a second and then immediately die. Fuel might not reach the engine at all. These issues mean fuel passages are totally blocked.
Is carburetor cleaner safe for all engine parts?
Carburetor cleaner is generally safe for carburetor metal parts. However, it can damage rubber and plastic components. Use it carefully. Avoid spraying it directly onto rubber hoses or plastic fittings if possible. Always read the product label for specific warnings. Proper ventilation is always needed.
How long does non-removal carburetor cleaning take?
Non-removal carburetor cleaning usually takes 15 to 30 minutes. This includes preparation, spraying, and running the engine. The time varies based on how dirty the carburetor is and your experience level. It is a quick and effective method for many common issues.
Will fuel stabilizer fix a dirty carburetor?
Fuel stabilizer helps prevent a carburetor from getting dirty in the first place. It also helps dissolve minor deposits over time. However, it will not fix a severely clogged carburetor immediately. For significant clogs, a dedicated carburetor cleaner or professional service is needed. Use stabilizer for prevention and minor maintenance.
Conclusion
Getting your lawn mower to run properly again does not always mean a trip to the repair shop. Learning how to clean a lawn mower carburetor without removing it is a valuable skill. It saves you effort, time, and money. This guide has shown you the power of simple tools and focused effort. You can tackle common engine problems by understanding your carburetor.
Remember, prevention is always easier than repair. Use fresh fuel and a reliable fuel stabilizer. Run your mower regularly. These habits keep your carburetor clean and your engine healthy. If your mower still struggles, consider the possibility of a deeper issue. Do not hesitate to seek professional help if needed. Take these steps. Your lawn mower will thank you with many seasons of reliable service.
- lawn mower maintenance
- carburetor cleaner
- engine repair
- small engine troubleshooting
- fuel system cleaning