· Gaming Console Care · 17 min read
How To Clean Lens On Wii
Revive Your Wii: How to Clean the Disc Lens
Do you remember the joy of sliding a disc into your Wii, ready for an evening of gaming? Sometimes, that feeling gets replaced by frustration. Your Wii might struggle to read games. Discs spin, but the console shows an error message. A dirty disc lens is often the reason for these problems. This guide helps you understand how to clean lens on Wii. You can bring your favorite gaming console back to life. I will walk you through the necessary steps. We will cover tool selection, safety measures, and the cleaning process.
Takeaway
A dirty Wii lens stops your games from loading. You can fix this.
- Gather cotton swabs, rubbing alcohol, and compressed air.
- Consider a specialized Wii lens cleaning kit.
- Clean the lens gently.
- Follow safety steps carefully.
- Regular care keeps your Wii working well.
Your Wii disc lens reads game data. Dust, dirt, and smoke particles settle on this lens over time. This build-up blocks the laser beam. When the laser cannot read the disc properly, your games fail to load. Cleaning the lens removes these obstructions. It lets the laser work clearly. This simple action often solves disc reading errors.
Why Your Wii Lens Needs Cleaning
Your Wii console has brought you countless hours of fun. Over time, even the most beloved consoles face issues. One common problem is the Wii’s inability to read game discs. This issue often points to a dirty disc lens. The optical lens inside your Wii is a sensitive component. It directs a laser beam onto the game disc. This beam reads the game data.
Dust is everywhere in your home. It enters your Wii through air vents and disc slots. Pet hair, smoke, and general airborne particles also settle inside the console. These tiny particles accumulate on the lens surface. A thin layer of grime forms. This layer scatters or blocks the laser beam. The Wii then struggles to accurately read the data. You see error messages like “Disc could not be read” or “An error has occurred.” Sometimes, games load slowly. They might freeze during gameplay. These are clear signs your Wii lens needs attention. Cleaning it restores the laser’s clear path. This allows the Wii to read discs without issue.
Common Symptoms of a Dirty Lens
You can spot signs of a dirty Wii lens easily. The most obvious symptom is your Wii not reading game discs. You insert a disc, and the console might make unusual noises. It spins the disc, but the game does not start. An error message often appears on your screen. This message usually says the disc cannot be read. Sometimes, games start but freeze frequently. They might glitch or load slowly.
Another sign involves specific types of discs. Your Wii might read store-bought games but not burnt discs. It might read older games but not newer ones. This happens because newer games or higher data density discs require a stronger, clearer laser signal. A dirty lens weakens this signal. The console struggles with these discs first. If your Wii shows any of these problems, a dirty lens is likely the cause. Addressing this quickly prevents further frustration.
Causes of Lens Contamination
Many things make your Wii lens dirty. Dust is the main culprit. It floats in the air and settles on surfaces. Your Wii’s vents pull air in for cooling. This air carries dust particles directly into the console. Over months and years, dust builds up inside. It lands on the delicate lens.
Other factors also contribute to contamination. Pet hair is very common. If you have pets, their hair can find its way inside. Smoke, whether from cooking or cigarettes, leaves a sticky residue. This residue attracts and holds dust onto the lens. Even microscopic debris from worn-out disc drives can accumulate. Storing your Wii in a dusty area makes the problem worse. Regular use also increases dust exposure. Understanding these causes helps you prevent future lens issues. You can take steps to keep your gaming area cleaner.
Essential Tools for Cleaning Your Wii Lens
To clean your Wii lens, you need the right tools. Using improper items can damage the delicate lens. I always recommend gathering everything before you start. This makes the cleaning process smooth and safe. You will need a few simple things. Most of these items you might already have at home.
First, get some high-purity isopropyl alcohol. This is often called rubbing alcohol. Choose a concentration of 90% or higher. Lower concentrations have more water, which can leave residues. Alcohol evaporates quickly. This makes it ideal for cleaning electronics. You will also need cotton swabs. The soft tips are gentle on the lens. Make sure they do not leave cotton fibers behind. Look for lint-free options if possible.
Compressed air is another helpful tool. It blasts away loose dust without touching the surface. Use short bursts to avoid moisture buildup. Be careful not to hold the can too close to the lens. This can cause condensation. Some people prefer specialized lens cleaning kits. These kits often include a cleaning disc with tiny brushes. They also come with special cleaning solutions. These kits are designed for optical drives. They offer a safe cleaning method. Choose tools that you feel comfortable using. Safety is always important when working with electronics.
What to Use and What to Avoid
When cleaning your Wii lens, selection of materials is important. Always use high-purity isopropyl alcohol (90% or higher). This alcohol evaporates quickly. It leaves no residue. Lint-free cotton swabs are best. They prevent new fibers from contaminating the lens. You can also use a microfiber cloth specifically for optics. Make sure it is clean and soft. Compressed air is good for removing loose dust. Use it in short bursts. Hold the can upright.
Avoid harsh chemicals. Window cleaner, for example, contains ammonia. This can damage plastic or lens coatings. Do not use tap water. It leaves mineral deposits when it dries. Paper towels are too abrasive. They can scratch the lens surface. Regular cotton balls might leave too much lint. Never use your fingers to touch the lens. Skin oils and dirt will smear it further. Choosing the right tools protects your Wii. It ensures an effective cleaning process.
Safety Precautions for Electronics Cleaning
Cleaning electronics like your Wii requires caution. Safety must be your top priority. Always unplug your Wii console first. Disconnect all cables from the back. This prevents any accidental electrical shock. It also protects your console from short circuits. Static electricity can harm internal components. Ground yourself before touching any internal parts. You can do this by touching a metal object. A metal doorknob works well. Wear anti-static gloves if you have them.
Work in a well-lit, clean area. This helps you see what you are doing. It also prevents new dust from settling on the lens. Keep liquids away from circuit boards. Use only a small amount of cleaning solution on your cotton swab. Do not spray anything directly into the console. Alcohol fumes can be flammable. Ensure good ventilation in your work area. Following these steps keeps both you and your Wii safe.
Step-by-Step Guide: Cleaning the Wii Disc Lens Safely
Cleaning your Wii disc lens might seem daunting. It is a simple process if you follow clear steps. I will guide you through each part. We start with preparing your console. Then, we access the lens. Finally, we clean it with care. Remember to be gentle throughout the entire process.
Preparing Your Wii for Cleaning
Before you begin, proper preparation is key. First, power down your Wii console completely. Unplug the AC adapter from the wall outlet. Also, disconnect all other cables. This includes the AV cable and sensor bar. Ensure the console is fully off. Move your Wii to a clean, well-lit workspace. A table free of clutter is ideal. This prevents new dust from entering the console. You need good visibility to see the small lens.
Gather all your cleaning tools. Have your high-purity isopropyl alcohol, cotton swabs, and compressed air ready. If using a lens cleaning kit, prepare it. Lay a soft cloth or towel on your workspace. This protects the Wii’s casing from scratches. It also keeps small screws or parts from rolling away. Taking these initial steps ensures a smooth cleaning experience. You are now ready for the next stage.
Opening the Wii Console to Access the Lens
Accessing the Wii lens requires opening the console. This part is a bit more involved. The Wii console uses specific screws. You will need a Tri-wing screwdriver. Some models might also have Phillips head screws. Turn your Wii so the disc slot faces you. Remove any rubber feet or covers on the bottom. These often hide screws. Unscrew all visible screws on the bottom panel. Gently lift the casing. Be careful not to pull it too hard. Wires connect parts inside. You do not want to disconnect them.
Once the bottom is off, you will see internal components. Locate the disc drive. It is a rectangular unit. The lens is inside this drive. Sometimes, you need to remove a few more screws to lift the drive. This gives you better access to the lens. The lens is a tiny, clear piece. It sits on a movable track. Take photos as you go. This helps with reassembly later. Do not force anything open. If a part resists, double-check for hidden screws.
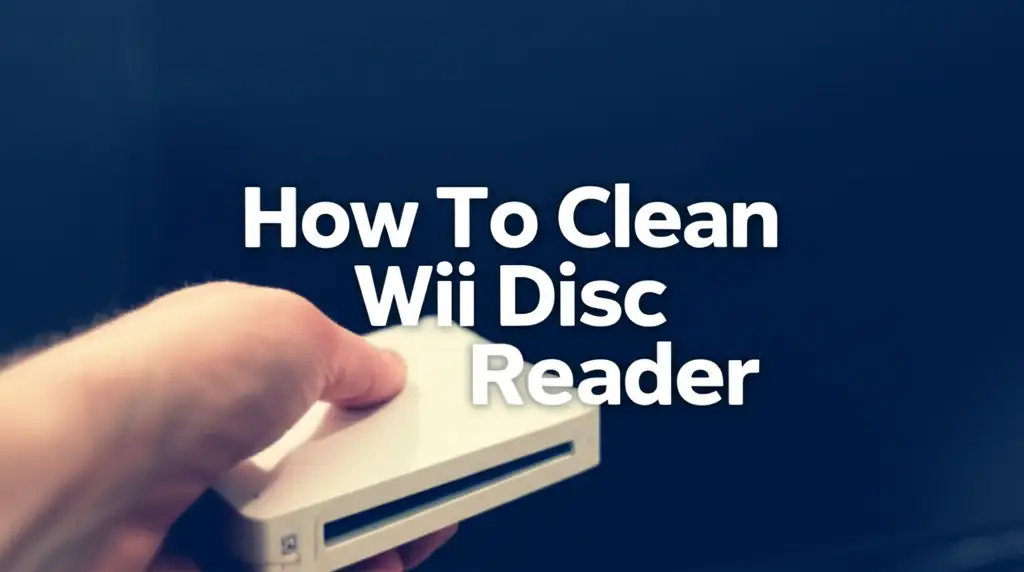
For those who find opening the console too difficult, consider a disc-based lens cleaner. These discs have tiny brushes. They clean the lens without opening the Wii. For more general maintenance related to the drive, understanding how to clean Wii disc reader can also be helpful.
Cleaning the Lens Directly
Now, the main task: cleaning the lens. Take a fresh cotton swab. Dip one end lightly into the isopropyl alcohol. The swab should be damp, not dripping wet. Excess alcohol can spread to other components. Gently blot the swab on a paper towel. This removes any extra liquid.
Carefully locate the optical lens inside the disc drive. It is a small, clear bump. Gently wipe the lens surface with the damp cotton swab. Use a very light touch. Do not press hard. Wipe in a circular motion, or from the center outwards. This helps lift away dust and grime. Use a new swab for each pass if the old one gets dirty. Repeat this process two or three times. After cleaning with alcohol, use the dry end of a new cotton swab. This removes any residual moisture.
Finally, use short bursts of compressed air. Aim it near the lens. This blows away any remaining dust particles. Keep the can upright to prevent propellant discharge. Let the lens air dry completely for a few minutes. Make sure it is perfectly dry before reassembling. This careful cleaning helps your Wii read discs clearly again.
Reassembling Your Wii
After cleaning the lens, it is time to put your Wii back together. This step requires patience. Start by carefully placing the disc drive back into its original position. Make sure all connections are secure. If you removed any small screws to access the drive, replace them now. Refer to any photos you took earlier. These pictures help you remember where each screw belongs.
Next, align the console’s top and bottom casings. Gently lower the top casing onto the bottom. Ensure all clips and tabs line up. Do not force the pieces together. If they do not fit, check for obstructions. All internal wires must be tucked safely. They should not get pinched. Once the casings are aligned, replace all external screws. Tighten them just enough to secure the console. Do not overtighten. Overtightening can strip the screw threads or crack the plastic. Once assembled, reconnect your Wii to your TV and power. Test it with a problematic game. You should notice a significant improvement in disc reading.
Alternatives to Manual Lens Cleaning
Opening your Wii console might not be for everyone. If you are uncomfortable with disassembling electronics, other options exist. These alternatives can help clean your Wii lens without taking it apart. They offer a simpler solution for many users. Understanding these methods gives you choices. You can pick the method that best suits your comfort level.
The most common alternative is a specialized lens cleaning disc. These discs look like regular game discs. They have tiny, soft brushes on their surface. When you insert the disc, it spins inside the Wii drive. The brushes gently wipe the optical lens. The disc often comes with a small bottle of cleaning solution. You apply a drop or two to the brushes before use. This helps loosen dirt and dust. These discs are easy to use. They require no console disassembly. You just put the disc in and follow the on-screen instructions.
While convenient, cleaning discs have limitations. They might not reach all parts of the lens. They are also less effective for heavy dust build-up. For very dirty lenses, direct manual cleaning is better. However, for light maintenance or general upkeep, they work well. They offer a great starting point for troubleshooting disc reading errors. Many people use them as a first step. Only if problems persist do they consider manual cleaning.
Troubleshooting After Cleaning and When to Seek Professional Help
You have cleaned your Wii lens. You put everything back together. Now, you insert a game disc. What if it still does not work? This can be frustrating. Do not lose hope yet. Several factors can cause persistent issues. We will discuss what to check next. We will also cover when to get professional help.
First, double-check your cleaning process. Did you use high-purity alcohol? Was the cotton swab lint-free? Did you ensure the lens was completely dry? Sometimes, a tiny bit of residue remains. A second, careful cleaning might solve it. Try a different game disc. Ensure the disc itself is clean and scratch-free. Some discs might have damage beyond what a clean lens can fix. Remember, the lens is part of a larger system. The entire disc drive assembly plays a role. If the problem is not the lens, it might be the drive mechanism. For example, the laser itself might be weak. Or, the motor that spins the disc could be failing.
If the Wii still struggles, the issue might be deeper. The optical drive itself might need repair or replacement. This is more complex. A professional repair technician can diagnose these problems. They have specialized tools. They can test the laser strength. They can replace faulty components. Consider seeking professional help if:
- Cleaning does not help: After thorough cleaning, the problem remains.
- Wii makes grinding noises: This suggests mechanical issues within the drive.
- Discs do not spin: The disc motor might be faulty.
- You hear clicking sounds: This could indicate the laser head is stuck.
Sometimes, the internal components of the console, like the Wii disc reader itself, may require more intensive cleaning or repair. This goes beyond just the lens. If you notice persistent issues with disc recognition, even after lens cleaning, the problem might lie with the reader’s mechanical parts or the laser assembly. These parts also gather dust or wear out.
Professional help saves you time and prevents accidental damage. They ensure your Wii is handled correctly. It extends your console’s life. Always choose a reputable repair service.
Maintaining Your Wii for Longevity
Cleaning your Wii lens helps solve immediate problems. Regular maintenance keeps your console running smoothly for years. Think about keeping your Wii healthy. This prevents future disc reading errors. A few simple habits make a big difference. They protect your investment in gaming.
Environmental factors greatly affect your Wii. Dust is the enemy. Place your Wii in an area with good airflow. Avoid placing it on carpet or in enclosed cabinets. These areas trap dust. They also restrict air circulation. Proper air circulation prevents overheating. Overheating can damage internal components. Dust filters are also an option. You can place them over air vents. These filters catch dust before it enters the console. Clean these filters regularly. This keeps dust out.
Avoid smoking near your Wii. Smoke leaves a sticky residue inside. This residue attracts and holds dust. It can coat the lens, making it harder to clean. Keep your gaming area tidy. Regularly dust the surfaces around your console. Use a soft, dry cloth. This reduces airborne particles. Store game discs properly. Keep them in their cases when not in use. This prevents scratches and dust accumulation on the discs themselves. Scratched discs make the lens work harder.
You might wonder about specific cleaners for general surfaces or delicate components. For example, while not directly related to internal lens cleaning, understanding how to clean surfaces like glass with vinegar can offer insights into the types of cleaners that are gentle or harsh. For your Wii lens, always stick to isopropyl alcohol. This ensures no damage to the sensitive optical parts. By following these simple maintenance tips, you extend the life of your Wii. You ensure consistent game performance. Enjoy your gaming without interruptions.
FAQ Section
Q1: How often should I clean my Wii lens?
You should clean your Wii lens when you notice performance issues. Common signs include games not loading or freezing. For preventative care, consider cleaning it once every 1-2 years. If you live in a dusty environment or have pets, more frequent cleaning may be beneficial. Regular checks prevent major problems.
Q2: Can I use a regular cotton ball to clean the lens?
No, I do not recommend using a regular cotton ball. Regular cotton balls can leave behind small fibers. These fibers may stick to the lens. They can obstruct the laser path. Always use lint-free cotton swabs or specialized optical cleaning cloths. These materials ensure a clean, residue-free lens surface.
Q3: What if I don’t have isopropyl alcohol? Are there substitutes?
High-purity isopropyl alcohol is the best and safest cleaner for Wii lenses. I do not recommend substitutes like window cleaner or nail polish remover. These products contain harsh chemicals. They can damage the delicate lens coating or plastic components. Always use 90% or higher isopropyl alcohol for safety and effectiveness.
Q4: Will cleaning the lens fix all Wii disc reading errors?
Cleaning the lens fixes disc reading errors caused by dust and grime. It often solves the problem. However, some errors stem from other issues. These include a failing laser, a faulty disc drive motor, or damaged internal components. If cleaning does not help, the problem might be mechanical.
Q5: Can I use a store-bought lens cleaning disc for my Wii?
Yes, you can use a store-bought lens cleaning disc. These discs contain small brushes. They gently wipe the lens as the disc spins. They are a good option if you do not want to open your console. However, they may not be as effective for heavy dust buildup. They serve as a good first step.
Q6: Is it dangerous to open my Wii console?
Opening your Wii console carries some risks. You might void your warranty. You could also accidentally damage internal components. This is why following safety precautions is critical. Always unplug the console. Ground yourself to prevent static discharge. If you feel uncomfortable, consider professional help.
Conclusion
Your Nintendo Wii brings back many fond memories. It provides hours of entertainment. When it starts struggling to read games, it can be frustrating. Learning how to clean lens on Wii is a simple and effective solution. We have walked through the entire process. From preparing your console to reassembling it, each step is manageable. You now have the knowledge and tools. You can bring your favorite console back to optimal performance.
Regular cleaning prevents future disc reading issues. It extends the life of your console. You have learned about the right tools and safety measures. You also know when to seek professional help. Do not let a dirty lens stop your gaming fun. Take action today. Give your Wii the care it deserves. Enjoy endless hours of smooth gameplay once more.
- Wii lens cleaning
- console maintenance
- Wii repair
- gaming tips
- disc read error
- Wii troubleshooting

