· Home Cleaning · 16 min read
How To Clean Mold From Bathroom Ceiling
Eliminating Bathroom Ceiling Mold: A Practical Guide
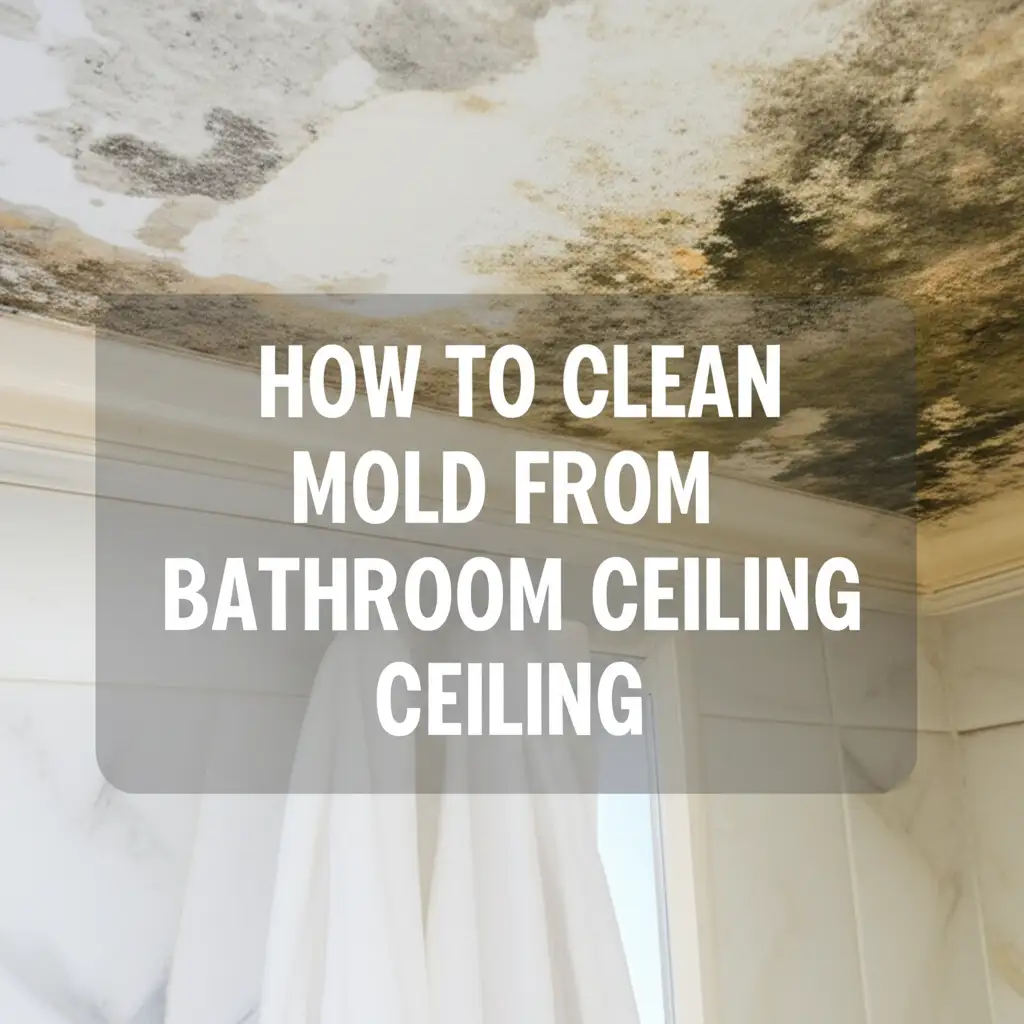
Dealing with mold on your bathroom ceiling is a common issue. This type of mold often appears due to high humidity and poor ventilation. Finding it can be unsettling, but I know how to tackle it safely and effectively. In this guide, I will walk you through understanding why mold grows, how to remove it, and simple ways to prevent its return. We will cover safety steps, required tools, and cleaning solutions. Let’s make your bathroom ceiling clean again.
Takeaway
Cleaning mold from your bathroom ceiling is achievable with the right approach. Key steps include:
- Prioritize safety with proper ventilation and protective gear.
- Identify the mold type and the extent of the growth.
- Choose the correct cleaning solution for the surface.
- Follow a systematic cleaning process from preparation to drying.
- Implement long-term prevention strategies, especially good ventilation.
To clean mold from a bathroom ceiling, first ensure good ventilation and wear protective gear. Lightly dampen the moldy area with water to prevent spore spread. Apply a suitable cleaning solution, such as diluted bleach or vinegar, allowing it to sit. Gently scrub the mold away, rinse the area, and ensure it dries completely to prevent regrowth.
Understanding Why Mold Appears on Your Bathroom Ceiling
Mold is a type of fungus. It thrives in damp, warm environments. Your bathroom ceiling offers perfect conditions for mold growth. Understanding these conditions helps you fight mold effectively.
Bathrooms have high humidity. Hot showers fill the air with moisture. This moisture rises and condenses on cooler surfaces. The ceiling is often the coolest surface. Water droplets form there. This creates a wet surface. Mold spores need moisture to grow.
Poor ventilation makes the problem worse. Many bathrooms lack good air circulation. Exhaust fans might be too small or rarely used. Without proper airflow, moist air stays trapped. This keeps the ceiling damp for extended periods. Mold spores land on these damp spots. They quickly begin to colonize and spread.
Different types of mold can grow. Black mold is common. It looks like black spots or patches. Green, brown, or white mold also appear. The color does not always indicate the mold type or danger level. All molds need prompt attention. They can cause respiratory issues or trigger allergies. Identifying the cause of the moisture is crucial. This helps you clean the mold. It also stops it from coming back. I always look for the source first. This makes the cleaning effort last.
Mold also feeds on organic matter. This includes dust, soap scum, or paint particles on the ceiling. These act as food sources for the mold. Combine food, moisture, and warmth, and you have a mold paradise. Regular cleaning helps reduce these food sources. It removes dust and grime. This makes it harder for mold to take hold. Knowing why mold grows helps you prevent it. Prevention is key to a mold-free bathroom.
Safety First: Essential Preparations for Mold Removal
Before you touch any mold, prioritize your safety. Mold spores are airborne. They can irritate your lungs and skin. Some molds produce mycotoxins. These substances can be harmful. Proper preparation protects your health.
Always ensure good ventilation in the bathroom. Open windows if possible. Turn on the bathroom exhaust fan. If your fan is not working well, consider inspecting it. Cleaning your bathroom exhaust fan without removing it improves air circulation. This reduces mold growth long-term. You need fresh air circulating during cleaning. This minimizes your exposure to dislodged mold spores. A small fan pointing towards the open window also helps.
Wear protective gear. This includes:
- N95 or P100 respirator mask: A regular dust mask is not enough. An N95 mask filters out tiny mold spores. This protects your lungs.
- Safety goggles: Mold spores can irritate your eyes. Goggles prevent contact.
- Rubber gloves: Protect your hands from mold and cleaning solutions.
- Old clothes: Choose clothes you can wash easily or dispose of after cleaning. Mold spores can cling to fabric.
- Head covering: A disposable shower cap or old hat prevents spores from landing on your hair.
Cover surfaces below the moldy area. Use old sheets or plastic sheeting. This catches any falling mold fragments or cleaning solution drips. This also makes cleanup easier. This prevents spread to other areas. Clear the bathroom of unnecessary items. Remove towels, toiletries, and anything absorbent. This prevents contamination. I always take these steps. They keep me safe during cleaning.
Prepare your cleaning area. Have all your tools ready. This prevents going back and forth. You want to minimize time spent directly under the mold. This also means you do not touch other surfaces with contaminated gloves. Safety is the foundation of effective mold removal. Do not skip these steps.
Gathering Your Tools and Choosing Effective Cleaning Agents
Having the right tools and cleaning solutions makes mold removal easier. You need to gather everything before you start. This prevents interruptions.
For tools, you will need:
- Step ladder or sturdy stool: To safely reach the ceiling. Stability is important.
- Spray bottles: For applying cleaning solutions. Label them clearly.
- Soft scrub brush or sponge: Avoid abrasive scrubbers on painted surfaces. A soft brush is gentle.
- Microfiber cloths or old rags: For wiping down surfaces.
- Buckets: One for cleaning solution, one for rinse water.
- Drop cloths or old sheets: To protect floors and fixtures.
When it comes to cleaning agents, you have several options. The choice depends on the mold severity and surface type.
- Bleach (Sodium Hypochlorite): This is highly effective for killing mold on non-porous surfaces. It sanitizes well. Mix 1 part bleach with 10 parts water. For example, 1 cup bleach to 1 gallon of water. Use this solution with caution. Never mix bleach with ammonia or other cleaners. This creates dangerous fumes. Bleach can lighten painted surfaces. Always test a small, hidden area first. This solution works best on tile or painted ceilings.
- White Vinegar: Vinegar is a natural, non-toxic alternative. It kills about 82% of mold species. It is safe for most surfaces and does not produce harsh fumes. Use undiluted white vinegar in a spray bottle. Spray it directly onto the mold. Let it sit for at least an hour. This allows it to penetrate and kill the mold. Vinegar is ideal for slightly porous surfaces or when you prefer a less harsh chemical. For tips on combining natural cleaners, you might find information on how to clean with vinegar and baking soda useful for other cleaning tasks around the house.
- Hydrogen Peroxide: A milder alternative to bleach. It is also an effective mold killer. Use a 3% hydrogen peroxide solution. Spray it directly on the mold. Let it sit for 10-15 minutes. Then scrub and wipe. It is color-safe for most surfaces. It is also good for more sensitive areas.
- Commercial Mold Removers: Many products are specifically designed for mold. Read instructions carefully. They often contain strong chemicals. Ensure they are suitable for ceiling use.
I personally prefer vinegar for small mold spots. For larger, more stubborn mold on a painted ceiling, I might use a diluted bleach solution if the surface can handle it. Remember to always test your chosen cleaner on an inconspicuous spot first. This prevents accidental damage or discoloration. Proper selection ensures effective and safe cleaning.
Step-by-Step Guide to Cleaning Mold from Your Bathroom Ceiling
Once you have prepared and gathered your supplies, you can begin the cleaning process. Follow these steps carefully to ensure thorough mold removal.
Step 1: Ventilate and Protect Yourself
Open windows wide. Turn on the exhaust fan. Put on your N95 mask, safety goggles, rubber gloves, and old clothes. Lay down drop cloths to protect the floor and fixtures. This setup keeps you safe. It also makes cleanup easier.
Step 2: Lightly Dampen the Mold
Before applying any cleaning solution, lightly mist the moldy area with plain water. Use a spray bottle for this. Do not saturate it. This step helps prevent mold spores from becoming airborne during the cleaning process. Dry mold releases more spores. A light dampening helps them cling to the surface.
Step 3: Apply Your Chosen Cleaning Solution
Now, apply your chosen cleaner.
- For Bleach Solution: Spray the diluted bleach solution directly onto the moldy area. Ensure complete coverage. Do not oversaturate.
- For Undiluted Vinegar: Spray undiluted white vinegar directly onto the mold.
- For Hydrogen Peroxide: Spray 3% hydrogen peroxide directly onto the mold.
Let the solution sit. For bleach, a few minutes is usually enough. For vinegar or hydrogen peroxide, allow it to sit for at least 30 minutes to an hour. This contact time allows the solution to penetrate and kill the mold roots. I find this waiting period crucial for effectiveness.
Step 4: Gently Scrub the Mold Away
Using a soft brush or sponge, gently scrub the mold from the ceiling. Start from the outer edges of the mold and work your way in. This helps contain the spores. Be gentle, especially on painted surfaces. You do not want to damage the paint. The goal is to remove the mold stain. Dip your brush or sponge in your cleaning solution frequently. Rinse it in a separate bucket of clean water often. This prevents spreading mold spores.
For more information on cleaning different parts of your ceiling, you might find general guidance on how to clean a ceiling helpful. This can provide broader context for ceiling maintenance.
Step 5: Rinse the Area
After scrubbing, wipe the area with a clean, damp cloth. Use plain water on the cloth. This removes any remaining cleaning solution and mold residue. Rinse the cloth frequently in a separate bucket of clean water. Avoid excessive wetting of the ceiling. You want to remove residues, not reintroduce moisture.
Step 6: Dry the Ceiling Completely
This is a critical step. Mold needs moisture to grow. After cleaning, ensure the ceiling dries completely. You can use a clean, dry cloth to blot the area. Run the bathroom exhaust fan for several hours. Open windows to promote airflow. A fan can also help circulate air and speed up drying. If the ceiling remains damp, mold will quickly return. I always make sure the area is bone dry. This stops immediate regrowth.
Dealing with Persistent Mold and When to Call Professionals
Sometimes, mold on a bathroom ceiling proves stubborn. You might clean it, but it reappears quickly. Or, the mold patch is very large. Knowing when to escalate your efforts is important.
If mold comes back shortly after cleaning, it means the moisture source is not resolved. Or, the mold growth goes deeper than the surface. Mold roots can penetrate porous materials. Drywall and wood are porous. Surface cleaning might remove visible mold. However, it leaves spores and roots behind. This allows rapid regrowth. In such cases, you might need to investigate further. Look for hidden leaks above the ceiling. This could be a leaky pipe or roof issue. Addressing the source is key.
Consider the size of the mold growth. Experts recommend that if mold covers an area larger than 10 square feet (about 3 feet by 3 feet), you should consider professional help. A small patch you can handle. A large infestation suggests a significant underlying moisture problem. It also means a higher concentration of spores. Handling large areas increases your exposure risk. Professionals have specialized equipment. They use strong cleaning agents. They also have tools to safely contain mold spores. They can identify hidden mold.
Another reason to call professionals is if you suspect black mold, specifically Stachybotrys chartarum. While you cannot identify mold types by color alone, if the mold has a slimy texture or a strong musty odor, it warrants caution. If you or family members experience health symptoms after exposure to the mold, call a professional. Symptoms include persistent cough, sneezing, skin irritation, or difficulty breathing. Mold can cause allergic reactions. It can worsen asthma.
Professionals offer a comprehensive service. They identify the source of moisture. They safely remove mold. They clean and disinfect the affected area. They also advise on prevention strategies. They use containment procedures. This prevents mold spores from spreading to other rooms. They often use HEPA filters to clean the air. This ensures thorough remediation. While DIY is good for small patches, large or recurring mold issues need expert intervention. Your health is worth the investment. I never hesitate to recommend pros for big jobs. For example, if you find extensive black mold on wood, this might be a task for experts, similar to managing black mold off wood.
Preventing Future Bathroom Ceiling Mold Growth
Removing mold is only half the battle. Preventing its return is essential for a healthy home. Mold needs moisture to thrive. Your prevention efforts should focus on controlling humidity and ensuring good ventilation in your bathroom.
The most critical step is improving ventilation. After every shower or bath, use your exhaust fan. Run it for at least 20-30 minutes after you leave the bathroom. This pulls moist air out. It prevents condensation on surfaces like the ceiling. If your bathroom does not have an exhaust fan, consider installing one. Ensure your current fan is properly sized for your bathroom. A small fan will not move enough air. Regular cleaning of the exhaust fan also helps it perform better.
Reduce humidity inside the bathroom. Take cooler, shorter showers. This produces less steam. Open a window slightly while showering if possible. This helps humid air escape. If you have a de-humidifier, use it in the bathroom if humidity levels remain high. Keep the bathroom door open when not in use. This allows air to circulate. It helps dry out the room.
Regular cleaning prevents mold. Wipe down surfaces that collect moisture. This includes walls and ceilings. Use a squeegee on shower walls. You can spray a diluted vinegar solution on your ceiling once a week. This acts as a preventative measure. It kills any developing spores before they become visible. Wipe dust and soap scum from the ceiling. These provide food for mold spores.
Address any leaks immediately. A leaky roof or pipe above the bathroom ceiling is a direct moisture source. Visible mold might be a sign of a larger water issue. Repairing these leaks promptly prevents mold from taking hold. Inspect your ceiling regularly. Look for water stains or peeling paint. These are signs of hidden moisture.
Mold often starts in small spots. Keep an eye out for any discoloration. The sooner you spot new mold growth, the easier it is to clean. Early detection stops large infestations. Maintaining a dry, well-ventilated bathroom is your best defense against recurring ceiling mold. I make these preventative steps part of my routine. This keeps my bathroom fresh and clean.
Maintenance Tips for a Mold-Free Bathroom
Regular maintenance is key to keeping your bathroom ceiling free of mold. It is easier to prevent mold than to clean it repeatedly. Incorporate these habits into your routine.
Daily Habits:
- Run the Exhaust Fan: As discussed, run your exhaust fan during and for 20-30 minutes after every shower or bath. This removes humid air.
- Wipe Down Surfaces: Quickly wipe down shower walls and the upper parts of bathroom walls after use. This removes standing water.
- Open the Door: Keep the bathroom door open when the room is not in use. This allows air to circulate. It helps dry out the space.
- Ventilate After Cleaning: If you clean your bathroom, ensure it is well-ventilated afterward. Cleaning solutions can release moisture.
Weekly Maintenance:
- Ceiling Inspection: Take a quick look at your bathroom ceiling. Look for small spots of discoloration. Early detection is crucial.
- Quick Wipe: Use a damp cloth to wipe down high moisture areas, including the ceiling corners. This removes dust and potential mold spores before they grow.
- Preventative Spray: Mix 1 part white vinegar with 1 part water in a spray bottle. Lightly mist the ceiling and upper walls. Do not rinse. The vinegar acts as a mold deterrent. This also works for areas like cleaning mold off window sills, where moisture often collects.
Monthly or Quarterly Tasks:
- Deep Clean Ceiling: Every few months, give your ceiling a more thorough cleaning. Use a mild all-purpose cleaner or a diluted vinegar solution. This helps remove any accumulated grime or dust. You can use a long-handled duster or mop for this.
- Check for Leaks: Inspect the ceiling for any signs of water damage. Look for yellow stains, bubbling paint, or damp spots. These indicate a leak from above. Address any leaks immediately.
- Clean Exhaust Fan: The bathroom exhaust fan collects dust and grime. This reduces its efficiency. Follow instructions for how to clean bathroom exhaust fan without removing it regularly. A clean fan moves more air. This prevents humidity buildup.
By following these maintenance tips, you create an environment less favorable for mold growth. Consistent effort goes a long way. This keeps your bathroom ceiling looking clean and your air quality healthy. I believe in consistent, small actions. They prevent big problems.
FAQs About Cleaning Mold from Bathroom Ceilings
Q1: Is bathroom ceiling mold dangerous? A1: Yes, bathroom ceiling mold can be dangerous. It can cause allergic reactions in some people. It can trigger asthma attacks. Some molds produce toxins that may affect health over time. Protect yourself with masks and gloves during cleaning. Prompt removal reduces health risks.
Q2: Can I paint over mold on my bathroom ceiling? A2: No, painting over mold is not a solution. Paint does not kill mold. The mold will continue to grow beneath the paint. It will eventually reappear. You must clean and thoroughly remove all mold first. Then, ensure the surface is dry before painting. Use mold-resistant primer and paint.
Q3: What’s the best cleaning solution for black mold on the ceiling? A3: For black mold on a bathroom ceiling, a diluted bleach solution often works well. Mix 1 part bleach with 10 parts water. For a less harsh alternative, use undiluted white vinegar. It effectively kills many mold species. Always test solutions on an inconspicuous area first.
Q4: How long does it take for mold to grow on a bathroom ceiling? A4: Mold can start to grow on a damp bathroom ceiling within 24 to 48 hours. It needs moisture, warmth, and organic material to thrive. Visible mold patches can develop quickly. Regular ventilation and drying prevent this rapid growth.
Q5: When should I call a professional for bathroom ceiling mold? A5: Call a professional if the mold covers an area larger than 10 square feet. Also, seek professional help if the mold returns quickly after cleaning. If you suspect a hidden water leak, or if you or your family experience health issues due to the mold, professionals are needed.
Q6: How can I prevent mold from returning to my bathroom ceiling? A6: Prevent mold by controlling humidity. Run the exhaust fan during and after showers. Open windows for ventilation. Wipe down surfaces. Repair any water leaks immediately. Regularly clean the ceiling with a preventative solution like diluted vinegar.
Conclusion
Cleaning mold from your bathroom ceiling is a manageable task when done correctly. We covered understanding why mold grows, prioritizing safety, gathering the right tools, and executing the cleaning steps effectively. Remember that prevention is your strongest tool. Addressing moisture sources and maintaining good ventilation are crucial for long-term success.
By following these guidelines, you can not only eliminate existing mold but also stop it from coming back. Consistent effort in keeping your bathroom dry and well-ventilated will ensure a clean, healthy environment. Take action today to protect your home and your health. Your bathroom ceiling can stay clean and mold-free.
- bathroom mold
- ceiling mold removal
- mold cleaning
- prevent mold
- household cleaning

