· Home Maintenance · 21 min read
How To Clean Mold Off Basement Walls
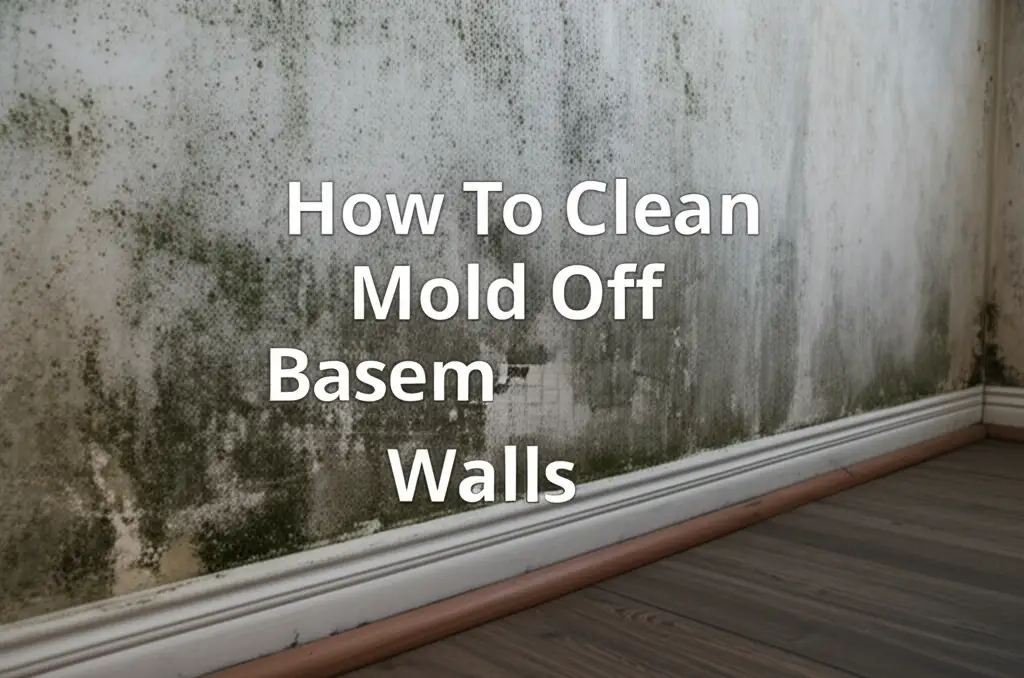
A Clean Guide: How To Clean Mold Off Basement Walls
Discovering mold on your basement walls is a common and unwelcome sight for many homeowners. This insidious growth not only looks unsightly but also poses potential health risks and compromises the structural integrity of your home. You probably wonder how to tackle this problem effectively. Cleaning mold off basement walls requires a clear understanding of its causes, proper safety measures, and effective cleaning techniques.
This comprehensive guide shows you exactly how to clean mold off basement walls. We explore the root causes of basement mold, detail essential safety precautions, and provide step-by-step instructions for various cleaning solutions. You will also learn about crucial post-cleaning steps and long-term prevention strategies. Our goal is to empower you with the knowledge to restore your basement walls and maintain a healthy living environment.
Takeaway:
- Address moisture sources to stop mold growth.
- Wear proper safety gear during cleaning.
- Use appropriate cleaning solutions for the mold type and wall surface.
- Ensure thorough drying after cleaning.
- Implement long-term prevention strategies like humidity control and good ventilation.
To clean mold off basement walls, first identify and fix the moisture source. Next, wear protective gear. Then, use a suitable cleaning solution like bleach, vinegar, or hydrogen peroxide to scrub and remove the mold. Finally, dry the area completely to prevent regrowth.
Understanding Basement Mold: Causes and Dangers
Mold thrives in damp, dark, and poorly ventilated environments. Basements offer ideal conditions for mold growth due to their inherent susceptibility to moisture. Understanding why mold appears is the first step toward effective removal and prevention. I know I always look for the root cause of any problem.
Common Causes of Basement Mold
Several factors contribute to mold growth on basement walls. Water intrusion is the primary culprit. This can come from various sources, each requiring a specific approach. For instance, foundation cracks allow groundwater to seep in. Poor exterior drainage directs rainwater towards your basement rather than away. Leaky pipes or appliances within the basement also contribute significant moisture. Even high humidity, often unnoticed, creates a perfect breeding ground for mold spores to settle and multiply on cool, damp surfaces.
Condensation is another major factor. Warm, moist air from the living space can condense on cooler basement walls, especially during humid seasons. This creates a thin layer of moisture where mold can easily take root. A lack of proper ventilation traps moisture inside the basement. Without fresh air circulation, humidity levels rise, and stagnant air becomes a breeding ground for mold. I often see this in older homes where basements lack proper air exchange systems.
Materials also play a role. Porous materials like drywall, wood, and insulation absorb and retain moisture easily. Once these materials become damp, mold can rapidly colonize them. Concrete basement walls, while less porous, can still harbor mold if moisture penetrates their surface or if efflorescence (salt deposits) provides a nutrient source. Understanding these causes helps you tackle the problem at its source. If you have experienced flooding, learning how to clean concrete basement floor after a flood is a vital related step.
Health Risks of Mold Exposure
Exposure to mold can cause a range of health issues, especially for sensitive individuals. Mold spores are microscopic and become airborne easily. When inhaled, these spores can trigger allergic reactions. Symptoms include sneezing, runny nose, red eyes, skin rash, and asthma attacks. People with pre-existing respiratory conditions are particularly vulnerable.
Beyond allergies, mold exposure can lead to more serious health problems. Some molds produce mycotoxins, which are toxic compounds. Ingesting or inhaling these mycotoxins can cause neurological problems, fatigue, and even chronic respiratory issues. It is important to treat any mold growth seriously due to these potential health risks. I always prioritize safety when dealing with mold.
Children, the elderly, and individuals with compromised immune systems are at higher risk. Prolonged exposure can weaken the immune system and lead to persistent health complaints. Even small patches of mold can release enough spores to affect indoor air quality. This is why addressing mold promptly is not just about aesthetics but about protecting your family’s health. You should always ensure you wear proper gear when cleaning.
Safety First: Essential Preparations for Mold Removal
Before you begin any mold cleaning project, proper preparation is key. Mold spores are irritating and potentially harmful. Taking the right safety precautions protects you and prevents further contamination of your home. I always emphasize safety above all else.
Personal Protective Equipment (PPE)
Wearing the correct personal protective equipment (PPE) is non-negotiable when dealing with mold. You need to protect your skin, eyes, and respiratory system from exposure to mold spores and cleaning chemicals. A good N95 respirator mask is essential. This type of mask filters out airborne mold spores, preventing you from inhaling them. Standard dust masks are not sufficient; they do not block microscopic mold spores.
Eye protection is also critical. Safety goggles or glasses shield your eyes from splashing chemicals and airborne mold particles. I always make sure my goggles form a tight seal around my eyes. Long rubber gloves protect your hands from direct contact with mold and harsh cleaning solutions. Choose gloves that extend up your forearms for maximum coverage. Disposable coveralls or old clothes you can easily wash in hot water after use are also recommended. This prevents mold spores from clinging to your everyday clothing and spreading throughout your house. Remembering to protect yourself is the first step in successful mold removal.
Protecting Your Basement Space
Before you start scrubbing, prepare the area around the mold. Isolate the affected area as much as possible. Close doors to other parts of your house to prevent spores from spreading. You can also use plastic sheeting and painter’s tape to create a barrier around the work zone. This helps contain the mold spores as you clean.
Remove any porous items from the vicinity if they are not contaminated. This includes furniture, rugs, or boxes. If items are moldy, decide if they can be cleaned or if they need disposal. Moldy upholstered furniture, for instance, often needs to be discarded. Place drop cloths or plastic sheeting on the floor to catch any drips or debris during cleaning. This also makes cleanup easier. Ensure good ventilation by opening windows and using fans to direct air outside, but not towards other living areas. This ventilation helps clear the air of mold spores and chemical fumes. Proper preparation makes the cleaning process safer and more efficient.
Choosing Your Weapon: Effective Mold Cleaning Solutions
Selecting the right cleaning solution depends on the severity of the mold and the type of surface. Different solutions offer varying strengths and properties. I have found certain options work better in specific situations.
Bleach Solution for Non-Porous Surfaces
Bleach is a powerful disinfectant and mold killer, especially effective on non-porous surfaces like sealed concrete or tiles. It kills mold spores and lightens stains. To prepare a bleach solution, mix one cup of household bleach with one gallon of water. Always use cold water, as hot water can break down the bleach’s active ingredient.
Apply the solution to the moldy area using a spray bottle or sponge. Allow it to sit for 10-15 minutes to penetrate and kill the mold. Then, scrub the surface with a stiff brush. Ensure you rinse the area thoroughly with clean water after scrubbing to remove all bleach residue. I always make sure to ventilate the area well when using bleach, as its fumes can be strong. Never mix bleach with ammonia or other cleaners, as this creates toxic gases. While good for non-porous surfaces, bleach is not recommended for porous materials like drywall or wood, as it does not penetrate deeply enough to kill mold roots. For other cleaning tasks, you may find our guide on how to clean painted walls without leaving streaks helpful.
Vinegar: A Natural Alternative for Mold
White distilled vinegar is a natural, non-toxic alternative for mold removal. It is effective on both porous and non-porous surfaces. Vinegar is a mild acid that can kill approximately 82% of mold species. Its acetic acid component effectively breaks down mold. I often prefer vinegar for smaller mold issues or when I want to avoid harsh chemicals.
Pour undiluted white vinegar into a spray bottle. Spray it directly onto the moldy area, saturating the surface. Let the vinegar sit for at least an hour to allow it to penetrate and kill the mold. After an hour, scrub the area with a stiff brush. You usually do not need to rinse vinegar, as its residue can help inhibit future mold growth. The smell of vinegar dissipates quickly as it dries. For a comprehensive guide on combining natural cleaners, you might want to read how to clean with vinegar and baking soda.
Hydrogen Peroxide: An Eco-Friendly Option
Hydrogen peroxide is another effective and eco-friendly mold killer. It is a fungicide, bleach, and antiviral agent. Hydrogen peroxide works well on many surfaces, including concrete, drywall, and even fabrics. Use a 3% hydrogen peroxide solution, which is commonly available.
Pour the hydrogen peroxide into a spray bottle. Spray the moldy area thoroughly, ensuring full saturation. Allow the solution to sit for 10-15 minutes to fully kill the mold. Then, scrub the area with a brush to remove the mold and any stains. Wipe the surface clean with a damp cloth afterward. Hydrogen peroxide is a good alternative to bleach if you are sensitive to its fumes. It does not produce toxic fumes and breaks down into water and oxygen. I find it to be a reliable option for various mold situations. If you need to clean mold off different materials, check out how to clean black mold off wood.
Borax Solution for Tough Mold
Borax is a natural mineral often used as a cleaning agent and fungicide. It is effective for killing mold and inhibiting its future growth. Borax is a non-toxic alternative to bleach, making it safer for homes with children or pets. I find it useful for stubborn mold spots.
To make a borax solution, dissolve one cup of borax powder in one gallon of hot water. Stir well until the powder is fully dissolved. Apply the solution to the moldy walls using a scrub brush or a sponge. Ensure the area is thoroughly saturated. Scrub vigorously to remove the mold. Unlike some other solutions, you do not need to rinse the borax solution off completely. Leaving a thin layer of borax on the surface can help prevent mold from returning, as it changes the pH level, making the environment less hospitable for mold. This makes it a great choice for long-term prevention on basement walls.
Step-by-Step Guide: Cleaning Mold Off Basement Walls
Now that you have chosen your cleaning solution and gathered your safety gear, it is time to tackle the mold. Following these steps ensures a thorough and effective cleaning process. I find breaking it down makes the task less daunting.
Step 1: Ventilate and Prepare
Before you even touch the mold, ensure the area is well-ventilated. Open any windows and doors in your basement to allow for air circulation. If possible, use fans to push air out of the basement. This helps disperse mold spores and chemical fumes, keeping the air safer to breathe. Remember to wear your N95 respirator mask and other PPE from the start.
Clear the work area of any items. Move furniture, boxes, or anything else away from the walls. Cover the floor with plastic sheeting or old towels to protect it from cleaning solutions and mold debris. This preparation ensures you have ample space to work safely and effectively. I always make sure I have a clear path and everything I need within reach before I start.
Step 2: Apply Your Chosen Solution
With your safety gear on and the area prepped, it is time to apply your chosen mold cleaning solution. Whether you selected bleach, vinegar, hydrogen peroxide, or borax, follow the specific mixing instructions for each. Pour the solution into a spray bottle for easy application or use a sponge for direct application.
Spray or wipe the solution generously onto the moldy area of the basement wall. Make sure to saturate the mold completely. Do not just lightly mist it; the solution needs to soak into the mold to kill it effectively. Allow the solution to sit for the recommended time (e.g., 10-15 minutes for bleach or hydrogen peroxide, one hour for vinegar). This contact time is crucial for the active ingredients to work their magic and kill the mold at its roots.
Step 3: Scrub and Remove Mold
After the solution has had enough time to work, it is time for the physical removal of the mold. Use a stiff-bristled brush or an old scrub brush. Vigorously scrub the moldy areas of the wall. Apply consistent pressure to dislodge the mold and clean the surface. The scrubbing action, combined with the cleaning solution, helps break down the mold and remove its stains.
Work in small sections if the mold coverage is extensive. This prevents the solution from drying out before you can scrub. If the mold is deeply embedded or on a porous surface, you might need to reapply the solution and scrub again. Do not be afraid to put some muscle into it. Once the mold appears to be gone, wipe the area clean with a damp cloth. Ensure you collect all removed mold particles and place them in a sealed plastic bag for disposal.
Step 4: Rinse and Dry Thoroughly
Rinsing the wall depends on the cleaning solution you used. If you used bleach or hydrogen peroxide, rinse the scrubbed areas thoroughly with clean water. Use a sponge or a clean cloth dampened with water to wipe away any residue. For vinegar and borax solutions, a full rinse is often not necessary, as leaving a slight residue can help prevent future growth. However, if you prefer, a light rinse is acceptable.
After rinsing (if applicable), the most critical step is to dry the basement walls completely. Mold cannot grow without moisture. Use old towels to absorb as much surface water as possible. Then, employ fans, dehumidifiers, or open windows to ensure the walls dry out fully. This can take several hours, or even a day or two, depending on the humidity and air circulation in your basement. Do not skip this step. Any remaining moisture creates an immediate invitation for mold to return. Ensuring the area is completely dry is paramount for successful mold remediation.
Post-Cleaning Steps: Ensuring Mold Does Not Return
Cleaning the mold is a significant achievement, but your work is not done yet. Mold will reappear if you do not address the underlying moisture issues and take proactive steps. These post-cleaning measures are crucial for long-term success. I always remind people that prevention is the best cure.
Drying the Area Completely
After scrubbing and rinsing, ensure the cleaned area is bone dry. This step is critical. Mold needs moisture to survive and grow. If any dampness remains, mold can quickly reappear. Use fans to circulate air directly onto the walls. A powerful dehumidifier is also highly effective at pulling moisture out of the air and off surfaces in your basement. Set the dehumidifier to maintain a humidity level below 50%.
Continue running fans and dehumidifiers for at least 24-48 hours after cleaning. You want to be absolutely certain the walls are dry to the touch and that no residual moisture lingers within the wall material. You can even use a moisture meter to check for dampness in drywall or wood if you have concerns. Proper drying starves any remaining mold spores and creates an inhospitable environment for new growth. This step often determines the long-term success of your mold cleaning efforts.
Applying Mold Inhibitors
Once the walls are completely dry, consider applying a mold inhibitor or a mold-resistant primer. These products create a surface that is less hospitable for mold spores to attach and grow. Mold-resistant paints and primers contain fungicides that actively deter mold. They act as an extra layer of defense against future mold outbreaks.
Before painting, ensure the wall surface is clean and free of dust or debris. Apply the mold inhibitor or primer according to the manufacturer’s instructions. Many of these products are designed specifically for damp environments like basements. While a mold inhibitor helps, it is not a substitute for addressing the root cause of the moisture. It acts as an additional protective barrier. Using these products provides extra peace of mind, knowing you have taken an additional step to prevent mold from returning to your basement walls.
Long-Term Mold Prevention Strategies for Basements
Preventing mold from returning is more important than simply cleaning it. Addressing the source of moisture and controlling the basement environment are key to long-term success. I always tell my clients that ongoing vigilance saves time and money in the long run.
Controlling Humidity Levels
High humidity is a primary driver of mold growth in basements. Warm, moist air contributes to condensation on cool basement surfaces. Investing in a good quality dehumidifier is one of the most effective prevention strategies. A dehumidifier actively pulls excess moisture from the air, maintaining humidity levels below 50%. Ideally, aim for 30-50% relative humidity.
Run your dehumidifier consistently, especially during humid months. Empty the water reservoir regularly or connect it to a drain if it has that feature. You can also use a hygrometer to monitor humidity levels in your basement. This small device gives you an accurate reading, helping you know when to adjust your dehumidifier settings. Keeping humidity in check drastically reduces the chances of mold spores finding the moisture they need to germinate and grow on your walls.
Addressing Water Leaks and Drainage Issues
Mold cannot thrive without a water source. Identifying and fixing all water leaks is paramount for long-term mold prevention. Inspect your basement regularly for signs of leaks. Look for cracks in the foundation walls or floor. Check pipes, plumbing fixtures, and appliances like water heaters or washing machines for drips or condensation. Repair any leaks immediately.
Poor exterior drainage often directs water towards your basement. Ensure your gutters are clean and free of debris, directing rainwater away from your home’s foundation. Extend downspouts at least six feet away from the foundation. Ensure the ground around your home slopes away from the foundation, preventing water from pooling against the basement walls. Consider installing a French drain or improving landscape grading if exterior water intrusion is a persistent problem. Fixing these issues stops water from entering your basement, which directly prevents mold growth. For deeper insights into managing water in your home, consider our article on how to clean sediment out of a well.
Improving Air Circulation
Stagnant air allows moisture to accumulate and mold spores to settle. Improving air circulation in your basement helps keep surfaces dry and discourages mold growth. Open basement windows and doors periodically to allow fresh air to circulate, especially on dry days. Use exhaust fans to vent moist air outside. If your basement has an HVAC system, ensure the vents are not blocked and that air circulates freely.
Consider installing an exhaust fan specifically for the basement if you do not have one. Running ceiling fans or standing fans in the basement can also help keep air moving. Adequate ventilation helps prevent condensation on walls and floors by exchanging humid indoor air with drier outdoor air. This simple measure can make a significant difference in preventing mold from taking hold.
Proper Insulation and Sealing
Proper insulation and sealing contribute significantly to mold prevention. Cold basement walls can lead to condensation when warm, humid air comes into contact with them. Insulating your basement walls helps keep their surface temperature closer to the indoor air temperature. This reduces the likelihood of condensation forming, cutting off a key moisture source for mold.
Seal any cracks or gaps in your basement walls, floors, and around windows and doors. Use caulk or appropriate sealants to prevent air and moisture from entering. Check around pipes and utility penetrations for gaps. Sealing these areas prevents humid air infiltration and direct water entry. This comprehensive approach, combining insulation with sealing, creates a more stable temperature and moisture environment in your basement, making it much harder for mold to establish itself.
When to Call the Professionals: Knowing Your Limits
While many mold issues are manageable with DIY methods, there are specific situations when professional mold remediation is necessary. Knowing when to call in the experts ensures safety and proper treatment. I always advise caution when the problem seems too big.
If the mold covers a large area, specifically more than 10 square feet, it is best to consult a professional. Large infestations often indicate a significant moisture problem that requires specialized equipment and expertise to identify and fix. Professionals also have the necessary training to safely contain and remove extensive mold growth without spreading spores throughout your home.
If the mold returns quickly after you have thoroughly cleaned it, this indicates an unresolved moisture issue. You might have missed a hidden leak, or the problem is more complex than it appears. Professionals use advanced tools like thermal cameras and moisture meters to locate hidden water sources. Additionally, if anyone in your household experiences severe health symptoms related to mold exposure, or if you suspect toxic mold (e.g., black mold), call a professional immediately. They can test the mold type and handle its removal with strict safety protocols. Trust your judgment: if you feel overwhelmed or unsafe, do not hesitate to seek expert help. It is worth the investment for your health and home’s integrity.
FAQ Section
Q1: Is bleach the best way to clean mold off basement walls?
Bleach is effective for killing mold on non-porous surfaces like sealed concrete walls. It also helps to lighten mold stains. However, it is not recommended for porous materials such as drywall or wood, as it does not penetrate deeply enough to kill the mold roots. For porous surfaces, consider alternatives like vinegar or hydrogen peroxide. Always ensure good ventilation when using bleach.
Q2: How do I prevent mold from growing back on basement walls?
To prevent mold regrowth, address the root cause of moisture. Control humidity levels below 50% with a dehumidifier. Fix any water leaks from pipes or foundation cracks. Improve air circulation through ventilation. Consider applying mold-resistant primers or paints to the walls after cleaning. Regular inspection helps catch new issues early.
Q3: Can I clean black mold off basement walls myself?
You can often clean small areas (under 10 square feet) of black mold yourself using proper safety gear and appropriate cleaning solutions. Black mold does not automatically mean it is the toxic Stachybotrys chartarum; many mold types are black. However, if the mold covers a large area, or if you or family members have health issues, call a professional for assessment and remediation.
Q4: What causes mold on basement walls?
Mold on basement walls is primarily caused by excess moisture. Common sources include high humidity, water leaks from pipes or foundation cracks, poor exterior drainage directing water towards the basement, and condensation on cool surfaces. Insufficient ventilation also contributes by trapping moisture inside the basement environment.
Q5: How long does it take for mold to grow in a basement?
Mold can begin to grow on damp surfaces within 24 to 48 hours if conditions are right. Spores are always present in the air; they just need moisture, food (like dust or dirt on surfaces), and a suitable temperature to germinate and multiply. Therefore, quick response to water issues is vital.
Q6: Do I need to prime basement walls after cleaning mold?
After cleaning mold off basement walls, it is highly recommended to let the walls dry completely, then prime them. Use a mold-resistant primer that contains fungicides. This creates a barrier that helps prevent future mold growth and prepares the surface for painting. Priming adds an extra layer of protection against returning mold.
Conclusion
Cleaning mold off basement walls is a critical task for maintaining a healthy and safe home environment. We have covered the essential steps, from understanding mold causes and health risks to preparing safely and choosing effective cleaning solutions. Remember, thorough cleaning involves not just scrubbing away the visible mold but also addressing the underlying moisture issues. Drying the area completely and implementing long-term prevention strategies are crucial for success.
By controlling humidity, fixing leaks, improving ventilation, and using mold inhibitors, you can significantly reduce the chances of mold returning to your basement. While most small mold problems are manageable as a DIY project, do not hesitate to call professionals for extensive infestations or if you have health concerns. Your proactive approach to cleaning mold off basement walls protects your home and promotes a healthier living space for everyone. Take action today to reclaim your basement from mold!
- mold removal
- basement cleaning
- home maintenance
- mold prevention
- DIY cleaning
- healthy home