· Mushroom Cleaning · 15 min read
How To Clean Morel Mushrooms
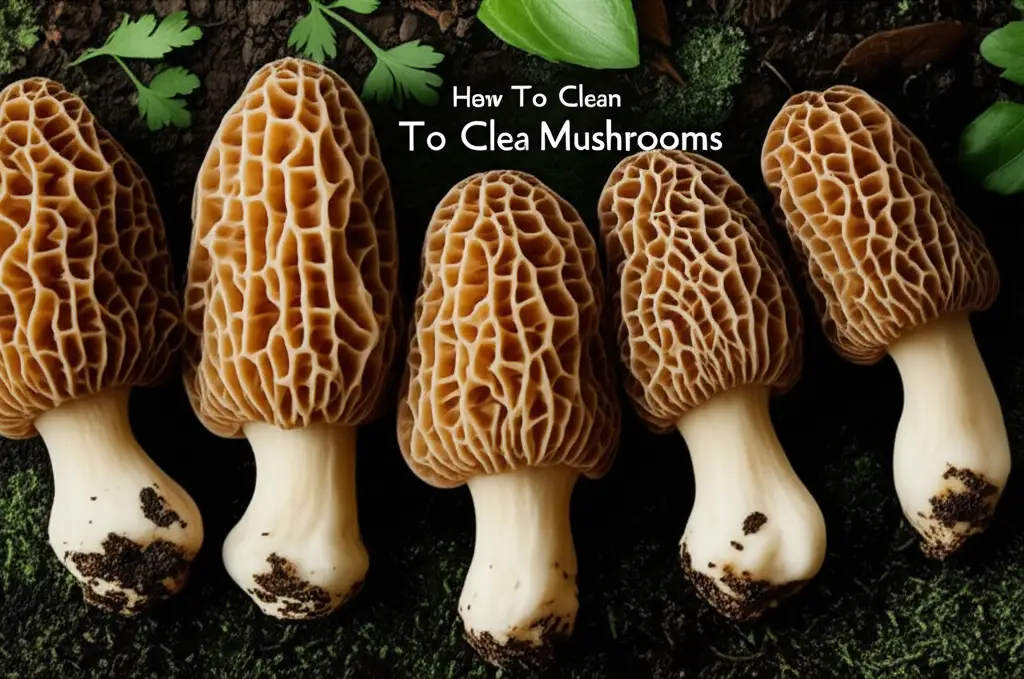
How To Clean Morel Mushrooms
Morel mushrooms are a true treasure for foragers and food lovers. Finding them feels like discovering hidden gold. But bringing these honeycomb-capped fungi home is only the first step. Proper cleaning of morel mushrooms is very important. It removes dirt, insects, and debris without damaging their delicate structure. This ensures your culinary creations taste amazing. I understand the excitement of finding morels, and I want to help you prepare them perfectly. This guide covers everything you need to know about cleaning morel mushrooms. We will explore dry and wet cleaning methods. We will also discuss how to handle common issues like bugs and sand. By the end, you will feel confident preparing your fresh morels for cooking or storage.
Takeaway
- Always clean morels before cooking or storing them.
- Start with a gentle dry brushing to remove loose dirt.
- Consider a quick rinse or soak only if morels are very dirty.
- Inspect each mushroom carefully for bugs and debris.
- Properly dry morels after wet cleaning to prevent spoilage.
To clean morel mushrooms, first, gently brush off loose dirt with a soft brush. For heavily soiled morels, a quick, cold water rinse or a very short soak followed by thorough drying works well. Always inspect the hollow cap and stem for insects.
Understanding Morel Mushrooms: Why Proper Cleaning Is Key
Morel mushrooms are highly prized. People love them for their earthy flavor and unique texture. These wild fungi grow in specific conditions, often after spring rains. Their distinctive, ridged caps resemble a honeycomb. This unique shape makes them famous. However, it also makes them tricky to clean. Dirt, sand, and small insects can easily hide in these crevices. You need to remove these contaminants. Eating dirty morels is not pleasant. It can ruin the flavor and texture of your dish. Proper cleaning keeps your mushrooms safe to eat. It also ensures you enjoy their full, delicious taste.
Cleaning morel mushrooms carefully protects their delicate nature. These mushrooms are spongy and absorb water easily. Too much water can make them soggy. Soggy morels lose their firm texture. They also lose some of their distinct flavor. A good cleaning method balances effectiveness with gentleness. It ensures the morels are clean without becoming waterlogged. This balance is important for any wild mushroom. You can learn more about general mushroom cleaning techniques that apply to various types of fungi. You can read about it here: how to clean mushrooms before cooking.
Many people forage for morels. Foragers know the importance of cleaning their harvest soon after picking. This prevents bugs from settling in further. It also stops any dirt from drying and becoming harder to remove. Freshness makes cleaning easier. It also makes the mushrooms taste better. Think of cleaning as part of the foraging process. It prepares your food for the best possible culinary experience. My goal is to make this process simple and effective for you.
Morels differ from cultivated mushrooms. They often come with more dirt and potential inhabitants. Store-bought mushrooms are usually cleaner. Wild mushrooms need more attention. This extra effort pays off in the kitchen. You get clean, flavorful morels ready for any recipe. So, understanding the morel’s structure helps you clean it right.
Tools You Need for Cleaning Morel Mushrooms
Having the right tools makes cleaning morel mushrooms much easier. You do not need many special items. Simple kitchen tools work best. I always gather my supplies before I start. This saves time and keeps the process smooth. A soft brush is your main tool. A clean pastry brush or a dedicated mushroom brush works perfectly. These brushes help you gently remove loose dirt and debris from the cap and stem. They are soft enough not to damage the mushroom’s delicate surface.
Next, you will need a small, sharp knife. A paring knife is ideal. You use this knife to trim the very bottom of the stem. This part often has a lot of dirt or wood attached. You also use the knife to slice the morels in half, lengthwise. Slicing helps you check for bugs and ensures thorough cleaning of the inside. It also helps with even cooking later. A cutting board provides a stable surface for trimming and slicing.
For handling water, have a large bowl or a clean sink ready. You may need this for a quick rinse if your morels are extremely dirty. A salad spinner is also very useful for drying morels after any wet cleaning. It removes excess water quickly without bruising the mushrooms. Finally, clean paper towels or a clean kitchen towel are important for patting the morels dry. Excess moisture is the enemy of fresh morels. I always make sure I have plenty of paper towels on hand.
Having these tools nearby ensures an efficient cleaning process. It helps you prepare your morels properly. These simple items contribute to a better final product. They help you get clean, dry morels ready for your favorite recipes. Prepare your space, gather your tools, and you are ready for the next step.
Dry Cleaning Morel Mushrooms: A Gentle Approach
Dry cleaning is the preferred method for morel mushrooms. This approach keeps the mushrooms from absorbing too much water. Water can make morels soggy and dilute their flavor. I always start with this method. It works well for morels that are not heavily soiled. Many foragers recommend this method first. It is gentle and preserves the mushroom’s integrity.
First, lay your morels on a clean surface. A large baking sheet or a clean towel works well. Pick up each morel individually. Use a soft brush, like a pastry brush or a dedicated mushroom brush. Gently brush off any visible dirt, soil, or debris. Pay special attention to the deep crevices in the cap. Dirt likes to hide there. Also, brush off the stem. Do not use too much pressure. The goal is to remove loose particles without damaging the mushroom.
After brushing, take your small, sharp knife. Trim off the very end of the stem. This part often has caked-on dirt or bits of plant matter. Cut just enough to get rid of the dirty section. Next, slice each morel in half lengthwise. This step is crucial. It exposes the hollow interior of the mushroom. It allows you to check for any hidden dirt or, more commonly, small insects. If you find any dirt, you can gently brush it away. If you find bugs, you may need a different approach.
When performing dry cleaning, work quickly. Do not leave the mushrooms exposed for too long. If they look clean after brushing and slicing, they are ready for cooking or storage. This method is the least invasive. It helps maintain the best texture and flavor. Remember, morels absorb water like sponges, so less water is always better if you can help it. This dry cleaning method is often enough for freshly picked morels.
Wet Cleaning Morel Mushrooms: When Water Is Best
Sometimes, dry cleaning is not enough. Morel mushrooms can be very dirty. They may have a lot of sand or mud. This happens if it rained recently or if they grew in sandy soil. In these cases, a quick wet cleaning is necessary. The key is to be fast and efficient. You want to minimize the time morels spend in water. This prevents them from becoming waterlogged. My experience tells me this method is a last resort, but sometimes it is the only way to get them truly clean.
Prepare a large bowl of cold water. Do not use warm or hot water; cold water helps keep the mushrooms firm. Place your morels into the cold water. Swish them around gently for just a few seconds. Do not let them soak for more than 30 seconds to a minute. The goal is to loosen and release the dirt quickly. The water will become murky as the soil comes off the mushrooms. This indicates the dirt is leaving the morels.
Carefully lift the morels out of the water. Do not pour the water out with the morels still in it; the dirt will just fall back onto them. Instead, gently remove each moreel. Place them on a clean paper towel or a clean kitchen towel. You might need to rinse them under a very light stream of cold running water for a few seconds if they still look dirty. Again, keep this rinse brief. Remember that too much water can make them lose their flavor and texture. This is a common concern for all types of mushrooms, including delicate ones like oyster mushrooms. Learn more about their cleaning needs here: how to clean oyster mushrooms.
Immediately after rinsing, dry the morels thoroughly. Use a salad spinner if you have one. This is very effective at removing surface water. Place the morels in the spinner and spin them until most of the water is gone. Then, lay them out on a fresh layer of paper towels. Pat them dry gently. Air dry them for a bit longer if needed. Ensure they are completely dry before cooking or storing. Wet morels spoil very quickly. This quick wet method helps rescue very dirty morels without ruining them.
Addressing Common Morel Cleaning Challenges (Bugs & Grits)
Morel mushrooms, being wild, often come with unwanted guests and textures. Bugs and gritty dirt are common challenges. Dealing with them properly ensures a pleasant eating experience. I always inspect each morel carefully. It saves disappointment later. You might find small insects like slugs, earwigs, or tiny worms inside the hollow caps or stems. This is normal for wild mushrooms. Do not worry.
When you slice your morels in half, you can easily spot any insects. If you see a few small bugs, you can simply pick them out with the tip of your knife or your fingers. If the morel has many bugs, or if they are deeply embedded, a salt water soak is a common solution. Prepare a bowl of cold water with a tablespoon of salt. Place the morels in this salt water for about 5 to 10 minutes. The salt helps draw out the bugs. They will float to the surface or leave the mushrooms. After the soak, rinse the morels thoroughly under a light stream of cold water. Make sure no salt remains. Then, dry them completely as described earlier. This method is effective but use it only when needed, as it involves soaking.
Gritty dirt and sand are another common issue. These fine particles can cling to the morel’s porous surface. Dry brushing removes most of it. But if the morels are very sandy, a quick rinse under running water might be necessary. Hold each morel under a very gentle, cold stream. Use your fingers or a soft brush to help dislodge the sand. Work quickly. Do not let water pool inside the mushroom. Shake off excess water immediately. Drying them afterward is extremely important. Sandy morels are often a sign of their growing conditions. Other wild mushrooms, like Maitake, also require careful cleaning. See how they are cleaned here: how to clean maitake mushrooms.
Even with the best cleaning, some foragers suggest cooking morels well. Heat helps kill any remaining tiny organisms. It also transforms the mushroom, making it safe and delicious. Do not let bugs or dirt discourage you. With these methods, you can enjoy your morels with confidence.
Drying and Storing Cleaned Morel Mushrooms
After cleaning your morel mushrooms, proper drying and storage are very important. Morels are delicate. They spoil quickly if left wet or improperly stored. My advice is always to dry them thoroughly immediately after any wet cleaning. This step prevents them from becoming slimy or moldy. It ensures they stay fresh for as long as possible. A salad spinner is excellent for removing excess water after rinsing. Place the morels inside and spin them until water stops coming out. This helps remove most surface moisture quickly.
Once spun, or if you only dry-brushed them, lay the morels out on a clean, dry paper towel or a clean kitchen towel. Arrange them in a single layer. You can also place them on a wire rack with paper towels underneath. This allows air to circulate around them. Let them air dry for at least 30 minutes to an hour. You want them to feel completely dry to the touch. Any remaining moisture can lead to spoilage. Do not leave them out at room temperature for too long. They are perishable.
For short-term storage, place the thoroughly dried morels in a paper bag. A brown paper bag works best because it absorbs moisture. Do not use plastic bags or airtight containers. These trap moisture and cause the mushrooms to rot quickly. Place the paper bag in the main compartment of your refrigerator. Not in the crisper drawer, which can be too humid. Morels stored this way usually last for 3 to 7 days. Check them daily for any signs of spoilage. Discard any that become slimy or moldy.
For long-term storage, freezing or dehydrating are good options. To freeze morels, first blanch them quickly in boiling water for 1-2 minutes, then immediately plunge into ice water. This stops enzyme action. Drain and dry thoroughly, then freeze in a single layer on a baking sheet before transferring to freezer bags. You can also sauté them first, then freeze. Dehydrating is another excellent method. It preserves their flavor and allows you to enjoy them for months. After cleaning, thinly slice morels and place them in a food dehydrator until crisp. Store dried morels in an airtight container in a cool, dark place. Proper storage means you can enjoy your morel harvest for a long time.
Cooking Your Cleaned Morel Mushrooms
Once you have meticulously cleaned and dried your morel mushrooms, they are ready for culinary magic. Cooking transforms their earthy flavor and unique texture. I believe the simpler the preparation, the better. This lets the morel’s distinct taste shine. Many people start with a basic sauté. This method is quick and brings out their best qualities. Foragers often celebrate their finds this way.
To sauté morels, melt some butter in a skillet over medium heat. You can also use olive oil, but butter really complements their flavor. Add the cleaned and sliced morels to the pan. Cook them for about 5 to 10 minutes. Stir them occasionally. They will release their moisture and then start to brown. The goal is to cook them until they are tender and slightly crisp. Season simply with salt and freshly ground black pepper. Some people add a touch of garlic or fresh herbs like parsley or thyme. This simple dish can be a side, or you can serve it on toast.
Morels are also excellent in sauces. They add depth and richness. A creamy morel sauce pairs well with steak, chicken, or pasta. You can also use them in omelets or quiches. Their unique shape makes them visually appealing. They hold up well in many dishes without becoming mushy. Remember, morels should always be cooked before eating. Raw morels contain a mild toxin that heat destroys. So, always ensure they are fully cooked.
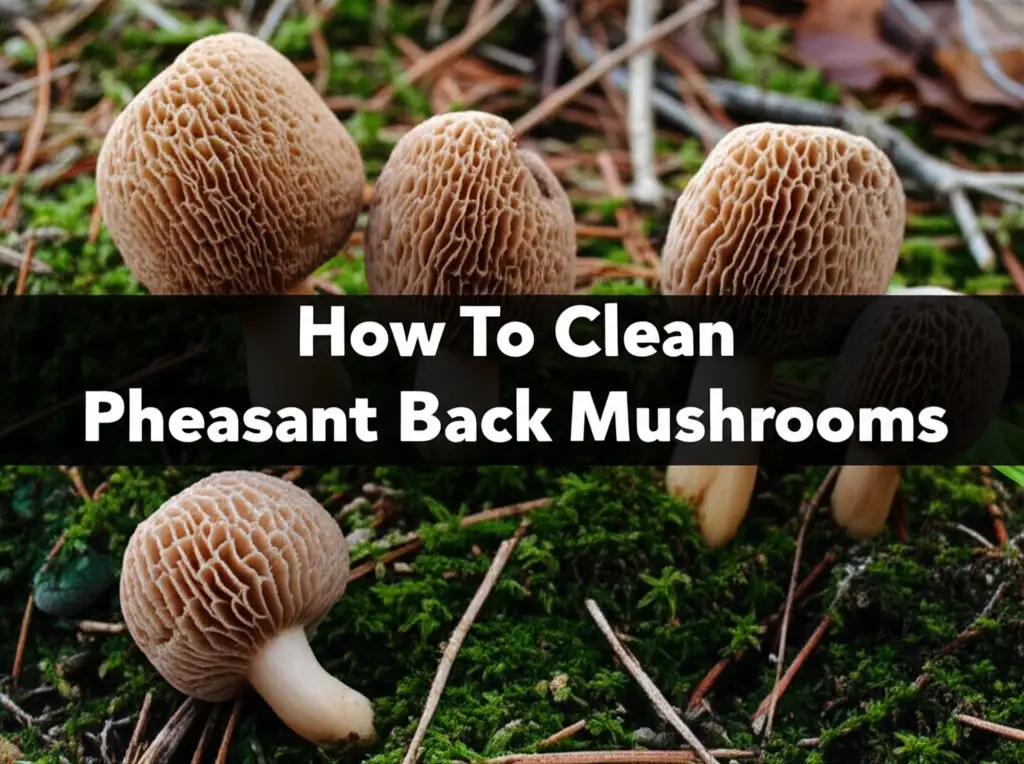
If you are cooking other types of mushrooms, the principles of cleaning and preparation are similar. For example, pheasant back mushrooms have a different texture but also benefit from careful cleaning before cooking. You can explore how to clean them for best results: how to clean pheasant back mushrooms. Preparing your morels correctly unlocks their full flavor potential. This step turns a simple mushroom into a gourmet experience. Enjoy the fruits of your foraging and cleaning efforts!
FAQ Section
Q1: Can you eat morel mushrooms raw?
No, you should not eat morel mushrooms raw. Raw morels contain small amounts of hydrazine toxins. Cooking them thoroughly destroys these toxins. Always cook morels until they are tender. This ensures they are safe and delicious to eat.
Q2: How do you check morels for bugs?
To check morels for bugs, slice each mushroom in half lengthwise. This exposes the hollow interior. Look inside the cap and stem for small insects, worms, or slugs. If found, remove them manually or use a saltwater soak if many are present.
Q3: How long can morels last in the fridge?
Cleaned and thoroughly dried morels can last in the refrigerator for about 3 to 7 days. Store them in a paper bag. Do not use plastic bags or airtight containers. Check them daily for any signs of spoilage.
Q4: Is it better to dry clean or wet clean morels?
Dry cleaning is generally preferred for morels. It avoids waterlogging and preserves their texture and flavor. Use a soft brush to remove dirt. Wet cleaning with a quick rinse is only for very dirty or sandy morels. Always dry them completely afterward.
Q5: Can I freeze morel mushrooms?
Yes, you can freeze morel mushrooms for long-term storage. First, clean them thoroughly. Then, blanch them quickly in boiling water or sauté them. After cooking, cool them completely and pack them into freezer-safe bags or containers.
Conclusion
Cleaning morel mushrooms is an important step. It makes sure these wild treasures are ready for your kitchen. We have covered the best ways to prepare them. Starting with a gentle dry brush helps remove most dirt. This protects their delicate texture. For very dirty morels, a quick, careful rinse is acceptable. Remember to dry them completely afterwards. Proper drying and storage ensure your morels stay fresh. This helps you enjoy them for as long as possible. Learning how to clean morel mushrooms properly means you get the best flavor and texture. It also ensures safety. You can now prepare your morels with confidence. Go ahead and enjoy your delicious morel mushrooms in any recipe you choose.
- morel mushroom cleaning
- wild mushroom preparation
- fresh morels