· Tile Cleaning · 20 min read
How To Clean Mortar Off Tile
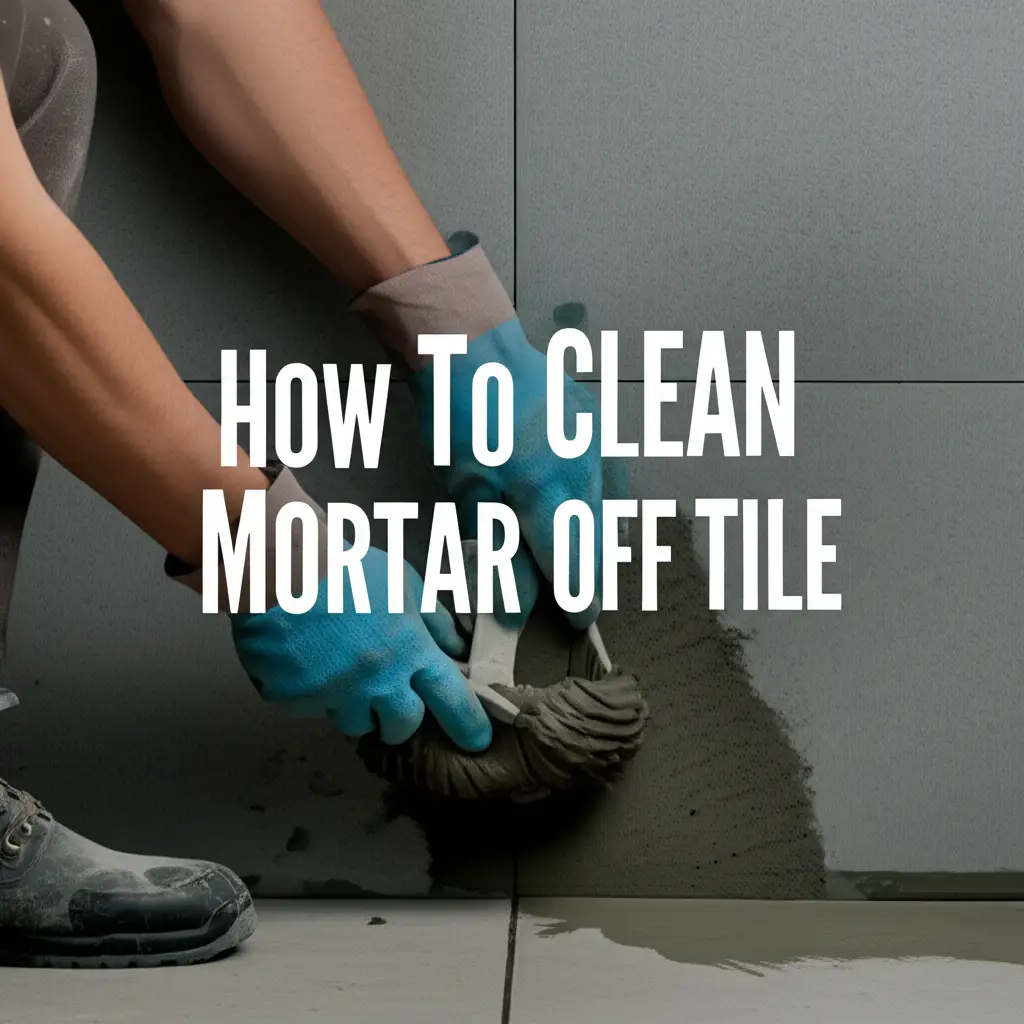
Effortlessly Clean Mortar Off Tile Surfaces
After installing new tiles, you might notice stubborn mortar residue. This happens easily, even for careful DIYers. Mortar can leave streaks, spots, or thick clumps on your beautiful new surfaces. Knowing how to clean mortar off tile is a key skill for any tiling project. It ensures your hard work results in a truly polished look.
I know the frustration of seeing dried mortar after a long day of tiling. It can feel like a setback, but rest assured, this problem has solutions. This article provides a complete guide for removing mortar effectively. We will cover different cleaning methods, essential tools, and important safety steps. You will learn to tackle both wet and dried mortar. Get ready to restore your tiles to their pristine condition.
Takeaway
- Act quickly to remove wet mortar for the easiest cleanup.
- Use mechanical scraping and brushing for dried mortar before resorting to chemicals.
- Always test cleaning solutions on a small, hidden area first.
- Prioritize safety by wearing gloves, eye protection, and ensuring ventilation.
To clean mortar off tile, promptly scrape wet mortar with a trowel or sponge. For dried mortar, carefully use a plastic scraper or utility knife. Apply a mild acidic cleaner like vinegar for haze, or a commercial mortar remover for tougher stains, always testing first and following safety guidelines.
Understanding Mortar: Its Types and Why It Sticks to Tile
Mortar is a strong bonding agent. It holds tiles firmly in place. Knowing a little about mortar helps you clean it better. Different types of mortar exist, each with specific properties.
Standard thin-set mortar is the most common. It is a mix of cement, sand, and water, often with polymers. Polymer-modified thin-set offers more flexibility and strength. It works well for various tile types and locations. Epoxy mortar is another type. It consists of resins and a hardener. This mortar is very strong and resistant to chemicals. It is used in demanding environments.
Mortar sticks to tile because of its adhesive properties. When mixed with water, cement in the mortar undergoes a chemical reaction. This process is called hydration. It creates a strong bond. As the mortar dries, it hardens around the tile. This secures it firmly. If mortar spills or smears onto the tile surface, it starts to cure there too. This forms a hard, cement-like residue. The longer it sits, the harder it becomes to remove. That is why quick action makes a big difference. Ignoring mortar spills allows them to cure into tough, permanent stains.
You might think that all mortars are the same. However, their composition affects how you clean them. For instance, epoxy mortar is much harder to remove than standard thin-set. It often requires specific epoxy removers. Standard thin-set usually responds well to common cleaning methods. Understanding the type of mortar you used helps you choose the right cleaning approach. This knowledge saves you time and effort in the long run.
Essential Tools and Safety Gear for Mortar Removal
Before you start cleaning mortar, gather your tools. Proper equipment makes the job easier and safer. Using the right tools also protects your tiles from damage. I always make sure to have everything ready before I begin. This prevents delays and frustration during the process.
Here is a list of essential tools you will need:
- Bucket and Sponges: For wiping up wet mortar and rinsing surfaces. Choose large, durable sponges.
- Plastic Putty Knife or Scraper: Ideal for gently scraping off wet or slightly dried mortar. Plastic prevents scratching the tile.
- Utility Knife or Razor Scraper: For carefully removing dried, stubborn mortar spots. Use these with extreme caution to avoid tile damage.
- Wire Brush (Nylon or Brass): Great for scrubbing mortar haze from rough tile surfaces or grout lines. Avoid steel brushes on delicate tiles.
- Stiff Bristle Brush: Useful for general scrubbing with cleaning solutions.
- Small Chisel or Hammer and Chisel: For breaking off thick, dried clumps of mortar. Use these very carefully.
- Shop Vacuum: To clean up dry debris after scraping.
- Spray Bottle: For applying cleaning solutions evenly.
Safety is paramount when working with chemicals or sharp tools. You need to protect yourself from dust, splashes, and cuts. Never skip these safety measures.
Here is the essential safety gear:
- Safety Glasses or Goggles: Protect your eyes from flying debris and chemical splashes. This is non-negotiable.
- Work Gloves: Protect your hands from harsh chemicals and sharp edges. Choose chemical-resistant gloves if using strong cleaners.
- Dust Mask or Respirator: Prevents inhaling mortar dust, which can irritate lungs. Especially important when dry scraping.
- Knee Pads: If working on floors, knee pads save your knees from discomfort.
- Adequate Ventilation: Work in a well-ventilated area, especially when using chemical cleaners. Open windows and doors. Use fans if necessary.
Having these items on hand ensures you are prepared. It makes the cleaning process more efficient and much safer. Taking these precautions protects both you and your home.
Cleaning Wet Mortar: The Easiest Approach to Spills
Cleaning wet mortar is by far the easiest method. Time is your biggest ally here. The moment you notice a mortar spill or smear on your tile, act immediately. Fresh mortar has not yet started to harden. This makes its removal simple. Waiting even a short while can make the job significantly harder.
I always recommend keeping a bucket of clean water and a sponge handy during tiling. This allows for instant cleanup. My personal rule is to wipe any fresh drips as soon as I see them. This small habit saves hours of work later.
Follow these steps for cleaning wet mortar:
- Scrape Excess: Use a plastic putty knife or the edge of your trowel. Gently scrape away any large blobs of wet mortar. Collect it back into your mortar bucket or discard it. Be careful not to smear it further onto clean tile.
- Wipe with Damp Sponge: Immediately after scraping, take a clean, damp sponge. Wipe the affected tile surface. Use a wiping motion to lift the mortar. Do not just smear it around. You want to pick it up.
- Rinse and Repeat: Rinse your sponge frequently in a bucket of clean water. It is important to use a clean sponge for each wipe. If the sponge is dirty, you are just spreading mortar residue. Continue wiping and rinsing until all visible mortar is gone. The tile surface should feel smooth and clean.
- Final Wipe: For the very last pass, use a fresh sponge with clean water. This helps remove any remaining film or haze. Look at the tile from different angles to ensure no streaks remain.
This immediate action prevents mortar from drying onto your tiles. It avoids the need for harsh chemicals or extensive scraping later. Cleaning wet mortar saves you time, effort, and potential damage to your tiles. It is the golden rule of tiling cleanup.
Tackling Dried Mortar: Mechanical Removal Methods
Dried mortar presents a greater challenge than wet mortar. It adheres strongly to the tile surface. You cannot simply wipe it away. For dried mortar, mechanical removal is often the first step. This involves physically scraping or chipping the mortar off the tile. The key is to be careful not to damage the tile itself.
When facing dried mortar, you need patience and the right tools. I usually start with the least aggressive method. I then move to more robust tools if needed. This minimizes the risk of scratching or chipping the tile.
Light Scraping and Brushing for Minor Residue
For thin layers of dried mortar or light haze, gentle mechanical methods work best.
- Plastic Scrapers: A plastic putty knife or a dedicated plastic tile scraper is your friend here. Apply firm, steady pressure. Push the scraper along the tile surface at a low angle. The goal is to lift the mortar without scratching the tile. This works well for mortar that is not fully cured or for light smears.
- Stiff Bristle Brushes: A stiff nylon or brass-bristle brush can help remove dried haze. Scrub the affected area with warm water. The bristles work the mortar loose. Always use brass or nylon brushes on tile. Steel brushes can scratch many tile types.
- Utility Knife (Carefully): For very thin, stubborn lines of mortar, a utility knife or razor scraper can be effective. Hold the blade at a very shallow angle, almost flat against the tile. Carefully shave off the mortar. This method requires extreme precision and a steady hand. One wrong move can scratch the tile. I recommend this only for small, isolated spots.
Heavy-Duty Scraping for Thick Clumps
When dealing with thicker, more stubborn dried mortar clumps, you might need more aggressive tools.
- Hammer and Chisel: For large, cured blobs of mortar, a hammer and chisel can be effective. Use a small, sharp chisel. Position it at a very low angle to the tile surface. Gently tap the chisel with a hammer. The aim is to chip away the mortar in small pieces. Be incredibly careful not to hit the tile directly. This method is best for very thick, raised spots.
- Oscillating Tool with Scraper Blade: An oscillating multi-tool fitted with a rigid scraper blade can be a powerful ally. This tool vibrates rapidly. It can effectively chip away dried mortar. Again, hold the blade at a shallow angle. Guide it carefully along the tile. Practice on a spare tile if you have one. This helps you get a feel for the tool.
- Wire Wheel Brush (Drill Attachment): For very tough, uneven surfaces like rough-textured tiles, a wire wheel brush attachment for a drill might be an option. Use a brass wire brush, not steel. Brass is softer and less likely to damage the tile. Test it in an inconspicuous area first. This method creates a lot of dust, so wear your mask and eye protection.
Remember that mechanical removal generates dust and debris. Use a shop vacuum to clean up as you go. This keeps your workspace tidy and prevents dust from spreading. After mechanical removal, you might still have a mortar haze. This is where chemical solutions come into play. For additional help with tough, dried residue, you might find tips on how to clean thinset off tile helpful, as thinset is a common type of mortar that often leaves stubborn marks.
Chemical Solutions for Stubborn Mortar Haze and Stains
After mechanical removal, a persistent mortar haze or stain might remain. This is where chemical solutions become necessary. Always test any chemical cleaner on an inconspicuous area first. This prevents potential damage or discoloration to your tile or grout. Different tiles react differently to chemicals. Natural stone, for example, is much more sensitive than porcelain or ceramic.
I always start with the mildest solution and increase strength only if needed. Patience is key when using chemical cleaners.
Vinegar: A Natural, Mild Acid for Haze
Vinegar is a common household item. It contains acetic acid, a mild acid. It works wonders for light mortar haze and general cleaning. It is a safer alternative to stronger chemicals.
- Mix Solution: Create a solution of equal parts white vinegar and warm water. For tougher haze, you can use undiluted white vinegar.
- Apply to Surface: Pour the solution into a spray bottle. Spray it liberally onto the affected tile area. Ensure the haze is thoroughly wet.
- Let it Sit: Allow the vinegar solution to sit on the mortar haze for 5-10 minutes. This gives the acid time to soften the mortar.
- Scrub: Use a stiff bristle brush or a scrubbing pad. Scrub the haze in small circular motions. You should see the haze start to lift.
- Rinse Thoroughly: After scrubbing, rinse the area completely with clean water. Use a clean sponge or mop to wipe away all residue. Any remaining vinegar can leave a film.
Vinegar is generally safe for ceramic and porcelain tiles. Be cautious when using it on natural stone tiles like marble, travertine, or limestone. The acid can etch or dull their surface. For general tile maintenance, learning how to clean pool tile with vinegar offers valuable insights into its effective use.
Commercial Mortar Removers and Acidic Cleaners
If vinegar does not fully remove the mortar haze, you might need a specialized commercial product. These cleaners are formulated to dissolve cement-based products. They contain stronger acids, but are typically safer than pure muriatic acid.
- Read Instructions: Always, always read the manufacturer’s instructions carefully. These products vary in strength and application.
- Ensure Ventilation: Work in a well-ventilated area. Open windows and doors.
- Wear PPE: Wear chemical-resistant gloves, safety glasses, and a respirator.
- Test First: Apply a small amount to an inconspicuous area. Observe for any adverse reactions on the tile or grout.
- Apply and Agitate: Apply the cleaner as directed. Let it dwell for the recommended time. Then, scrub with a stiff brush.
- Rinse Thoroughly: Rinse the area many times with clean water. Neutralize the area if the product requires it.
These cleaners are effective for more stubborn mortar residue. Always follow the specific product guidelines.
Muriatic Acid (Hydrochloric Acid): A Last Resort
Muriatic acid (hydrochloric acid) is a very strong and corrosive chemical. It should only be used as a last resort for extremely stubborn mortar or concrete stains. This acid can etch or permanently damage many surfaces, including certain tiles and grout. It produces dangerous fumes.
- Extreme Caution: This is not a DIY friendly product for beginners. If you are unsure, hire a professional.
- Superior PPE: Wear a full-face shield, heavy-duty chemical-resistant gloves, and a respirator rated for acid fumes. Ensure maximum ventilation.
- Dilution: Always dilute muriatic acid with water. Pour the acid slowly into water, never water into acid. A common starting ratio is 1 part acid to 10 parts water.
- Wet the Surface: Before applying, wet the tile and grout with plain water. This helps dilute the acid further and prevents it from soaking into porous surfaces too quickly.
- Apply and Monitor: Apply the diluted solution to a small area using a plastic watering can or a brush with a plastic handle. Watch closely for bubbling or fizzing. This indicates the acid reacting with the mortar.
- Agitate and Rinse: After a very short dwell time (seconds to a minute), scrub vigorously. Immediately rinse the area with large amounts of clean water. You may need to neutralize the area with a baking soda and water solution afterwards.
- Do Not Mix: Never mix muriatic acid with other cleaners, especially bleach. This can create highly toxic gases.
Muriatic acid is powerful, but dangerous. For guidance on handling strong chemicals safely, insights from how to clean pool tile with muriatic acid can be very useful, as pool tiles often require similar aggressive cleaning. Its use is generally not recommended for home DIY projects unless you have extensive experience and proper safety equipment. For common cleaning tasks, understanding how to clean tile after grouting can provide safer and more applicable solutions for residue.
Step-by-Step Guide: The Mortar Removal Process
Now that we have covered tools and methods, let’s put it all together into a clear, actionable process. This step-by-step guide walks you through cleaning mortar off tile from start to finish. I follow these steps for consistent results, ensuring no detail is overlooked.
Step 1: Prepare Your Workspace and Yourself
Preparation is crucial for safety and efficiency.
- Clear the Area: Remove any furniture or items from the tiled area.
- Protect Surroundings: Cover adjacent surfaces like baseboards, cabinets, or delicate flooring with plastic sheeting and painter’s tape. Mortar dust and chemical splashes can cause damage.
- Gather Tools: Have all your chosen tools, cleaners, buckets, and sponges within easy reach.
- Don Your PPE: Put on your safety glasses, gloves, dust mask/respirator, and knee pads. Ensure good ventilation by opening windows or using fans.
Step 2: Initial Assessment and Wet Mortar Cleanup
Examine the extent of the mortar residue. Address any wet or semi-wet mortar first.
- Identify Wet Spots: Look for fresh drips, smears, or small blobs.
- Scrape Gently: Use a plastic putty knife or trowel edge. Gently scrape away as much wet mortar as possible.
- Wipe with Sponge: Immediately follow with a clean, damp sponge. Wipe the tile surface. Rinse the sponge frequently in a bucket of clean water. Repeat until the tile is clean. This prevents mortar from drying on the tile.
Step 3: Tackle Dried Mortar with Mechanical Methods
For any dried mortar, start with physical removal.
- Light Scraping: For thin layers or haze, use a plastic scraper or a utility knife at a very shallow angle. Carefully shave off the mortar.
- Brushing: Use a stiff nylon or brass-bristle brush. Scrub areas with stubborn haze using warm water.
- Chisel for Clumps: For thick, hard clumps, carefully use a small chisel and hammer. Angle the chisel nearly flat against the tile. Gently tap to chip away the mortar. Remember to be very cautious to avoid damaging the tile.
- Vacuum Debris: As you scrape, use a shop vacuum to clean up the dry mortar dust and chips.
Step 4: Apply Chemical Solutions for Remaining Haze
Once mechanical methods have removed the bulk, use chemicals for persistent haze.
- Test a Small Area: Before full application, always test your chosen cleaner (vinegar or commercial product) on an inconspicuous part of the tile. Wait for any reaction.
- Prepare Solution: Mix your chosen cleaner according to its instructions. For vinegar, use a 1:1 ratio with warm water.
- Apply and Dwell: Apply the solution to the mortar haze using a spray bottle or sponge. Let it sit for the recommended dwell time (5-10 minutes for vinegar, follow product instructions for commercial cleaners).
- Scrub: Vigorously scrub the treated area with a stiff brush or scrubbing pad. Apply pressure to work the solution into the mortar.
- Rinse Thoroughly: Rinse the area completely with large amounts of clean water. Use a clean sponge or mop to wipe away all residue. You may need multiple rinses. Ensure no cleaner remains.
- Repeat if Necessary: For very stubborn haze, you might need to repeat the chemical application and scrubbing process.
Step 5: Final Inspection and Post-Cleaning Care
After cleaning, perform a thorough inspection.
- Inspect Closely: Allow the tile to dry completely. Then, inspect the surface from different angles under good light. Look for any remaining haze or streaks. If needed, repeat steps 3 and 4 on any missed spots.
- Clean Grout Lines: Pay attention to the grout lines. Mortar can often get into them. A small stiff brush can help clean grout. For broader tile and grout cleaning tips, explore how to clean tile grout on floors.
- General Clean-up: Mop the entire tiled area with a neutral pH tile cleaner to remove any cleaning solution residue.
- Consider Sealing: For porous tiles or grout, consider applying a penetrating sealer after cleaning. This helps protect them from future stains. For natural stone surfaces, refer to guidelines like how to clean natural stone tile and grout to ensure proper post-cleaning care.
Following these steps provides a systematic way to clean mortar off tile. It ensures a professional-looking finish.
Preventing Mortar Stains and Post-Cleaning Care
Preventing mortar stains is always easier than cleaning them. A little bit of foresight during your tiling project can save you a lot of effort later. Once your tiles are clean, proper post-cleaning care keeps them looking their best. I have learned that prevention and regular maintenance are key to long-lasting beauty.
Here are some tips for preventing mortar stains:
- Work Clean: The most effective prevention is to work cleanly. Keep a bucket of clean water and a damp sponge near your work area at all times.
- Wipe as You Go: As soon as you set a tile, look for any excess mortar squeezing out from the edges. Immediately wipe it away with your damp sponge. Do not let it dry.
- Tape Off Adjacent Surfaces: If tiling next to finished walls, cabinets, or other delicate surfaces, use painter’s tape and plastic sheeting to protect them from drips and splatters.
- Control Mortar Consistency: Mix your mortar to the correct consistency. Too wet, and it will be messy. Too dry, and it will not spread properly. A good consistency reduces drips.
- Apply Mortar Evenly: Use the correct notch trowel for your tile size. Spread the mortar evenly. This helps prevent excessive squeeze-out.
- Clean Trowel Frequently: Wipe your trowel clean often. A dirty trowel can spread mortar onto clean tile surfaces.
- Limit Work Area: Work in manageable sections. This allows you to clean up mortar before it dries.
Once you have successfully removed all mortar and your tiles are sparkling clean, consider these post-cleaning care steps:
- Allow Full Curing: After cleaning, allow the mortar and grout to fully cure. This can take several days or weeks depending on the product. Avoid heavy traffic during this time.
- Grout Sealing: If your grout is unsealed (common with sanded grout), consider applying a grout sealer. This penetrates the grout, making it less porous. It helps repel water and stains, including future spills. For maintaining grout, specific guides on how to clean tile grout on floors can provide helpful routines.
- Tile Sealing (for Porous Tiles): Natural stone tiles (like marble, travertine, slate) and some unglazed ceramic tiles are porous. They benefit from a penetrating sealer. This protects them from staining and moisture absorption. Always check the manufacturer’s recommendations for your specific tile. If you have natural stone tiles, you should definitely read about how to clean natural stone tile and grout for comprehensive care.
- Regular Cleaning: Establish a routine cleaning schedule for your tiled surfaces. Use a pH-neutral tile cleaner. Avoid harsh chemicals or abrasive scrubbers for routine cleaning, as they can damage sealers or the tile surface over time.
- Address Spills Immediately: Just like with mortar, clean up any spills on your tiled floor immediately. This prevents stains from setting.
By taking these proactive measures during installation and maintaining your tiles properly afterward, you can enjoy beautiful, clean surfaces for many years.
Frequently Asked Questions About Cleaning Mortar Off Tile
Can vinegar remove dried mortar?
Yes, vinegar can remove dried mortar haze and thin layers of dried mortar. Its mild acetic acid works to soften and dissolve the cement-based residue. It is most effective on lighter haze and fresh mortar. For thick, cured mortar, vinegar may not be strong enough. Always test it in a small area first.
Is muriatic acid safe for all tiles?
No, muriatic acid is not safe for all tiles. It is a highly corrosive acid. It can etch, dull, or permanently damage natural stone tiles like marble, travertine, and limestone. It can also harm some glazed ceramic or porcelain tiles if not used correctly. Use extreme caution and only as a last resort on specific, acid-resistant tiles.
How do I prevent mortar from sticking to tile?
Preventing mortar from sticking involves working cleanly and quickly. Keep a damp sponge and a bucket of water handy. Immediately wipe away any mortar drips or smears as soon as they appear. Use painter’s tape to protect adjacent surfaces. Mixing mortar to the correct consistency also helps minimize mess.
What’s the difference between mortar haze and caulk haze?
Mortar haze is a fine, powdery residue left behind by cement-based mortar or grout. It is a mineral deposit. Caulk haze, on the other hand, is a film left by silicone or latex caulk. They require different cleaning methods. Mortar haze often responds to acidic cleaners, while caulk haze usually needs specialized caulk removers or alcohol.
When should I hire a professional for mortar removal?
Consider hiring a professional if you have extensive, thick, or deeply set dried mortar. This is also true if the tile is delicate or expensive (e.g., natural stone). If you are uncomfortable using strong chemical cleaners like muriatic acid, a professional has the expertise, tools, and safety equipment to handle the job without damaging your tiles.
Conclusion
Cleaning mortar off tile might seem like a daunting task at first. However, with the right approach, tools, and a bit of patience, you can restore your tiled surfaces to their original, pristine condition. We have explored a range of methods, from simple wet mortar cleanup to tackling stubborn dried residue with mechanical and chemical solutions. Remember, prompt action is your best defense against tough mortar stains.
I hope this comprehensive guide gives you the confidence to tackle your next cleaning project. Whether you are dealing with a fresh spill or old, dried-on mortar, the principles remain the same: assess, choose the right tools, prioritize safety, and work systematically. Always test your cleaning methods in an inconspicuous spot. This ensures you do not damage your beautiful tiles. You now possess the knowledge to effectively clean mortar off tile and maintain your home’s appearance.
Now that you are equipped with this knowledge, go ahead and make your tiled surfaces shine. For more cleaning tips and guides, explore the other resources on our website. Happy cleaning!
- mortar removal
- tile cleaning
- grout haze
- DIY cleaning
- home improvement

