· Painting & Art · 6 min read
How To Clean Oil Paint Brushes Between Colors
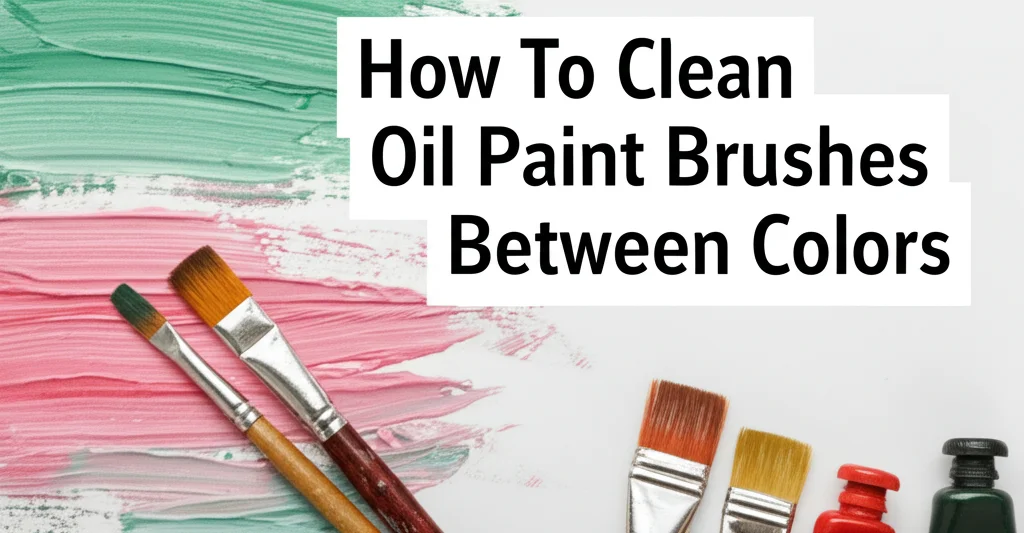
Keeping Your Palette Clean: How To Clean Oil Paint Brushes Between Colors
Ever find your beautiful oil painting turning a bit…muddy? Often, this happens because of improper brush cleaning between colors. It’s a common frustration for artists of all levels. Cleaning your brushes frequently during a painting session isn’t just about neatness; it’s about maintaining color purity and achieving the effects you desire. This article will guide you through the best methods for cleaning oil paint brushes between colors, ensuring your artwork stays vibrant and true to your vision. We’ll cover everything from quick wipe-downs to more thorough cleaning techniques, so you can confidently switch between hues without compromise.
Takeaway:
- Wipe excess paint off with a rag.
- Use a solvent like odorless mineral spirits for a quick clean.
- Follow up with soap and water for a thorough cleaning.
- Condition your brushes to maintain their shape and longevity.
Quick Answer:
To clean oil paint brushes between colors, wipe off excess paint with a clean rag, then swish the brush in odorless mineral spirits. Follow this with a gentle cleaning using soap and water, and reshape the bristles before storing.
Why Clean Brushes Between Colors?
Think of your oil paint brushes as precision instruments. Just like a chef wouldn’t use the same knife for sweet and savory dishes without washing it, you shouldn’t switch oil paint colors without cleaning your brush. Leaving residual paint in the bristles leads to color contamination, resulting in dull, mixed shades where you want brilliance. This is especially crucial when working with light colors, as even a tiny amount of darker pigment can significantly alter the outcome.
Beyond color purity, cleaning between colors also preserves the integrity of your brushes. Dried paint stiffens the bristles, making them difficult to work with and shortening their lifespan. Regular cleaning keeps the bristles soft and flexible, allowing for smooth application and precise control. It’s a small step that makes a huge difference in both your artwork and the longevity of your tools.
The Essential Supplies You’ll Need
Before you start, gather your cleaning supplies. Having everything within reach streamlines the process and prevents unnecessary delays. Here’s a checklist of what you’ll need:
- Clean Rags: Lint-free rags are ideal for wiping off excess paint. Old t-shirts work great!
- Odorless Mineral Spirits (OMS): This is your primary solvent for removing oil paint. It’s less harsh than turpentine and has a milder odor. https://www.beacleaner.com/how-to-clean-bacon-grease-from-pan/ - understanding solvent properties is helpful.
- Brush Cleaner Soap: Specifically designed for oil paint brushes, these soaps effectively remove paint residue without damaging the bristles.
- Two Containers: One for OMS and one for soapy water. Glass jars with tight-fitting lids are perfect.
- Brush Spinner (Optional): A brush spinner helps remove excess solvent and water, speeding up the drying process.
- Brush Conditioner (Optional): Helps restore moisture and flexibility to the bristles.
The Quick Clean: For Minor Color Changes
Sometimes, you just need to switch between slightly different shades of the same color. For these minor transitions, a quick clean is all you need. Start by wiping the brush thoroughly on a clean rag to remove as much paint as possible. Then, dip the brush into your container of odorless mineral spirits, swirling it gently to loosen any remaining pigment.
Don’t scrub aggressively, as this can damage the bristles. Next, wipe the brush again on a clean section of your rag. Repeat the swirling and wiping process until the solvent runs clear. This method is fast and efficient, allowing you to quickly return to your painting without significant interruption.
The Thorough Clean: For Significant Color Shifts
When switching between drastically different colors – say, from a deep crimson to a bright yellow – a more thorough cleaning is necessary. Begin with the same initial wipe on a clean rag. Then, immerse the brush in odorless mineral spirits, working the solvent deep into the bristles.
Gently massage the bristles against the bottom of the container to dislodge any stubborn paint. Repeat this process with fresh solvent until the brush is relatively clean. Now, it’s time for the soapy water. Add a small amount of brush cleaner soap to your second container of water and swirl the brush in the solution. Rinse thoroughly under running water until all traces of soap are gone.
Conditioning and Reshaping Your Brushes
Cleaning is only half the battle. Proper conditioning and reshaping are crucial for maintaining the longevity and performance of your brushes. After rinsing, gently squeeze out excess water from the brush. Avoid twisting or bending the bristles harshly, as this can cause them to splay.
Reshape the bristles to their original form using your fingers. For round brushes, gently roll the bristles into a point. For flat brushes, reshape them into a rectangular shape. Lay the brushes flat to dry, or hang them bristles-down to prevent water from seeping into the ferrule (the metal part that holds the bristles).
Consider applying a brush conditioner to restore moisture and flexibility to the bristles, especially after frequent use. https://www.beacleaner.com/how-to-clean-white-patches-on-bathroom-tiles/ - maintaining tools is key, just like maintaining surfaces.
Choosing the Right Solvent: OMS vs. Turpentine
While both odorless mineral spirits (OMS) and turpentine are effective solvents for oil paint, OMS is generally preferred for brush cleaning. Turpentine is a stronger solvent, but it’s also more toxic and has a more pungent odor. It can also dry out brushes more quickly.
OMS is a refined petroleum distillate that’s less harsh on bristles and has a milder odor, making it a safer and more pleasant option for artists. However, it’s important to note that OMS is still a flammable substance and should be used in a well-ventilated area. Always dispose of used solvent properly, following local regulations.
Frequently Asked Questions (FAQs)
Q: Can I use vegetable oil to clean my oil paint brushes?
A: While vegetable oil can remove paint, it’s not an ideal cleaner. It leaves a residue that can attract dirt and make the brushes sticky. It’s better to use OMS or turpentine followed by soap and water.
Q: How often should I deep clean my brushes?
A: A deep clean (with soap and water) should be done after each painting session, or whenever the brushes become heavily soiled. Quick cleans with OMS can be done frequently during a session.
Q: What’s the best way to store oil paint brushes?
A: Store brushes bristles-up in a container or brush roll to prevent the bristles from bending or becoming damaged.
Q: Can I use dish soap to clean my oil paint brushes?
A: While dish soap can be used in a pinch, it’s not ideal. It can strip the natural oils from the bristles, making them brittle. Brush cleaner soap is specifically formulated for oil paint brushes. https://www.beacleaner.com/how-to-clean-kitchen-floor-without-mop/ - using the right tool for the job is important.
Conclusion: Maintaining Your Tools for Artistic Success
Cleaning oil paint brushes between colors is a fundamental skill for any oil painter. It’s a simple process that yields significant results – cleaner colors, smoother blending, and longer-lasting brushes. By following the techniques outlined in this guide, you can ensure your artwork remains vibrant and true to your artistic vision. Remember to wipe, swirl, soap, and reshape! Investing a little time in brush maintenance will pay dividends in the quality and longevity of your art. Don’t let dirty brushes hold you back – keep them clean and keep creating!