· DIY Cleaning · 17 min read
How To Clean Pennies With Vinegar
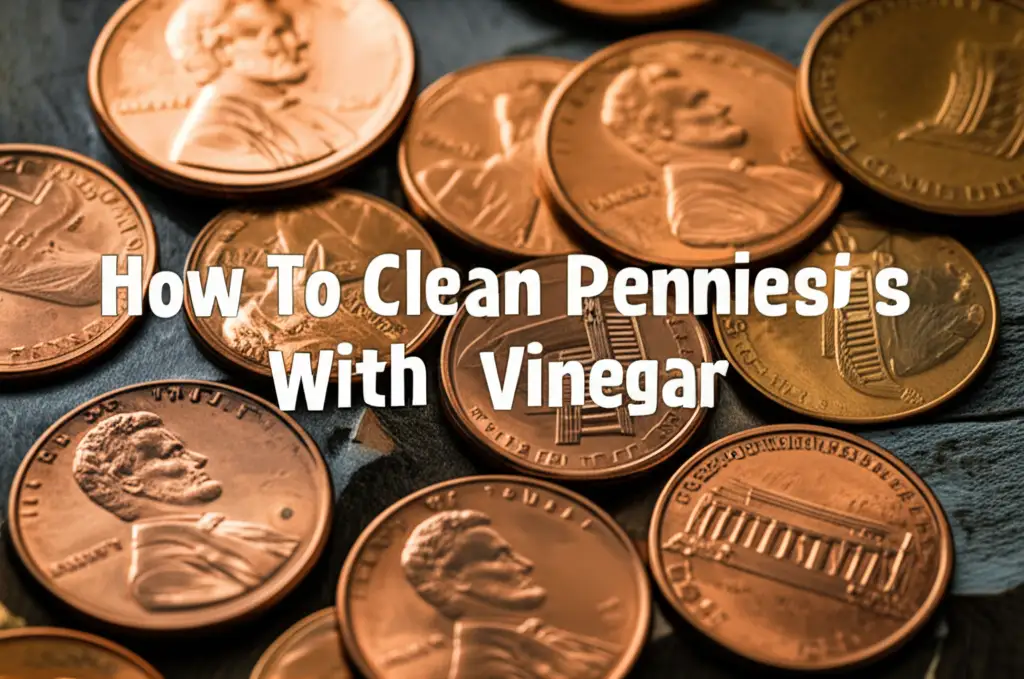
Clean Pennies with Vinegar: A Simple Guide
Have you ever looked at a dull, dirty penny and wished it could sparkle again? Cleaning pennies with vinegar is a simple and effective method. It uses common household items to bring back their shine. This process is not only practical but also offers a fascinating glimpse into basic chemistry. You can transform old coins, making them look new. This article will show you exactly how to do it.
You will learn the science behind vinegar’s cleaning power. We will cover all the supplies you need. We will also provide a detailed, step-by-step guide. You will discover advanced techniques and common mistakes to avoid. Finally, we will discuss practical uses for clean pennies and important aftercare tips. Get ready to turn those grimy coins into gleaming treasures!
Takeaway
- Gather Supplies: Collect white vinegar, salt, a non-metal bowl, dirty pennies, and paper towels.
- Mix Solution: Combine 1/4 cup white vinegar with 1 teaspoon of salt in the bowl.
- Soak Pennies: Place pennies in the solution for a few minutes.
- Observe and Rinse: Watch the dirt dissolve, then rinse pennies thoroughly with water.
- Dry Completely: Dry pennies immediately to prevent re-oxidation.
Cleaning pennies with vinegar involves a simple chemical reaction. The acetic acid in vinegar, combined with salt, dissolves the copper oxide tarnish. This process reveals the shiny copper underneath. Simply soak pennies in a vinegar and salt solution, then rinse and dry them.
The Science Behind Cleaning Pennies with Vinegar
Cleaning pennies involves a straightforward chemical reaction. Pennies turn dull because of oxidation. Copper, the main metal in pennies, reacts with oxygen in the air. This reaction forms a layer of copper oxide. Copper oxide is a black or green substance that makes pennies look dirty.
Vinegar helps remove this tarnish. Vinegar contains acetic acid. Acetic acid is a weak acid. Acids react with metal oxides. When you mix vinegar with salt, the salt helps speed up this reaction. Salt provides chloride ions. These ions break down the copper oxide layer.
The acid in vinegar dissolves the copper oxide. The penny’s copper surface then becomes exposed. This makes the penny look shiny again. This process is safe for modern pennies. It demonstrates basic chemistry right in your kitchen.
The reaction is a good example of acid-base chemistry. The acid attacks the basic copper oxide. This transforms the tarnish into soluble compounds. These compounds wash away easily with water. Understanding this science helps you get the best results. It also shows why vinegar is a powerful, natural cleaner for many items.
Gather Your Supplies: What You Need for Penny Cleaning
Starting any cleaning project requires the right tools. Cleaning pennies with vinegar is no different. Luckily, you likely have most of these items at home already. Gathering everything before you start makes the process smooth. You will avoid interruptions once you begin.
First, you need the stars of our show: dirty pennies. Look for pennies that are visibly dull or tarnished. These will show the most dramatic results. Next, grab some white vinegar. Distilled white vinegar is best for this purpose. It has the right acidity level. You can find it in any grocery store.
You also need salt. Table salt works perfectly fine. The salt acts as an abrasive and helps the chemical reaction. Choose a non-metal bowl or dish. Glass or plastic bowls are ideal. Metal bowls can react with the vinegar and salt. This could affect the cleaning process or damage the bowl.
Finally, prepare some paper towels or a soft cloth. These are for drying the pennies after cleaning. A small, soft brush, like an old toothbrush, is optional. It can help scrub stubborn dirt. Having these items ready ensures you can follow the steps easily.
Essential Materials for Penny Cleaning
- Dirty Pennies: Choose pennies that show noticeable tarnish. Newer pennies (post-1982) are mostly zinc with a copper coating. Older pennies are solid copper. Both react with vinegar.
- White Vinegar: This is the acidic component that dissolves the tarnish. Ensure it is distilled white vinegar for consistent results.
- Table Salt: Salt provides chloride ions. These ions help break down the copper oxide more effectively.
- Non-Metal Bowl: A glass, ceramic, or plastic bowl prevents unwanted reactions. Do not use metal containers.
- Paper Towels or Soft Cloth: These are crucial for drying the pennies completely. Proper drying prevents re-tarnishing.
- Optional Soft Brush: An old toothbrush can help dislodge stubborn dirt. Use it gently to avoid scratching the coin surface.
Step-by-Step Guide: Cleaning Pennies with Vinegar and Salt
Cleaning pennies with vinegar and salt is a simple, effective process. Follow these steps carefully for the best results. I like to do this as a quick project on a rainy afternoon. It is satisfying to see the pennies transform.
First, pour about 1/4 cup of white vinegar into your non-metal bowl. Then, add 1 teaspoon of table salt to the vinegar. Stir the mixture gently until the salt mostly dissolves. The solution is now ready. This simple combination creates the powerful cleaning agent.
Next, carefully place your dirty pennies into the solution. Make sure the pennies are fully submerged. Avoid overcrowding the bowl. Give each penny enough space to interact with the liquid. You will likely see bubbles forming around the pennies immediately. This is a sign the chemical reaction has begun.
Let the pennies soak for a few minutes. For very tarnished pennies, you might need to wait up to 10 minutes. Watch them closely. You will see the tarnish begin to disappear. Once the pennies look clean, remove them from the solution. You can use tongs or just your fingers.
Finally, rinse the pennies thoroughly under running water. This removes any remaining vinegar solution or dissolved tarnish. Drying them immediately is very important. Use a paper towel or soft cloth. Rub them gently until they are completely dry and shiny. This prevents them from re-tarnishing quickly.
Detailed Cleaning Procedure
Prepare the Cleaning Solution:
- Measure 1/4 cup of white vinegar into a glass or plastic bowl.
- Add 1 teaspoon of table salt.
- Stir until the salt dissolves. The solution should appear clear.
Submerge the Pennies:
- Place dirty pennies into the solution.
- Ensure all surfaces of the pennies are in contact with the liquid.
- Do not stack pennies too high. Spread them out if you have many.
Soak and Observe:
- Allow pennies to soak for 2-5 minutes.
- Very dark pennies might need up to 10 minutes.
- You will see the tarnish lighten and disappear. This is the acid reacting with copper oxide.
- If some parts remain dirty, gently rub them with a soft brush while in the solution.
Rinse Thoroughly:
- Remove pennies from the vinegar solution.
- Rinse each penny under cool, running tap water. This washes away dissolved tarnish and acid residue.
- Proper rinsing stops the cleaning action and prevents further reactions.
Dry Immediately:
- Place rinsed pennies on a clean paper towel or soft cloth.
- Pat them dry completely.
- Rubbing them gently can enhance their shine.
- Drying is critical to prevent new tarnish from forming quickly.
This method also works for other household items. Many people use vinegar to clean mold from various surfaces. For example, you can learn how to clean mold with vinegar in your home. The principles of acidity breaking down unwanted substances apply broadly.
Beyond Basic Cleaning: Advanced Techniques and Variations
While the basic vinegar and salt method works wonders, you can explore other techniques. These methods offer different approaches for specific needs. Sometimes, you need a little extra power or a different application. I enjoy experimenting with these variations to see the different results.
One common variation involves using baking soda. You can create a paste with vinegar and baking soda. Mix a small amount of baking soda with vinegar until it forms a thick paste. Apply this paste directly to a tarnished penny. Gently rub the penny with the paste using your fingers or a soft cloth. The baking soda acts as a mild abrasive. The vinegar continues its chemical action. This combination helps remove stubborn grime. After scrubbing, rinse the penny well and dry it thoroughly. This method is similar to how people clean with vinegar and baking soda for tougher cleaning jobs around the house.
Another technique involves using different types of vinegar. While white vinegar is standard, apple cider vinegar can also work. Its acetic acid content is similar. However, it might leave a slight residue due to its natural components. Always test on one penny first if using an alternative vinegar.
For a visually engaging experiment, try the “penny bridge” method. Place a paper towel half-submerged in the vinegar solution. Lay pennies on the dry part of the paper towel. This allows the liquid to wick up to the pennies. It demonstrates capillary action and cleaning. This method helps prevent over-soaking. Remember, these variations offer flexibility. Always prioritize safety and coin preservation.
Alternative Cleaning Methods
Vinegar and Baking Soda Paste:
- Combine equal parts white vinegar and baking soda to make a thick paste.
- Apply the paste directly to the penny.
- Gently rub the penny with a soft cloth or toothbrush.
- Rinse thoroughly and dry completely. This method combines chemical action with gentle abrasion. It is effective for very dirty coins. You might use a similar approach when you clean your dishwasher with vinegar and baking soda.
Lemon Juice and Salt:
- Lemon juice contains citric acid, another effective acid.
- Mix lemon juice with salt in the same proportions as vinegar and salt.
- Soak pennies, then rinse and dry. This offers an alternative if you do not have vinegar.
Different Vinegars:
- While white vinegar is standard, apple cider vinegar also works. It may leave a slightly different finish.
- Avoid balsamic or red wine vinegars. They can stain the pennies.
The “Penny Bridge” Method (for observation):
- Soak half a paper towel in the vinegar and salt solution.
- Lay pennies on the dry part of the paper towel, touching the wet part.
- The liquid will slowly wick up, cleaning the pennies gradually. This is a good way to show how the solution travels.
These advanced methods give you more options. They help you tackle different levels of tarnish. Remember to always rinse and dry your pennies well.
Common Mistakes to Avoid When Cleaning Pennies
While cleaning pennies with vinegar is simple, certain mistakes can harm your coins. Avoiding these errors ensures the best results. It also protects your pennies from damage. I have seen many people make these mistakes, leading to disappointing outcomes.
First, do not over-soak your pennies. While a few minutes are fine, leaving pennies in the solution for hours or days is a bad idea. Prolonged exposure to acid can etch the copper surface. It can also strip zinc from newer pennies. This makes them appear dull and can even cause pitting. Aim for short soaking times. Remove the pennies as soon as they look clean.
Second, avoid using abrasive materials. Steel wool, scouring pads, or harsh brushes can scratch the penny’s surface. These scratches are permanent. They reduce the coin’s appeal. Stick to soft cloths or an old, soft-bristled toothbrush if scrubbing is needed. Gentle handling is key.
Third, always rinse and dry your pennies thoroughly. Leaving any vinegar solution on the coin can lead to rapid re-tarnishing. The acid continues to react with the air. This causes a dull, sometimes greenish, film to form. This film is often harder to remove than the original tarnish. Drying also prevents water spots.
Finally, be cautious with collectible coins. Cleaning valuable or antique pennies, like Indian Head Pennies, can significantly decrease their value. Coin collectors prefer original patina. The cleaning process removes this natural aging. If you have an Indian Head penny, learning how to clean Indian Head pennies might involve different, more specialized methods, or ideally, no cleaning at all. Always research a coin’s value before attempting any cleaning.
Pitfalls to Steer Clear Of
Over-Soaking:
- Leaving pennies in vinegar too long (e.g., overnight) can damage them.
- The acid can erode the copper surface or expose the zinc core on newer pennies.
- This leads to dullness, uneven color, or pitting.
- Limit soaking to minutes, not hours.
Using Abrasive Materials:
- Never use rough sponges, steel wool, or hard brushes.
- These scratch the coin’s surface. Scratches are irreversible damage.
- Use only soft cloths or very soft brushes for gentle rubbing.
Incomplete Rinsing and Drying:
- Failing to rinse off all the vinegar solution allows continued reaction with air.
- This causes rapid re-tarnishing, often with a greenish hue.
- Water spots can also form if pennies air dry.
- Always rinse thoroughly and dry immediately with a clean, soft cloth.
Cleaning Valuable or Collectible Coins:
- Cleaning antique or rare pennies can destroy their collector value.
- Collectors prefer coins with their original, undisturbed patina.
- Research coin value before cleaning. When in doubt, do not clean.
These guidelines help preserve your pennies and achieve the desired shine. Pay attention to these details for successful cleaning outcomes.
Why Clean Pennies? Practical Uses and Fun Experiments
Cleaning pennies might seem like a simple task, but it offers many practical uses. It also provides fantastic opportunities for fun science experiments. This activity is more than just making coins shiny. It opens doors to learning and creativity. I often do this with children, as it demonstrates chemistry in action.
One main reason to clean pennies is for educational purposes. It serves as a classic science experiment for kids. They can observe the chemical reaction firsthand. Seeing a dull coin become bright teaches them about oxidation and acids. This hands-on learning is memorable and engaging. It’s a great way to introduce basic scientific principles at home.
Beyond education, clean pennies have several practical applications. They can be used in crafts or decorative projects. Imagine creating a shiny mosaic or decorating a picture frame with bright copper coins. They add a unique, metallic touch to any project. Clean pennies are also great for sorting games or teaching children about money.
Furthermore, clean pennies can be useful for simple household tasks. Some people use them to add a bit of copper to plant soil. This may help deter slugs and snails. Others use them as small weights or markers. While not their primary function, a clean penny is always more pleasant to handle.
This simple cleaning activity offers both educational value and practical benefits. It encourages curiosity and creativity. It is a testament to how everyday items can be part of interesting projects.
Educational and Practical Benefits
Science Experiment for Kids:
- Demonstrates oxidation, acid-base reactions, and chemical changes.
- Children observe the transformation from dull to shiny.
- This fosters curiosity about chemistry and scientific inquiry. It provides a simple, safe way to explore these concepts.
Crafts and Decoration:
- Shiny pennies are visually appealing.
- Use them for mosaics, jewelry, or decorative accents on picture frames and boxes.
- They add a metallic, vintage touch to DIY projects.
Teaching Money Concepts:
- Clean pennies are more engaging for children learning to count money.
- They are easier to distinguish and handle for small hands.
Household Aids:
- Can be used as small weights.
- Some people believe they help deter garden pests like slugs.
- They are simply more pleasant to use or collect when clean.
Cleaning items with vinegar is a broad concept. For example, people also use vinegar to clean seashells. Understanding how to clean shells with vinegar follows similar principles of dissolving natural deposits. Both processes involve using a mild acid to reveal natural beauty.
Preserving Your Clean Pennies: Aftercare Tips
You have put in the effort to clean your pennies. Now, you want to keep them shiny. Proper aftercare is crucial for preserving their newly acquired luster. Neglecting these steps can lead to rapid re-tarnishing. I always make sure to follow these tips so my cleaned pennies stay bright.
The most important step is immediate and thorough drying. As soon as you rinse the pennies, dry them with a soft cloth or paper towel. Any residual water will cause new oxidation. Water spots can also form. Pat or rub each penny gently until it is completely dry. This simple action significantly extends their shine.
Consider storing your clean pennies properly. Exposure to air, especially humid air, speeds up tarnishing. Storing them in airtight containers helps. Small plastic bags or coin holders are good options. You can also use silica gel packets in the container. These packets absorb moisture. This reduces the risk of oxidation.
Avoid touching clean pennies directly with bare hands often. The oils and acids from your skin can transfer to the coin surface. These residues can cause new tarnish to form. If you handle them frequently, consider wearing cotton gloves. This is a common practice among coin collectors.
Finally, understand that some re-tarnishing is natural. Copper reacts with its environment over time. You cannot prevent it entirely. However, following these steps slows down the process considerably. Re-cleaning is always an option if they become dull again.
Key Aftercare Steps
Immediate and Thorough Drying:
- This is the most critical step.
- As soon as pennies are rinsed, dry them with a clean, soft cloth or paper towel.
- Ensure no moisture remains. Water accelerates re-tarnishing and causes spots.
Proper Storage:
- Store clean pennies in airtight containers.
- Small zip-top bags or coin flips protect them from air exposure.
- Adding silica gel packets can absorb ambient moisture, further preventing oxidation.
- Keep them in a cool, dry place.
Minimize Handling:
- Avoid touching clean pennies directly with bare hands.
- Finger oils and moisture can leave residues. These residues promote new tarnish.
- Use cotton gloves if you need to handle them frequently.
Understand Natural Tarnishing:
- Copper will naturally react with air over time.
- You cannot stop tarnishing completely, but proper care slows it down.
- Re-cleaning is an option when pennies become dull again.
These aftercare practices ensure your hard work pays off. Your pennies will remain shiny for a longer time. This maximizes the visual appeal and satisfaction from your cleaning efforts.
Frequently Asked Questions About Cleaning Pennies with Vinegar
How long should I soak pennies in vinegar?
Soak pennies in a vinegar and salt solution for 2 to 5 minutes. Very dirty pennies might need up to 10 minutes. Watch them closely. Remove them as soon as they appear clean. Over-soaking can damage the coin’s surface. This is especially true for newer pennies.
What kind of vinegar is best for cleaning pennies?
Distilled white vinegar is best for cleaning pennies. It has a consistent acetic acid concentration. This provides reliable cleaning power. Other vinegars, like apple cider vinegar, can also work. However, white vinegar offers the purest results without potential staining. Avoid darker vinegars like balsamic.
Does cleaning pennies with vinegar damage them?
Cleaning modern pennies with vinegar is generally safe for their appearance. However, over-soaking can cause pitting or uneven color. For valuable or collectible pennies, cleaning can significantly reduce their monetary value. Collectors prefer the original patina. Always research a coin’s worth before cleaning.
Can I clean other coins with vinegar?
Vinegar is effective for copper and some brass items. It is not recommended for other types of coins. For silver, nickel, or gold coins, vinegar might not work or could cause damage. These metals react differently. Always use specific cleaning methods for different coin materials.
Why do pennies turn green after cleaning?
Pennies turn green after cleaning if they are not rinsed and dried thoroughly. The leftover acid on the coin reacts with oxygen in the air. This forms copper acetate, which is a greenish substance. This is similar to how the Statue of Liberty’s copper turned green over time. Proper rinsing and drying prevent this.
Is it safe for children to clean pennies with vinegar?
Yes, cleaning pennies with vinegar is a safe and fun science experiment for children. Adult supervision is always recommended. Ensure children do not ingest the solution. Teach them to wash their hands thoroughly after handling the pennies and the solution. This activity helps them learn basic chemistry.
Conclusion
Cleaning pennies with vinegar is a straightforward and rewarding task. It transforms dull, tarnished coins into shiny treasures. You do not need fancy equipment. Just simple household items like white vinegar and salt. This process also offers a fantastic hands-on science lesson. It shows how common substances cause chemical reactions.
We covered the science behind this cleaning magic. We also detailed the supplies you need. The step-by-step guide showed you exactly how to get those pennies gleaming. You learned about advanced techniques and common pitfalls. Remember to avoid over-soaking and harsh scrubbing. Also, be careful with valuable coins. Finally, proper aftercare ensures your cleaned pennies stay bright for longer.
This simple activity empowers you. You can easily bring new life to old coins. You gain a clearer understanding of everyday chemistry. So grab some dirty pennies and try it yourself. Experience the satisfaction of seeing them shine! Your efforts will result in sparkling copper.
- penny cleaning
- vinegar uses
- copper cleaning
- household hacks
- science experiment

