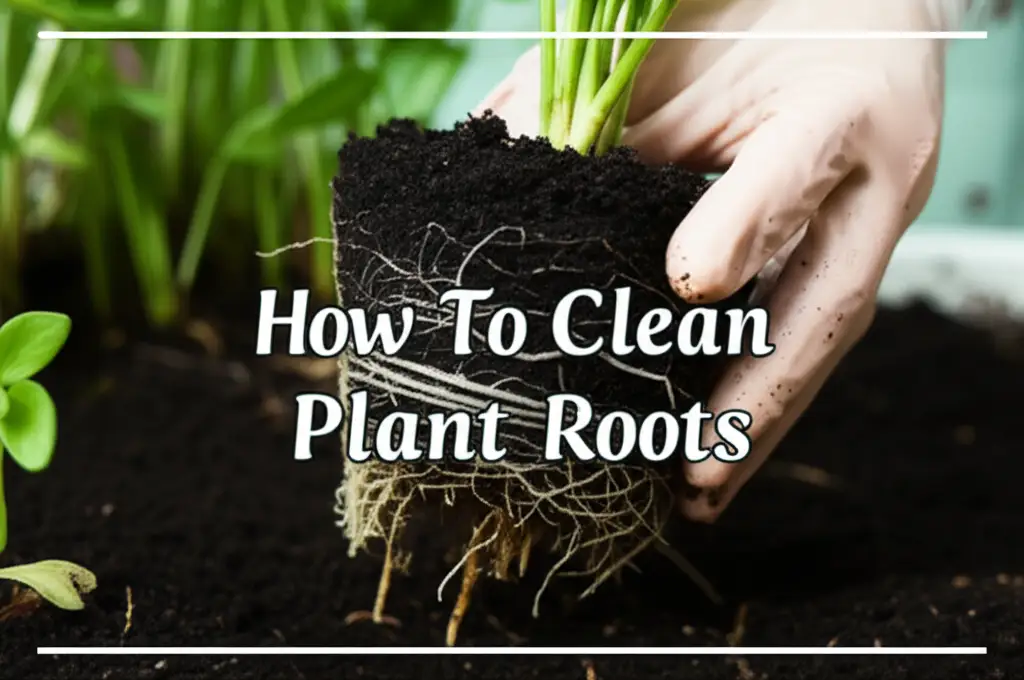
· Plant Care · 17 min read
How To Clean Rubber Plant Leaves

Cleaning Rubber Plant Leaves for Vibrant Health
Have you noticed your beautiful rubber plant looking a bit dull? I certainly have. Dust buildup is a common issue for indoor plants. It prevents light from reaching the leaves. This impacts the plant’s health and its ability to grow.
Cleaning rubber plant leaves is an essential part of plant care. It helps your plant breathe better and absorb more sunlight. This article shares simple, effective methods to clean rubber plant leaves. I will guide you through the best tools and techniques. We will discuss common issues and how to make your plant shine. Regular cleaning keeps your rubber plant healthy and vibrant. It also makes your home look much better.
Takeaway
To ensure your rubber plant thrives, clean its leaves regularly.
- Dust and debris block sunlight.
- Wipe leaves gently with a damp cloth.
- Use mild solutions for sticky residue.
- Regular cleaning supports plant health and appearance.
To clean rubber plant leaves, gently wipe them with a soft, damp cloth or sponge. You can also rinse small plants under lukewarm water. This removes dust and debris. It helps the plant breathe and absorb light.
Why Cleaning Rubber Plant Leaves Matters
Cleaning rubber plant leaves is more than just a cosmetic task. It plays a vital role in your plant’s overall health and growth. When dust accumulates on the broad leaves of a rubber plant, it creates a barrier. This barrier blocks sunlight from reaching the plant’s cells. Sunlight is crucial for photosynthesis. This process allows the plant to convert light into energy. Without sufficient light, your rubber plant cannot produce enough food. This slows down its growth. It can also make the plant look sickly.
Dust also clogs the pores on the leaves. These pores, called stomata, are essential for gas exchange. Plants release oxygen and take in carbon dioxide through these stomata. Blocked stomata reduce the plant’s ability to “breathe.” This stresses the plant. Over time, it can lead to health issues. Regular cleaning ensures these pores remain open. This allows proper air circulation. It helps your plant perform its vital functions efficiently.
Furthermore, a clean rubber plant is a beautiful plant. Shiny, dust-free leaves reflect light better. This makes your plant appear more vibrant and healthy. It enhances the aesthetic appeal of your indoor space. I have found that a clean plant brings a sense of calm to any room. Cleaning also gives you a chance to inspect your plant closely. You can spot potential pest problems or nutrient deficiencies early. Early detection leads to quicker solutions. This keeps your plant in top condition.
Essential Tools and Materials for Leaf Cleaning
Before you begin cleaning your rubber plant leaves, gather the right tools. Having everything ready makes the process smooth and efficient. You will need a few simple items. These items are often found around the house. Using the correct tools prevents damage to your plant’s delicate leaves. I always make sure I have these things on hand before starting.
First, you need a soft cloth. Microfiber cloths work best. They are gentle and highly absorbent. They pick up dust without scratching the leaf surface. Avoid using paper towels. They can be too abrasive. They can also leave small fibers behind. A soft sponge is another good option. Ensure it is clean and has not been used with harsh chemicals.
Next, you need clean water. Lukewarm water is ideal. Cold water can shock the plant. Very hot water can damage the leaves. Distilled water is even better if your tap water is hard. Hard water can leave mineral spots on the leaves as it dries. This defeats the purpose of cleaning.
For tougher grime or sticky residue, a mild soap solution is helpful. Use a tiny amount of dish soap. Mix it with water. Choose a soap free from degreasers or strong perfumes. These can harm your plant. Alternatively, some plant enthusiasts use a very diluted neem oil solution. Neem oil is a natural pesticide. It also gives a nice shine. However, use it sparingly. Too much can clog pores.
Finally, consider a spray bottle. This is useful for misting large plants. It can help rinse away dust. A small soft brush, like a clean paintbrush, can help too. It reaches into crevices or gently brushes off loose dust. For very large plants, a step stool might be necessary. This helps you reach all leaves safely. Having these tools ready ensures a gentle and effective cleaning process.
Step-by-Step Methods for Cleaning Rubber Plant Leaves
Cleaning your rubber plant’s leaves can be done using a few different methods. The best approach depends on the size of your plant and the amount of dust. I often switch between methods based on my plant’s needs. Each method aims to gently remove dust and grime. This helps the leaves absorb light better.
Method 1: Gentle Wiping for Regular Dust
This is my go-to method for routine cleaning. It is quick and effective for light dust.
- Prepare your cloth: Dampen a clean microfiber cloth with lukewarm water. Wring it out well. The cloth should be damp, not dripping wet.
- Support the leaf: Hold one hand under the leaf you are cleaning. This provides support. It prevents the leaf from bending or breaking. Rubber plant leaves are sturdy. Still, support is important.
- Wipe the surface: Gently wipe the top surface of the leaf. Use a smooth, continuous motion. Start from the base of the leaf near the stem. Move towards the tip.
- Clean both sides: Turn the leaf over. Gently wipe the underside as well. Dust collects there too. Be careful with younger, more delicate leaves.
- Rinse and repeat: Rinse your cloth often. Dirty water can spread dust. Repeat for all leaves. This method ensures each leaf gets individual attention. For very large leaves, you might need to wipe them multiple times.
Method 2: Showering for Heavy Dust
For a very dusty plant, or a plant that needs a quick refresh, a shower works wonders. This is especially good for smaller to medium-sized plants.
- Move the plant: Carefully move your rubber plant to a shower or bathtub. Make sure the drainage hole in the pot is not blocked. You can also cover the soil with plastic wrap. This prevents it from getting waterlogged.
- Use lukewarm water: Turn on the shower. Use a gentle stream of lukewarm water. Avoid strong jets. Strong water pressure can damage leaves.
- Rinse thoroughly: Direct the water flow over the leaves. Let the water run over both the top and bottom surfaces. Allow it to rinse off all the dust. You will see the dust washing away.
- Allow to drain: Let the plant sit in the shower for a while. This allows excess water to drain from the pot. Do not move it back until it stops dripping. This prevents water from sitting in the pot saucer. Standing water can lead to root rot.
- Dry if needed: For very large leaves, you can gently pat them dry with a clean, soft cloth. This prevents water spots. For more information on effective plant cleaning, you might find useful tips on cleaning other plant leaves like how to clean fiddle leaf fig leaves.
Method 3: Targeted Cleaning for Sticky Residue
Sometimes, rubber plant leaves develop a sticky residue. This can be sap or honeydew from pests.
- Identify the cause: First, inspect your plant for pests like aphids or scale. If pests are present, address them separately.
- Prepare a mild solution: Mix a few drops of mild dish soap into a bowl of lukewarm water. A solution of vinegar and baking soda is not suitable for plants. Always use a very diluted soap solution.
- Dampen a cloth: Dip a corner of your microfiber cloth into the soapy water. Wring it out very well.
- Gently wipe: Carefully wipe the sticky areas of the leaves. You might need to gently rub a bit more than with plain water. Be patient.
- Rinse thoroughly: After removing the stickiness, wipe the leaf again with a clean, plain damp cloth. This removes any soap residue. Soap can attract more dust if left on the leaves.
By following these methods, your rubber plant leaves will look pristine. This helps them stay healthy.
Dealing with Common Rubber Plant Leaf Issues
Rubber plants are generally resilient. However, their leaves can sometimes show signs of distress. These issues are often related to care or environment. Knowing how to address them keeps your plant thriving. I have encountered these problems myself. Learning to identify them early makes a big difference.
Dust Accumulation
This is the most common issue. Dust settles on the broad leaves. This layer blocks light and hinders photosynthesis. Regular cleaning is the best defense.
- Solution: Use the gentle wiping or showering methods described earlier. Make this a part of your routine plant care. For persistent dust, consider using a soft brush first to dislodge loose particles. Then follow up with a damp cloth.
Sticky Residue (Honeydew or Sap)
Sticky leaves often indicate a pest problem. Pests like aphids, mealybugs, or scale insects excrete a sugary substance called honeydew. Sometimes, it can also be natural sap.
- Solution: First, inspect the plant closely. Look under leaves and in crevices for tiny insects. If pests are present, treat them. You can use a cotton swab dipped in rubbing alcohol for individual pests. For more widespread infestations, use an insecticidal soap or diluted neem oil solution. After treating pests, gently wipe the sticky residue with a cloth dampened in mild soapy water. Always rinse the leaf with clean water afterward.
Water Spots
Water spots appear as white or cloudy marks on leaves. They result from minerals in tap water. These minerals are left behind after the water evaporates.
- Solution: To prevent water spots, use distilled water for cleaning. If you use tap water, dry the leaves immediately after wiping or showering. Gently pat them dry with a soft, clean cloth. This removes the water before minerals can dry on the surface.
Dullness and Lack of Shine
Even after cleaning, leaves might lack their natural luster. This often points to ongoing dust, hard water issues, or simply the plant’s natural state.
- Solution: Ensure you are cleaning regularly. If using tap water, switch to distilled water. For a natural shine, consider a very diluted neem oil application. Some people use a tiny bit of milk on a cloth. However, I am cautious with milk. It can attract pests or block pores if not applied correctly. I prefer simple water cleaning followed by careful drying. Focus on healthy plant growth overall. A healthy plant naturally looks vibrant.
Addressing these common issues directly improves the appearance and health of your rubber plant. Always observe your plant closely. Its leaves often tell you what it needs.
Boosting Natural Shine and Healthy Growth
We all love a shiny, vibrant rubber plant. Beyond simple cleaning, certain practices can enhance their natural luster. These methods also promote healthier growth. It is important to remember that true shine comes from a healthy plant. Artificial leaf shine products can actually harm your plant. They can clog pores and attract dust. I always prioritize natural methods.
Neem Oil for Luster and Protection
Neem oil is a fantastic, natural option. It offers both a gentle shine and pest deterrent properties.
- How to use: Mix a few drops of pure neem oil with water and a tiny bit of mild soap (as an emulsifier). Follow package directions for dilution. Place this mixture in a spray bottle. Lightly mist the top and bottom of the leaves. Then, gently wipe the leaves with a clean, soft cloth. This removes excess oil and distributes it evenly. Do this every few weeks, or as needed. Neem oil also helps keep common pests away. It makes your plant less appealing to them.
Careful Misting
Misting can hydrate leaves and keep dust from settling firmly. It is not a replacement for wiping, but a good supplement.
- How to use: Use a fine mist spray bottle. Fill it with distilled water. Lightly mist the leaves once or twice a week. Do this in the morning. This allows the leaves to dry before nightfall. Avoid misting in direct sunlight. Water droplets can magnify sun rays. This can burn the leaves. Misting also increases humidity around the plant. Rubber plants appreciate higher humidity.
Proper Watering and Fertilization
A well-hydrated and nourished plant will naturally have healthier, shinier leaves.
- Watering: Water your rubber plant when the top 2-3 inches of soil feel dry. Water thoroughly until it drains from the bottom. Do not let the plant sit in standing water. Overwatering leads to root rot. Underwatering causes leaves to droop and lose vigor.
- Fertilization: During the growing season (spring and summer), feed your rubber plant monthly. Use a balanced liquid fertilizer. Dilute it to half strength. Avoid fertilizing in fall and winter. This is when the plant’s growth slows down. Good nutrition results in strong, glossy leaves.
Optimal Lighting Conditions
Adequate light is fundamental for healthy leaves. Rubber plants thrive in bright, indirect light.
- Placement: Place your plant near a window that receives bright, indirect sunlight. East-facing windows are often ideal. Too much direct sun can scorch the leaves. Too little light causes leggy growth and dull leaves. Rotate your plant every few weeks. This ensures all sides receive light. It promotes even growth.
By combining consistent cleaning with these care practices, your rubber plant will not only look stunning but also thrive for years to come. Remember, a shiny leaf is often a sign of a happy plant.
Frequency and Best Practices for Rubber Plant Leaf Cleaning
Knowing when and how often to clean your rubber plant’s leaves is crucial. Consistency is key to maintaining their health and appearance. I have found that a regular schedule makes the task less daunting. It also ensures my plants always look their best.
How Often to Clean
The frequency of cleaning depends on your environment.
- High-dust environments: If you live in a dusty area, or have pets, or your home is undergoing renovation, weekly or bi-weekly cleaning may be necessary. You will see dust accumulating faster.
- Average environments: For most homes, cleaning rubber plant leaves once a month is sufficient. This keeps dust buildup minimal. It allows for regular inspection of your plant.
- Low-dust environments: If your home is very clean and dust-free, you might get away with cleaning every 2-3 months. However, a quick wipe down can still be beneficial.
- Visual cue: The best indicator is to simply look at your plant. If the leaves look dull or you see a visible layer of dust, it is time for a cleaning. Do not wait until the leaves are heavily coated.
Best Practices for Optimal Results
Adhering to these practices ensures effective and safe cleaning.
- Be gentle: Rubber plant leaves are sturdy but still require a gentle touch. Avoid scrubbing or harsh rubbing. This can damage the leaf surface.
- Use lukewarm water: Always use water that is room temperature or slightly warm. Cold water can shock the plant.
- Avoid harsh chemicals: Never use household cleaning products like furniture polish, glass cleaner, or strong detergents. These contain chemicals that can harm or kill your plant. They can also clog leaf pores.
- Clean both sides: Dust and pests can be on the underside of leaves. Always wipe both surfaces for a thorough clean.
- Inspect during cleaning: Use cleaning time as an opportunity to inspect your plant. Look for pests, discoloration, or any signs of stress. Early detection helps address issues quickly.
- Dry leaves if using tap water: If your tap water is hard, gently pat leaves dry after cleaning. This prevents mineral spots. For other cleaning needs, similar attention to detail is key, like when you clean sticky rubber handles. While different, the principle of gentle, thorough cleaning applies.
- Clean the pot too: While cleaning leaves, give the pot a quick wipe down. This adds to the plant’s overall clean appearance.
By following a consistent schedule and these best practices, your rubber plant will stay healthy and vibrant. Regular cleaning is a simple act of care. It yields significant benefits for your beloved plant.
Conclusion
Cleaning your rubber plant leaves is a vital part of houseplant care. It is more than just making your plant look good. Regular cleaning ensures your plant can breathe and absorb light effectively. This leads to healthier growth and a more vibrant appearance. I have seen firsthand how much a clean plant thrives.
We explored why cleaning matters, the right tools to use, and step-by-step methods for different levels of dust and grime. From gentle wiping to thorough showering, each technique helps your rubber plant flourish. We also covered how to tackle common issues like sticky residue and water spots. Remember that natural shine comes from overall plant health. Focus on proper watering, light, and occasional natural boosters like neem oil. Make cleaning a consistent part of your plant care routine. You will notice a remarkable difference. Your rubber plant will reward you with lush, glossy leaves. Start cleaning your rubber plant leaves today. Give your green companion the care it deserves. Watch it thrive and beautify your home.
FAQ Section
Q1: Can I use olive oil to make my rubber plant leaves shiny? A1: I do not recommend using olive oil or any food oils on your rubber plant leaves. While they may offer a temporary shine, they can attract dust and pests. More importantly, oils can clog the plant’s pores. This hinders the plant’s ability to breathe. It also interferes with photosynthesis. Stick to water or diluted neem oil for a natural and safe shine.
Q2: My rubber plant leaves are sticky. What causes this, and how do I fix it? A2: Sticky leaves are usually a sign of sap or pest activity. Pests like aphids or scale insects excrete a sugary substance called honeydew. Inspect your plant for tiny insects. If pests are present, treat them first. Then, gently wipe the sticky residue with a cloth dampened in mild soapy water. Always rinse the leaves thoroughly with clean water afterward to remove soap residue.
Q3: How often should I clean my rubber plant leaves? A3: The frequency depends on how dusty your environment is. For most homes, cleaning once a month is sufficient. In dustier areas or with pets, you might need to clean every two weeks. The best approach is to check your plant regularly. If you see visible dust or the leaves look dull, it is time for a wipe-down.
Q4: Can I use commercial leaf shine products on my rubber plant? A4: I advise against using commercial leaf shine products. Many contain chemicals that can harm your plant. They can also clog the stomata (pores) on the leaves. This prevents the plant from breathing properly. These products often leave a waxy buildup. This can attract more dust and hinder light absorption. Natural methods are always safer and better for your plant’s long-term health.
Q5: What is the best way to remove hard water spots from rubber plant leaves? A5: Hard water spots are mineral deposits left after water evaporates. To remove them, gently wipe the leaves with a cloth dampened with distilled water or filtered water. For stubborn spots, a very diluted solution of white vinegar (1 part vinegar to 10 parts water) can work. Apply cautiously and wipe immediately with clean water to rinse. To prevent new spots, always use distilled or filtered water for cleaning and misting. Gently pat the leaves dry after cleaning.
Q6: Should I clean the underside of the leaves too? A6: Yes, absolutely. It is crucial to clean both the top and underside of rubber plant leaves. Dust accumulates on both surfaces. Pests often hide and feed on the undersides of leaves. Cleaning both sides ensures thorough dust removal. It also allows you to inspect for any signs of pest infestation early.
- Rubber Plant
- Leaf Cleaning
- Houseplant Care
- Plant Maintenance
- Healthy Plants