· Food Preparation · 10 min read
How To Clean Shrimp Fast
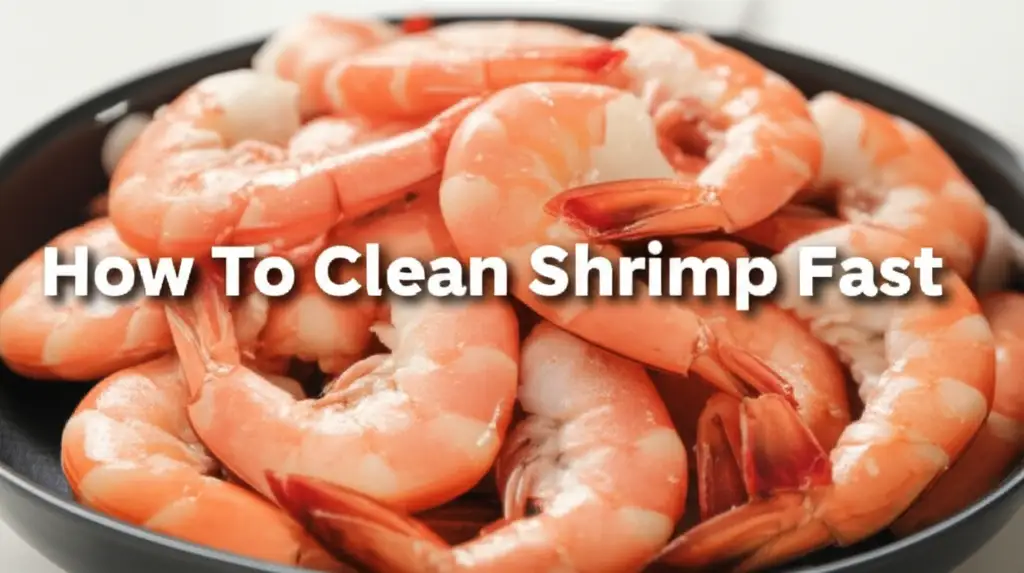
How to Clean Shrimp Fast: Quick Methods for Busy Cooks
Cooking shrimp is wonderful. Cleaning shrimp, however, often feels like a slow task. Many people avoid fresh shrimp because they dread the preparation. I understand this feeling completely. But what if you could clean shrimp quickly?
Imagine having perfectly cleaned shrimp ready for your pan in minutes. This article shows you how. We will cover the best tools and techniques. You will learn efficient peeling and deveining methods. We will also discuss final steps for perfect, clean shrimp. Get ready to make shrimp prep easy.
Takeaway
- Prepare Your Workspace: Have a large bowl for shrimp, a bowl for shells, and paper towels ready.
- Chill Shrimp: Keep shrimp very cold to make peeling easier and faster.
- Master the Peel: Pinch the tail and peel from the legs up for quick shell removal.
- Choose Your Deveining Method: Use a shrimp tool, a small knife, or a toothpick for efficient vein removal.
- Rinse Thoroughly: Always rinse cleaned shrimp under cold water.
- Batch Process: Clean many shrimp at once to save time.
Quick Answer
You can clean shrimp fast by chilling them first, then using a systematic approach. Pinch the tail for easy peeling. Use a small knife or a shrimp deveining tool to quickly remove the dark vein. Rinse the shrimp well under cold water for a clean finish.
Why Clean Shrimp? More Than Just a Preference
Cleaning shrimp is more than just making them look nice. It is about taste and safety. The vein you remove is the shrimp’s digestive tract. It contains grit and waste. Leaving it in can make your shrimp taste gritty. Nobody wants that in their meal.
Removing the shell is also important for many recipes. Some dishes require peeled shrimp for better texture. A clean shrimp also cooks more evenly. It absorbs flavors better. This step ensures a better meal experience. We clean shrimp to ensure good taste and proper hygiene.
Gathering Your Tools: Preparing for Fast Shrimp Cleaning
Having the right tools makes cleaning shrimp much faster. You do not need many special items. A sharp paring knife is helpful. Some people prefer a dedicated shrimp deveiner tool. This tool can cut down your cleaning time significantly. I find a small spoon useful for scooping.
You will also need a few bowls. Use one bowl for the raw shrimp. Keep another bowl ready for discarded shells and veins. A colander is essential for rinsing. Make sure you have paper towels nearby for cleanup. A clean workspace ensures efficient work. Keeping your tools clean is also important for general kitchen hygiene, much like keeping your cooking surfaces and implements clean, perhaps by knowing how to clean the bottom of a pan after cooking.
Mastering the Peel: Quick Techniques for Shell Removal
Peeling shrimp is often the first step. It can be time-consuming without the right technique. Start by holding the shrimp firmly. You can start peeling from the head end. Work your way down towards the tail. Some prefer to leave the tail on for presentation.
For faster peeling, grasp the shrimp’s body with one hand. Use your thumb to separate the shell along the underside. The legs offer a good starting point. Then, peel the shell back from the body. It should come off in large pieces. A quick twist or pinch near the tail helps detach the shell completely.
- If keeping the tail on: Pinch the base of the tail firmly. Gently pull the shell away from the body. The last segment of the shell will remain attached to the tail.
- For fully peeled shrimp: Pull the shell off entirely, including the tail section. This gives you a completely naked shrimp.
- Working with frozen shrimp: Thaw shrimp completely before peeling. They are much harder to peel when partly frozen. Cold shrimp, however, are easier to handle than room temperature ones.
The Art of Deveining: Simple Ways to Remove the Vein
Deveining is the process of removing the dark line on the shrimp’s back. This line is the digestive tract. It is mostly harmless but can contain sand or grit. Removing it improves both the taste and texture of your shrimp. There are several effective ways to do this quickly.
One common method involves a small, sharp knife. Make a shallow cut along the shrimp’s back. Cut from the head end almost to the tail. The vein should become visible. You can then lift it out with the tip of your knife. I often use my finger to gently pull it away.
- Using a Shrimp Deveiner Tool: This specialized tool has a curved, pointed tip. Insert the tip under the vein near the head. Push it along the back of the shrimp. The tool lifts the vein out in one go. This method is very fast for many shrimp.
- The Toothpick Method: This works best for smaller shrimp. Insert a toothpick under the vein near the second segment from the head. Gently pull up. The vein should come out. This method is surprisingly effective for quick individual deveining.
- The Water Flow Method: Some people devein under running water. As you cut the back, water can help flush out the vein. This is quick, but it uses more water. Ensure your water supply is clean for this. You want to make sure you use high-quality, clean water for all food preparation, much like you would want to use a clean water filter for your drinking water.
Butterfly or Keep Whole? Enhancing Your Shrimp Prep
Once peeled and deveined, you can decide how to shape your shrimp. Most recipes use whole, cleaned shrimp. However, butterflying shrimp offers some benefits. This step involves cutting the shrimp further. It creates a larger, flatter surface.
To butterfly a shrimp, continue the cut you made for deveining. Cut almost all the way through the shrimp’s back. Do not cut through the belly. Then, open the shrimp flat like a book. This creates a pleasing shape. It also exposes more surface area.
- Benefits of butterflying:
- Faster Cooking: Butterflied shrimp cook much quicker. Their flatter shape allows heat to penetrate rapidly.
- Better Flavor Absorption: More surface area means more marinade or seasoning can stick. This leads to richer flavors.
- Improved Presentation: Butterflied shrimp look impressive on a plate. They are great for appetizers or gourmet dishes.
- Easier Eating: They are often easier to eat, especially in a dish like shrimp scampi.
Deciding to butterfly depends on your recipe and preference. It adds a small amount of time. The benefits, however, often outweigh the extra effort.
Rinsing and Storing Cleaned Shrimp: Final Steps for Freshness
After peeling and deveining, the shrimp still need one crucial step. You must rinse them thoroughly. This washes away any remaining shell bits, grit, or vein residue. Use cold running water for this. Place the cleaned shrimp in a colander. Rinse them under the faucet for a minute or two. Gently toss them to ensure all sides get rinsed.
After rinsing, pat the shrimp dry with paper towels. Excess moisture can prevent browning. It can also dilute flavors. Dry shrimp sear better and absorb seasonings well. This step is important for good cooking results.
- Storing Cleaned Shrimp:
- Short-Term Storage: If you plan to cook shrimp within a day, place them in an airtight container. Store them in the coldest part of your refrigerator. I always put them on a bed of ice if I have it.
- Long-Term Storage: For longer storage, freeze the cleaned shrimp. Lay them in a single layer on a baking sheet. Once frozen, transfer them to a freezer-safe bag. This prevents them from sticking together. They can stay frozen for up to three months.
- Water Quality: Always ensure the water you use for rinsing is clean and free of impurities. This is crucial for food safety. Just as you might consider if your well water has sediment, be aware of the quality of water used in food preparation.
Time-Saving Tricks and Common Pitfalls to Avoid
Cleaning shrimp can be efficient. Several tricks can speed up the process. Always start with very cold shrimp. I put my shrimp in an ice bath for 10-15 minutes before I start. Cold shrimp are firmer. This makes them easier to handle and peel. Room temperature shrimp can be slippery.
Consider cleaning a large batch at once. If you buy a lot of shrimp, clean them all at once. Then, portion and freeze them. This saves time in the long run. You will have ready-to-cook shrimp whenever you need them.
Time-Saving Tricks:
- Use a Bowl of Ice Water: Have a bowl of ice water next to your cleaning station. Drop cleaned shrimp directly into it. This keeps them cold and fresh.
- Work in a Assembly Line: If you have many shrimp, perform one task on all of them first. Peel all, then devein all. This creates a rhythm and speeds things up.
- Invest in a Good Deveiner: A quality shrimp deveiner tool can be a game-changer. It makes the deveining process incredibly quick.
Common Pitfalls to Avoid:
- Not Chilling Shrimp Enough: Warm shrimp are harder to peel and handle. They can also spoil faster.
- Cutting Too Deep: When deveining with a knife, do not cut too deep into the shrimp’s flesh. A shallow cut is enough to expose the vein.
- Not Rinsing: Skipping the final rinse leaves behind impurities. This affects taste and hygiene.
- Over-Handling: Minimize handling the shrimp. The more you touch them, the warmer they get. This can impact their texture.
By using these tips, you can clean shrimp quickly and efficiently. You will have perfect shrimp ready for any recipe.
Frequently Asked Questions About Cleaning Shrimp
Do I really need to devein shrimp?
No, deveining shrimp is not always necessary. The dark line is the digestive tract. It is not harmful to eat. However, it can contain sand or grit. Removing it improves the taste and texture. I always recommend deveining for a better eating experience.
What is the easiest way to peel shrimp?
The easiest way to peel shrimp is to start from the underside near the legs. Pinch the shell firmly and peel it back towards the tail. Keeping the shrimp cold makes the shell firmer. This allows it to come off more easily. Some prefer leaving the tail on for appearance.
Can I clean shrimp with the shells on?
You can devein shrimp with the shells on. Use a small, sharp knife. Make a shallow cut along the back, then pick out the vein. Some people prefer using a special shelled shrimp deveiner tool. This method saves a step if you plan to cook shrimp in their shells.
How long can cleaned shrimp stay in the fridge?
Cleaned raw shrimp can stay in the refrigerator for one to two days. Store them in an airtight container. Place them in the coldest part of your fridge. For longer storage, you should freeze the shrimp. Freezing keeps them fresh for up to three months.
Is it better to clean shrimp frozen or thawed?
It is always better to clean shrimp when they are fully thawed. Thawed shrimp are flexible and easier to peel. Their shells come off smoothly. Trying to clean partly frozen shrimp makes the process much harder. The shells stick and can break apart.
Conclusion: Enjoying Your Perfectly Clean Shrimp
Learning how to clean shrimp fast changes your cooking. It turns a dreaded task into a quick step. You can now prepare fresh shrimp for any meal. Mastering peeling and deveining saves you time. It ensures your shrimp dishes taste their best.
Start practicing these quick cleaning methods today. You will soon have perfectly cleaned shrimp ready for your favorite recipes. I encourage you to try preparing fresh shrimp more often. Enjoy the amazing taste and texture that only properly cleaned shrimp can offer. Your cooking will thank you.
- shrimp cleaning
- deveining shrimp
- peeling shrimp
- quick seafood prep
- kitchen hacks