· Home Cleaning · 19 min read
How To Clean Stained Concrete Floors
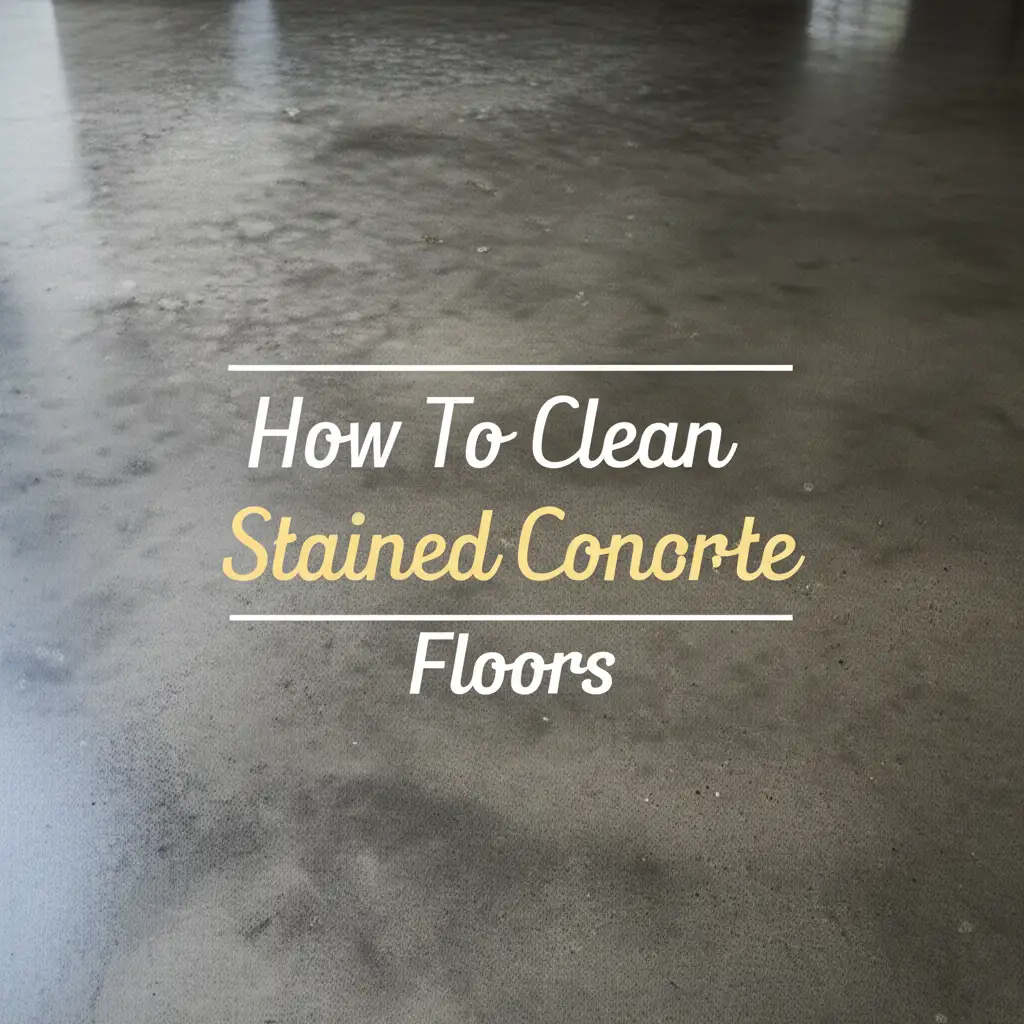
How To Clean Stained Concrete Floors
Concrete floors offer durability. Yet, they absorb stains easily. Spills, grime, and wear can leave lasting marks. Learning how to clean stained concrete floors brings back their original look. This guide helps you identify stains and choose the right cleaning method. I will walk you through the steps for various types of damage.
You do not need to replace your floors. Stains do not mean the end for your concrete. You can restore its beauty with the correct approach. I will explain the necessary tools and specific techniques. This article covers common stains, deep cleaning, and prevention tips. You will gain confidence in tackling any concrete floor stain.
Takeaway
- Identify the type of stain to choose the correct cleaning method.
- Gather necessary tools and safety gear before starting.
- Pre-clean the area to remove loose debris.
- Apply the right cleaning agent for specific stains like oil, rust, or mold.
- Rinse thoroughly and consider sealing for future protection.
How do you clean stained concrete floors?
You clean stained concrete floors by first identifying the stain type. Then, you choose a suitable cleaning agent like a degreaser, acid, or alkaline cleaner. Apply the cleaner, scrub the stained area, and rinse it thoroughly. Repeat the process if stains remain.
Understanding Different Concrete Floor Stains
Concrete floors are tough, but they are also porous. This means they can absorb many kinds of liquids. Different stains require different cleaning methods. You need to know what caused the stain before you try to remove it. This saves you time and effort. I often see people try one cleaner for everything, but that rarely works.
Common stains on concrete floors include oil, grease, rust, and organic matter. Oil and grease stains often come from cars or machinery. They leave dark, slick spots. Rust stains show up as orange or reddish marks. These come from metal items left on the floor. Organic stains, like mildew or mold, appear as dark or greenish patches. These often grow in damp areas.
Other stains might be from paint, food, or chemical spills. Each of these stains reacts differently to cleaners. For example, a degreaser works well on oil. But it does little for rust. Acids might remove rust but harm the concrete if used improperly. Knowing your stain is the first step to success. I always check the stain first.
Sometimes, efflorescence appears on concrete. This is a white, powdery substance. It forms when water moves through concrete and brings salts to the surface. It is not a stain from a spill, but a natural mineral deposit. You treat it differently from other stains.
- Oil and Grease: Dark, slick spots. Common in garages or workshops.
- Rust: Orange or reddish marks. From metal objects.
- Organic Stains: Dark, green, or black patches. Caused by mold, mildew, or leaves.
- Paint: Varies in color. From spills during painting projects.
- Efflorescence: White, powdery residue. Mineral deposits from within the concrete.
You can often tell the stain type by its color, location, and the history of the area. For example, a dark spot under a car is likely oil. A red mark near a metal tool is probably rust. Once you identify the stain, you can pick the right cleaner. This simple step makes a big difference in cleaning results. If you want to know more about general stain removal from concrete, I recommend learning about how to clean stains from concrete.
Essential Tools and Cleaning Solutions for Concrete
Before you start cleaning, gather all your tools and supplies. Having everything ready saves you trips back and forth. It also makes the cleaning process smoother and more efficient. I always lay out my gear before I begin any big cleaning project. You need safety gear, basic cleaning tools, and specific cleaning agents.
First, think about safety. Concrete cleaning can involve strong chemicals. You should always wear protective gloves. Eye protection like safety glasses is also important. A respirator or mask protects your lungs from fumes. Long sleeves and pants keep chemicals off your skin. Your safety is most important.
Next, get your basic cleaning tools. You will need a stiff-bristled brush or a push broom. These help scrub the stains. Buckets are useful for mixing solutions and rinsing. A garden hose with a strong nozzle or a pressure washer makes rinsing much easier. A shop vac can help remove water after cleaning, especially indoors. For outdoor concrete areas like a pool deck, a pressure washer is often very effective. You can learn more about how to use it by reading about how to clean a concrete pool deck.
Now, let us talk about cleaning solutions. Different stains need different chemicals.
- Degreasers: These are best for oil and grease stains. Many come in concentrated forms. You dilute them with water. Look for alkaline degreasers for heavy oil.
- Acidic Cleaners: Use these for rust stains, efflorescence, or mineral deposits. Muriatic acid is powerful but dangerous. Safer options include phosphoric acid or citric acid-based cleaners. Always dilute acids and use them with caution.
- Alkaline Cleaners (Bleach or Oxygen Bleach): Good for mold, mildew, and other organic stains. Bleach kills mold effectively. Oxygen bleach is safer for colors and less harsh.
- Enzyme Cleaners: These work well on organic stains like food spills, pet urine, or blood. Enzymes break down organic matter naturally. They are good for persistent organic smells. For example, if you encounter blood stains, enzyme cleaners are often recommended. You can find more details on how to clean blood off concrete.
- Poultices: For deep, set-in stains like oil or rust. A poultice is a paste made from an absorbent material (like cat litter or diatomaceous earth) and a strong cleaner. You apply it, let it dry, and it pulls the stain out.
Before using any chemical, always read the label. Test a small, hidden area first. This checks for any adverse reactions on your specific concrete. I always do a test spot to prevent surprises. Having the right tools and knowing how to use them makes cleaning concrete floors much simpler.
Step-by-Step Guide to General Concrete Floor Cleaning
Before tackling specific stains, you should always do a general cleaning of your concrete floor. This removes loose dirt, dust, and light grime. A clean surface helps specialized cleaners work better on tough stains. It is like preparing a canvas before painting. I find this step makes all the difference.
First, clear the area. Move any furniture, tools, or other items off the concrete floor. You want a completely clear space to work. Sweep the floor thoroughly with a stiff-bristled broom or use a leaf blower outdoors. This removes loose dirt, leaves, and debris. Make sure no small rocks or sharp objects remain. These can scratch the concrete surface during scrubbing or pressure washing. For larger areas like a garage floor, you might consider how to generally clean your garage concrete floor.
Next, pre-wet the concrete. Use a garden hose to wet the entire surface. This helps loosen dirt and prevents cleaners from drying too quickly. It also stops strong chemicals from absorbing too deeply into the concrete. Do not let water pool; just get the surface damp.
Now, apply a general concrete cleaner or a mild degreaser diluted with water. Follow the product instructions for dilution ratios. Pour or spray the solution evenly over the entire floor. For basic cleaning, dish soap mixed with warm water can also work wonders on light grime. I often use a simple solution first.
Let the cleaner sit for a few minutes. This allows the solution to penetrate the dirt and grime. Do not let it dry on the surface. If it starts to dry, add a little more water. Then, scrub the floor vigorously. Use a stiff-bristled push broom for large areas. For tougher spots, a hand brush is better. Put some effort into it. The scrubbing action helps lift the dirt.
Finally, rinse the floor completely. A pressure washer is ideal for this step, especially outdoors. It blasts away the dirty water and cleaner residue effectively. If you do not have a pressure washer, a strong stream from a garden hose works too. Rinse from the highest point down to a drain or out of the area. Make sure no soapy residue remains. Leftover soap can attract more dirt. Once rinsed, let the concrete air dry. Good airflow helps it dry faster. This general cleaning sets the stage for more targeted stain removal.
Targeted Treatments for Common Concrete Stains
Once you have completed the general cleaning, you can focus on specific, stubborn stains. Each type of stain requires a different approach for effective removal. I will explain the best methods for the most common culprits you might find on your concrete floors.
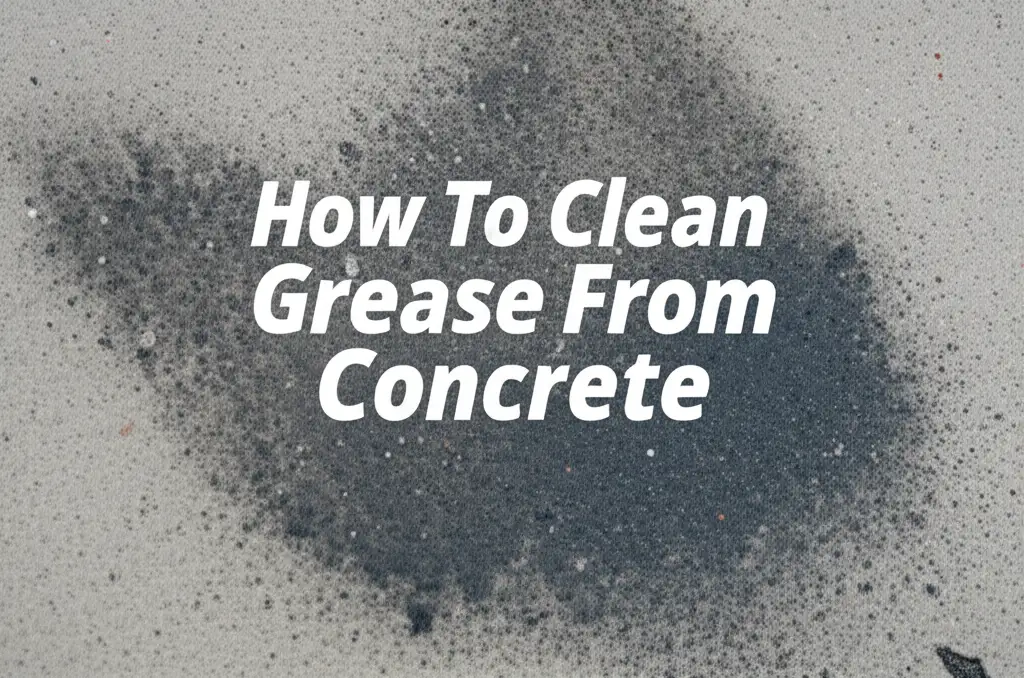
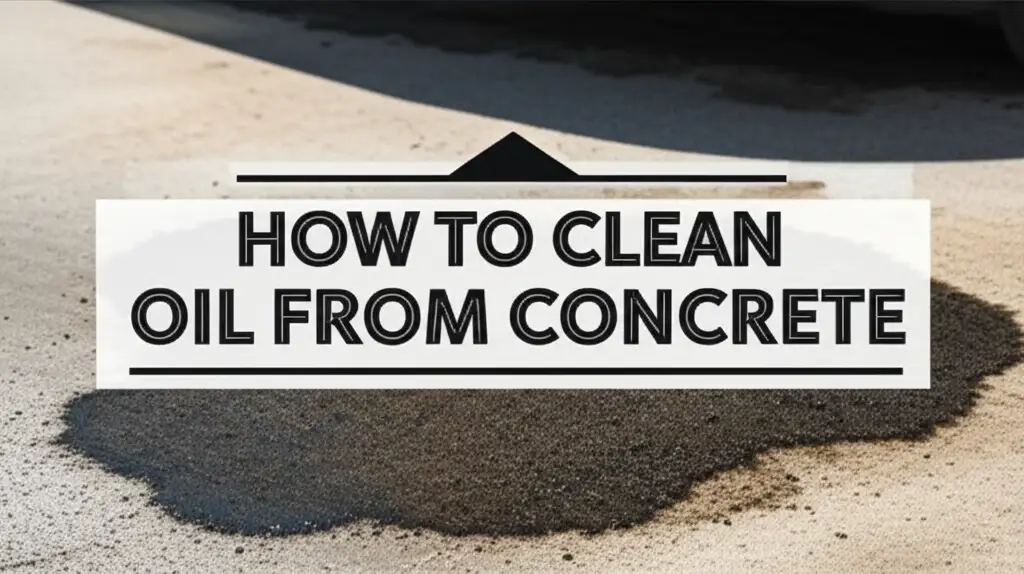
Removing Oil and Grease Stains
Oil and grease stains are common, especially in garages and driveways. They penetrate deep into the concrete.
- Absorb Fresh Spills: For fresh spills, blot up as much oil as possible with old rags or paper towels. Then, cover the stain with an absorbent material like cat litter, sawdust, or sand. Let it sit for several hours or overnight. This pulls oil out of the pores.
- Apply a Degreaser: Sweep away the absorbent material. Apply a heavy-duty alkaline degreaser directly onto the stain. Scrub it in with a stiff brush. Allow the degreaser to sit for 15-30 minutes, keeping it wet.
- Pressure Wash or Rinse: After scrubbing, rinse the area thoroughly with a pressure washer or strong hose spray. Repeat if necessary. For serious engine oil stains, you may need a specialized product. I wrote a detailed guide on how to clean engine oil off concrete. Similarly, if you are dealing with general grease, understanding how to clean grease from concrete can provide more tips. Even gas spills on concrete require specific handling. You can learn more about how to clean gas off concrete.
Tackling Rust Stains
Rust stains are orange-red marks. They result from metal objects sitting on wet concrete.
- Use an Acid-Based Cleaner: Apply a commercial rust remover designed for concrete. These usually contain phosphoric or oxalic acid. Follow product instructions carefully.
- Scrub and Rinse: Scrub the rust stain with a stiff brush. Let the cleaner sit for the recommended time. Do not let it dry. Then, rinse thoroughly with water.
- Neutralize (If Using Strong Acid): If using a strong acid like muriatic, neutralize the area with a baking soda and water solution after rinsing. This stops the acid from damaging the concrete further. You can read more details on how to clean rust off concrete.
Eliminating Mold and Mildew
Mold and mildew appear as dark green, black, or gray fuzzy patches. They thrive in damp, shaded areas.
- Prepare a Solution: Mix one part bleach with three parts water. For a milder option, use oxygen bleach following package directions.
- Apply and Scrub: Apply the solution to the affected area. Let it sit for 10-15 minutes. Scrub with a stiff brush. The mold should start to disappear.
- Rinse Well: Rinse the area completely with water. Ensure all bleach residue is gone. For future prevention, address any moisture issues.
Removing Paint Spills
Paint stains require quick action. The older the paint, the harder it is to remove.
- Scrape Fresh Paint: For wet paint, scrape up as much as possible immediately.
- Use a Scraper or Wire Brush for Dry Paint: For dry paint, carefully scrape off the bulk with a stiff metal scraper. Be careful not to gouge the concrete. A wire brush can help loosen smaller bits.
- Apply Paint Stripper: Apply a chemical paint stripper designed for concrete. Follow the product instructions for application and dwell time.
- Scrub and Rinse: Scrub the softened paint with a stiff brush. Scrape off the residue. Rinse the area thoroughly. Sometimes, pressure washing helps lift the remaining paint. For a full guide on this, check out how to clean paint off concrete. You might also encounter wood stain, which is a different beast. Here is a guide on how to clean wood stain off concrete.
Cleaning Efflorescence
Efflorescence is a white, powdery deposit. It comes from salts within the concrete itself.
- Dry Brush First: Start by dry brushing the efflorescence off with a stiff brush. This removes the loose surface powder.
- Use an Acidic Cleaner: Mix a mild acid cleaner, like white vinegar or a diluted phosphoric acid cleaner, with water. Apply it to the efflorescence.
- Scrub and Rinse: Scrub the area with a stiff brush. The acid helps dissolve the salt. Rinse thoroughly. This often requires repeated treatments. You can get more details on how to clean efflorescence off concrete.
Always remember to test any cleaner on an inconspicuous spot first. This prevents damage to your concrete floor. Each stain is unique, but with the right approach, you can restore your concrete.
Advanced Concrete Cleaning Techniques
Sometimes, standard cleaning methods are not enough. For deep-set stains, large areas, or very tough grime, you might need more advanced techniques. These methods often involve stronger tools or specialized products. I use these when regular scrubbing just does not cut it.
Pressure Washing for Deep Cleaning
A pressure washer is a powerful tool for cleaning concrete. It uses high-pressure water to blast away dirt, grime, and even some stains. It is great for large outdoor areas like patios, driveways, or garage floors.
- Preparation: Clear the area. Sweep away loose debris.
- Choose the Right Nozzle: Use a fan-tip nozzle (25-degree or 40-degree) for general cleaning. For tough spots, a rotating turbo nozzle works well, but be careful. It can etch the concrete if held too close.
- Start Safely: Hold the wand a foot or more away from the surface. Gradually move closer until you find the right distance. Keep the wand moving in even strokes. Do not linger in one spot, as this can leave stripes or damage the surface.
- Apply Detergent (Optional): Many pressure washers have a detergent tank. You can use a concrete-specific detergent for better cleaning results, especially on very dirty surfaces.
- Rinse Thoroughly: Once clean, rinse the entire area to remove all detergent residue and loosened dirt.
Pressure washing is fast and effective. But it can also cause damage if you do not use it properly. Always practice in an inconspicuous area first.
Poultices for Stubborn Stains
A poultice is a paste that draws out deep stains from porous materials like concrete. It works by creating a strong bond with the stain. As the poultice dries, it pulls the stain out. This method is effective for oil, rust, and other deeply absorbed stains.
- Prepare the Poultice: Mix an absorbent material (like diatomaceous earth, powdered chalk, or cat litter) with a strong cleaner. For oil, use a degreaser. For rust, use an acidic cleaner. The mixture should be like peanut butter.
- Apply the Poultice: Spread a 1/4 to 1/2 inch thick layer of the poultice over the entire stain. Extend it slightly beyond the stain edges.
- Cover and Wait: Cover the poultice with plastic wrap. Tape the edges down to prevent it from drying out too quickly. Let it sit for 24-48 hours. The longer it sits, the more it works.
- Remove and Clean: Once dry, scrape off the hardened poultice. The stain should be lighter or gone. Rinse the area. You may need to repeat the process for very stubborn stains.
Commercial Grade Cleaners and Strippers
For extremely tough stains or heavily soiled floors, professional-grade cleaners or strippers may be necessary. These are much stronger than typical household products. They often contain high concentrations of acids, alkalis, or solvents.
- Alkaline Degreasers: These are very effective on heavy grease and oil, especially in industrial settings.
- Acidic Cleaners: Stronger acids are available for severe rust or efflorescence. Use these only as a last resort and with extreme caution.
- Sealer Strippers: If your concrete has an old, stained sealer, you might need a stripper to remove it before cleaning. Then you can clean and re-seal the floor.
Always wear full personal protective equipment (PPE) when using these powerful chemicals. This includes gloves, eye protection, and a respirator. Ensure good ventilation. Read and follow all manufacturer instructions carefully. If you are unsure, consider hiring a professional. My experience tells me that safety comes first with these products.
Sealing and Protecting Your Concrete Floors
After you have put in the effort to clean your stained concrete floors, the next logical step is to protect them. Sealing your concrete floor offers many benefits. It prevents future stains and makes cleaning easier. It also extends the life of your concrete. I always recommend sealing concrete after a deep clean.
Why Seal Concrete?
Concrete is porous. This means it has tiny holes and channels that absorb liquids. Oil, grease, water, and other spills can easily penetrate these pores, causing stains. A sealer creates a protective barrier on the surface. This barrier fills the pores, making the concrete less absorbent. It acts like a shield.
- Stain Prevention: The primary benefit is preventing new stains from setting in. Spills sit on the surface, giving you time to clean them up.
- Easier Cleaning: Sealed concrete is much easier to clean. Dirt and grime do not get embedded. A simple mop and mild cleaner often suffice.
- Durability and Longevity: Sealers protect concrete from wear and tear, abrasion, and chemical damage. They help prevent cracks and spalling caused by freeze-thaw cycles.
- Enhanced Appearance: Many sealers enhance the concrete’s color and can add a matte, satin, or glossy finish. This makes your floor look better.
Types of Concrete Sealers
There are different types of concrete sealers. Each offers unique properties and benefits.
- Penetrating Sealers: These soak into the concrete and react chemically within the pores. They do not form a film on the surface. They offer excellent protection against water, oil, and de-icing salts. They do not change the concrete’s appearance or make it slippery. These are great for outdoor concrete or areas where a natural look is desired.
- Topical Sealers: These form a protective film on the surface of the concrete. They can be acrylic, epoxy, or urethane-based.
- Acrylic Sealers: Most common and affordable. They provide good stain resistance and come in various finishes (matte to high gloss). They need reapplication every few years.
- Epoxy and Urethane Sealers: These are more durable and chemical-resistant. They are often used in commercial or industrial settings, or in garages where heavy traffic and spills occur. They offer superior protection but are more expensive and harder to apply.
Application Process for Sealers
Applying a sealer is straightforward but requires good preparation.
- Clean and Dry: Ensure the concrete floor is completely clean and dry before applying any sealer. Any moisture or dirt trapped under the sealer will cause problems. I always wait at least 24-48 hours after cleaning for the concrete to dry fully.
- Temperature Matters: Apply sealer when the temperature is moderate, typically between 50-85°F (10-30°C). Avoid direct sunlight or very windy conditions.
- Application Method: Use a roller, sprayer, or brush, depending on the sealer type and area size. Apply thin, even coats. Avoid puddling.
- Multiple Coats: Most sealers benefit from two thin coats rather than one thick coat. Allow the first coat to dry according to manufacturer instructions before applying the second.
- Curing Time: Allow the sealer to cure fully before heavy traffic or placing items on the floor. This can take several days.
Sealing your concrete floor is an investment in its appearance and longevity. It is a simple step that saves you a lot of cleaning trouble in the future. I believe it is essential for any concrete floor that sees regular use.
Preventing Future Stains on Concrete Floors
You have done the hard work of cleaning your stained concrete floors. Now, the goal is to keep them looking good. Preventing future stains is much easier than removing old ones. A proactive approach saves time and effort. I always tell my clients that maintenance is key.
Regular Cleaning Routine
Consistent cleaning is your first line of defense. Do not wait for stains to build up.
- Sweep or Vacuum Regularly: Remove dirt, dust, and debris often. This prevents loose particles from getting ground into the concrete.
- Wipe Up Spills Immediately: Address spills as soon as they happen. The longer a liquid sits, the deeper it penetrates. Have old rags or paper towels handy for quick cleanups. For any liquid spills, a quick blot often prevents a lasting mark.
- Mop with Mild Cleaner: For interior concrete floors, a regular mop with a pH-neutral cleaner keeps the surface clean. Avoid harsh chemicals that can degrade any existing sealer.
Use Protective Mats and Rugs
Strategic placement of mats can greatly reduce stain potential.
- Entryways: Place doormats at all entrances to trap dirt and moisture before it reaches the concrete floor.
- High-Traffic Areas: Use rugs or runners in areas with heavy foot traffic. This protects the concrete from scuffs and abrasion.
- Under Vehicles or Equipment: In garages or workshops, place drip pans or absorbent mats under vehicles, machinery, or any area prone to oil and fluid leaks. This catches spills before they hit the concrete.
Address Moisture Issues
Moisture contributes to mold, mildew, and efflorescence.
- Improve Drainage: Ensure proper drainage around outdoor concrete. Water should flow away from the structure, not pool on or near the concrete.
- Ventilation: For interior concrete floors, ensure good ventilation, especially in basements or laundry rooms. This reduces humidity and prevents mold growth.
- Fix Leaks: Repair any plumbing leaks promptly. A constant drip can cause water stains and encourage mold.
Reapply Sealer Periodically
Even the best sealer wears down over time. Regular reapplication is crucial for continued protection.
- Check Sealer Condition: Observe your concrete floor. If water no longer beads on the surface, or if the floor looks dull, it might be time to re-seal.
- Follow Manufacturer Guidelines: Sealer reapplication frequency depends on the sealer type and traffic. Acrylics may need reapplication every 1-3 years. More durable sealers like epoxies can last 5-10 years.
- Proper Preparation: Before re-sealing, clean the concrete thoroughly. Ensure it is completely dry. You do not want to seal in dirt.
By following these simple prevention steps, you can significantly reduce the likelihood of future stains. This keeps your concrete floors looking clean and beautiful for many years. A little effort now saves a lot of cleaning later.
Maintaining Your Concrete Floor’s Appearance Long-Term
Keeping concrete floors looking great is an ongoing process. It extends beyond just cleaning and sealing. Regular maintenance ensures your concrete stays durable and attractive for many years. Think of it as a commitment to your floor’s health. I find that small, consistent actions prevent big problems later.
Routine Cleaning for Longevity
Daily or weekly cleaning is important. This prevents dirt from embedding into the surface.
- Sweep Often: Use a soft-bristled broom or a dust mop. This removes loose dust and debris.
- Spot Clean: Address any small spills or marks immediately. A damp cloth with mild soap often works for fresh spots.
- Periodic Wet Mopping: For interior floors, mop periodically with a pH-neutral cleaner. Avoid harsh detergents. These can strip sealers and dull the finish.
Inspection and Minor Repairs
Regularly inspect your concrete floors. Look for signs of wear, damage, or new stains.
- concrete cleaning
- stain removal
- floor maintenance
- garage floor cleaning