· Home Cleaning · 20 min read
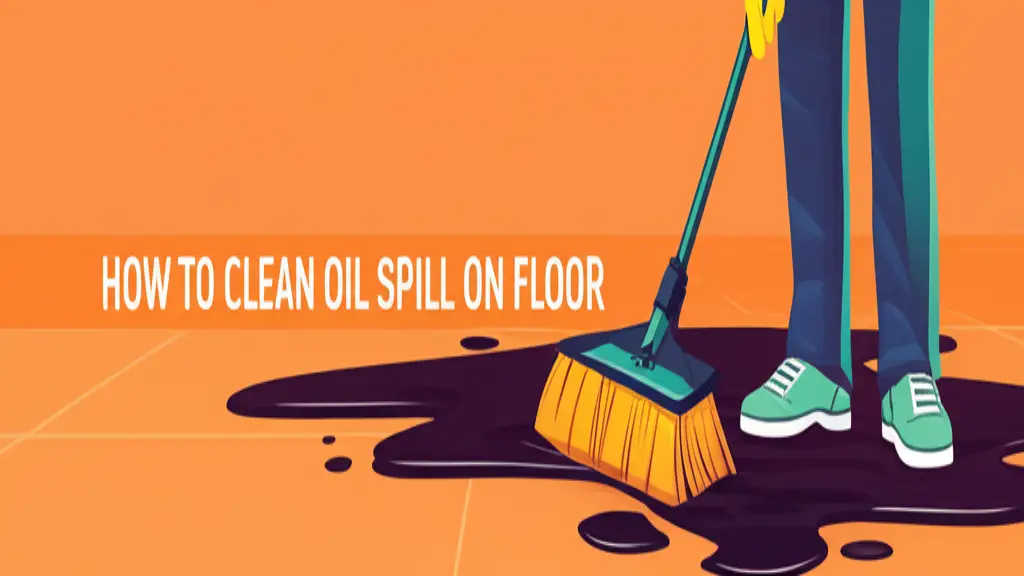
How To Clean Up Spilled Oil

Effective Ways to Clean Up Spilled Oil
Imagine a busy morning, a sudden slip, and then a slick, dark puddle on your garage floor or kitchen tile. A spilled oil mess can feel overwhelming. Cleaning up spilled oil quickly prevents slip hazards and deep stains. This guide will help you tackle oil spills on various surfaces with confidence. We will cover immediate actions, necessary tools, and specific cleaning methods. We will also discuss proper disposal and how to prevent future spills.
Takeaway:
- Act Fast: Contain the spill immediately to prevent spreading.
- Prioritize Safety: Wear gloves, eye protection, and work in a well-ventilated area.
- Absorb First: Use cat litter, sawdust, or paper towels to soak up liquid oil.
- Degrease & Scrub: Apply a suitable degreaser for the surface and scrub the remaining stain.
- Dispose Properly: Collect all oily waste and dispose of it according to local regulations.
To clean up spilled oil, act quickly. First, absorb the bulk of the oil with materials like cat litter or sawdust. Next, apply a degreasing agent to the remaining stain. Scrub the area thoroughly, then rinse and dry. Always ensure proper disposal of oil-soaked materials.
Immediate Steps for Any Oil Spill
When oil spills, quick action saves time and effort. My first thought is always to prevent the spill from spreading further. This initial response minimizes damage and makes the cleanup process much simpler. Always prioritize safety before beginning any cleanup.
Prioritizing Safety First
Safety is the first step in any cleanup. Oil makes surfaces very slippery, creating a fall risk. You should put on gloves and eye protection right away. If the spill is in an enclosed area, open windows or doors. Good ventilation helps reduce fumes, especially with motor oil or cooking oil that might vaporize.
Always keep children and pets away from the spill area. Their curiosity could lead to contact with the oil. Have a clear path to exit the area if needed. Safety gear protects your skin and eyes from direct contact with the oil.
Containing the Spill Area
Once safety is in place, focus on stopping the spill’s spread. You can use absorbent materials to create a barrier around the spill’s edges. Sand, cat litter, or even paper towels work well for this. Pour these materials around the perimeter of the oil. This creates a dam that holds the oil in one place.
After containing the edges, start pouring more absorbent material directly onto the spill. Begin at the outer edges and work your way inward. This method helps soak up the bulk of the liquid oil. Allowing the absorbent material to sit for a few minutes gives it time to soak up as much oil as possible.
Essential Tools and Materials for Oil Cleanup
You need the right tools to tackle oil spills effectively. Having these items ready can make a big difference in how quickly and thoroughly you clean up. My cleanup kit always includes a few key components. These items help absorb, break down, and remove oil safely.
Absorbent Materials
Absorbent materials are your first line of defense against liquid oil. They soak up the bulk of the spill, making it easier to clean. Common household items can be very effective for this. You might already have some of them.
- Cat Litter (Clay-based): This is highly absorbent and inexpensive. Pour a generous amount directly onto the oil spill. Let it sit for at least 30 minutes, or even longer for larger spills. The clay granules draw the oil out.
- Sawdust or Wood Shavings: These materials also absorb oil well. They are often available from lumberyards or pet stores. Spread them over the spill to soak up the liquid.
- Sand: Regular sand can work in a pinch. It provides good friction and absorption.
- Baking Soda or Cornstarch: For small, fresh spills on sensitive surfaces, these fine powders can absorb oil. They are less abrasive than cat litter.
- Old Rags or Paper Towels: Use these to dab up excess oil or for smaller spills. Avoid spreading the oil around with them.
Cleaning Agents
After absorbing the liquid, you need something to break down the remaining oil residue. This is where cleaning agents come in. Choose the right cleaner for the surface you are working on.
- Dish Soap/Liquid Detergent: This is excellent for many surfaces. Its grease-cutting properties help emulsify the oil. Mix a few drops with warm water to create a soapy solution.
- Degreasers (Commercial or Heavy-Duty): For tough, set-in oil stains on concrete or garage floors, a commercial degreaser works best. Look for products specifically designed for oil and grease. Follow the product instructions for application and safety.
- Solvents (Mineral Spirits, Acetone): Use these with extreme caution and only on specific surfaces. They can damage certain finishes or materials. Always test in an inconspicuous area first. Ensure good ventilation.
- White Vinegar: While not a strong degreaser on its own for oil, it can help cut through light grease. It is useful for finishing touches or very minor fresh spills.
Personal Protective Gear
Protecting yourself is crucial during any cleanup. Oil can irritate skin and eyes. Fumes from cleaning products can also be harmful.
- Gloves: Wear chemical-resistant gloves. Latex or nitrile gloves protect your hands.
- Eye Protection: Safety goggles shield your eyes from splashes and fumes.
- Mask/Respirator: For large spills or strong cleaning agents, a mask provides respiratory protection.
- Old Clothes: Wear clothes you do not mind getting dirty or potentially ruined. Long sleeves and pants are ideal.
- Sturdy Shoes: Prevent slips and protect your feet from potential oil contact.
Having these tools ready makes the cleanup process safer and more efficient. I always make sure I have a stock of absorbents and protective gear on hand.
Cleaning Up Oil Spills on Hard Surfaces
Hard surfaces like concrete and garage floors are common places for oil spills. Vehicle maintenance often leads to these kinds of messes. Cleaning oil from these surfaces needs a targeted approach. The porous nature of some hard surfaces means oil can penetrate deep.
Concrete and Driveway Oil Stains
Concrete is very porous, meaning oil can seep deep into it. This makes oil stains on driveways or garage floors challenging. But, with the right method, you can make a big difference. I often use a combination of absorbent materials and strong degreasers for these tough stains.
- Soak Up Excess Oil: Cover the fresh spill with a thick layer of cat litter, sawdust, or sand. Grind it into the stain with your shoes or a stiff brush. Let it sit for several hours, or even overnight. This step pulls out as much oil as possible.
- Sweep and Remove: Once the absorbent material has done its job, sweep it up carefully. Collect all the oily waste in a durable bag.
- Apply Degreaser: Choose a commercial concrete degreaser. For smaller, less severe stains, heavy-duty dish soap can work. Mix the degreaser with water according to product instructions. Pour or spray it directly onto the remaining stain.
- Scrub Thoroughly: Use a stiff-bristled brush or a push broom to scrub the degreaser into the stain. Apply good pressure to work the cleaner deep into the concrete’s pores.
- Rinse the Area: Rinse the area thoroughly with a garden hose or a pressure washer. Direct the water away from storm drains to prevent environmental contamination. You can learn more about how to get stubborn oil off concrete by reading about how to clean engine oil off concrete.
- Repeat if Needed: Stubborn stains might need multiple applications. Old stains can be particularly challenging.
Garage Floor Oil Spills
Garage floors face frequent oil spills from cars and other machinery. These spills can make the floor look unsightly and create slip hazards. Cleaning a garage floor oil spill is similar to concrete, but often on a larger scale. My approach is always methodical.
- Contain and Absorb: For fresh spills, immediately sprinkle cat litter or oil absorbent granules over the entire spill. Create a barrier around the edges. Let it sit for several hours to soak up the oil.
- Sweep Up Absorbent: Use a broom and dustpan to collect the oil-soaked absorbent. Place it in a heavy-duty trash bag.
- Apply Degreaser: Use a specialized garage floor degreaser. Many of these come in concentrated forms. Dilute as directed. Apply it evenly over the stained area.
- Scrub and Agitate: Use a stiff-bristled brush or a floor scrubber to work the degreaser into the oil stains. For larger areas, a power scrubber can be very effective. Ensure the degreaser penetrates the stain.
- Rinse Thoroughly: Use a hose or pressure washer to rinse the floor. Ensure all degreaser and loosened oil are washed away. Again, direct the water to a collection point, not storm drains. To learn detailed steps for garage floor oil cleanup, see our guide on how to clean oil off garage floor.
- Address Lingering Stains: For very old or deep stains, a poultice method can help. Mix an absorbent material (like fuller’s earth or talcum powder) with a strong solvent (like mineral spirits) to form a paste. Apply it to the stain, cover with plastic, and let it dry completely. Then scrape it off. For more information on removing persistent stains, check out how to clean garage floor oil stains.
Always ensure good ventilation when using strong degreasers. Proper disposal of all oily waste is essential.
Handling Oil Spills on Porous Surfaces
Porous surfaces like pavers and wood decks can absorb oil quickly. This makes them tricky to clean. The oil penetrates deep into the material, requiring special attention. I find that quick action is even more critical on these surfaces to prevent permanent staining.
Removing Oil from Pavers
Pavers add charm to driveways and patios, but their porous nature makes them vulnerable to oil stains. A spilled oil patch on pavers can look unsightly. Getting the oil out requires a dedicated effort.
- Immediate Absorption: For a fresh spill, blot up as much excess oil as you can with paper towels or old rags. Avoid rubbing, as this can spread the stain. Then, generously apply an absorbent material like cat litter or sand over the entire affected area. Let it sit for several hours, ideally overnight, to draw out the oil.
- Sweep and Prepare: Sweep up the oil-soaked absorbent. Be sure to collect all material in a durable bag.
- Apply Degreaser: Use a degreaser specifically designed for pavers or masonry. Some general-purpose degreasers might also work, but always test in an inconspicuous spot first. Apply the degreaser to the stain according to product instructions.
- Scrub the Stain: Use a stiff-bristled brush to vigorously scrub the stained area. Work the degreaser into the pores of the pavers. For larger areas, a power scrubber attachment can be helpful.
- Rinse Thoroughly: Rinse the pavers with a garden hose or a pressure washer. Ensure all degreaser and loosened oil are washed away. Direct the runoff away from storm drains or vegetation.
- Repeat if Necessary: Stubborn oil stains on pavers may require multiple treatments. Old stains are particularly challenging and might need several applications or a poultice method. For more detailed instructions, you can refer to resources on how to clean oil off pavers.
Addressing Oil on Wood
Wood decks, fences, or furniture can also suffer from oil spills, especially from barbecue grease or machinery. Oil can stain wood deeply and be difficult to remove. My approach involves careful cleaning to avoid damaging the wood grain.
- Blot and Absorb: Immediately blot up any excess liquid oil with paper towels or a clean cloth. Do not rub the oil into the wood. Then, sprinkle a thin layer of an absorbent like cornstarch or baking soda over the stain. Allow it to sit for at least an hour to soak up the oil.
- Gently Scrape and Sweep: Gently scrape up the absorbent material. Use a plastic scraper to avoid scratching the wood. Sweep away any residue.
- Clean with Soap Solution: Mix a small amount of dish soap with warm water. Create a gentle, sudsy solution. Dip a soft-bristled brush or sponge into the solution.
- Scrub Carefully: Lightly scrub the oil stain following the wood grain. Avoid using too much water, as it can swell the wood. The goal is to lift the oil, not saturate the wood.
- Rinse Sparingly: Use a damp cloth to wipe away the soapy residue. Rinse the cloth frequently. Ensure all soap is removed without drenching the wood.
- Dry Thoroughly: Allow the wood to air dry completely. You might need to place fans near the area to speed up drying. Ensure the wood is completely dry before assessing the stain.
- Consider Sanding/Refinishing: For deep or old oil stains on wood, the only way to fully remove them might be light sanding. After sanding, you may need to re-stain or seal the area to match the surrounding wood. This is a last resort, but often necessary for complete removal.
Always work carefully on porous surfaces. Their ability to absorb means quick action and patience are key.
Cleaning Oil from Kitchen and Indoor Surfaces
Oil spills in the kitchen are very common. Cooking oil, olive oil, or motor oil from a leaky appliance can end up on various surfaces. These indoor spills need quick attention to prevent slip hazards and permanent stains. I find that the right approach makes all the difference for a clean kitchen.
Kitchen Floor Oil Spills
Kitchen floors, whether tile, linoleum, or hardwood, often face cooking oil spills. A spilled oil bottle or a greasy pan can create a slippery mess. Cleaning these efficiently is important for safety and hygiene.
- Blot Up Excess: First, use paper towels or an old rag to blot up as much liquid oil as possible. Do not spread the oil by wiping it. Press down to absorb.
- Apply Absorbent: Sprinkle a generous amount of baking soda or cornstarch over the remaining oil film. These fine powders are less abrasive and work well on indoor floors. Let it sit for 15-30 minutes to absorb more oil.
- Sweep and Prepare: Sweep up the absorbent material. Dispose of it properly in a sealed bag.
- Degrease with Soap: Mix a few drops of dish soap with warm water. Create a sudsy solution. Dip a clean mop or sponge into the solution.
- Clean the Area: Mop or wipe the affected floor area with the soapy solution. Focus on scrubbing the oily residue. The dish soap will help break down the oil.
- Rinse and Dry: Rinse the area with clean water using a damp mop or cloth. Make sure all soap residue is gone. Dry the floor thoroughly to prevent water spots and ensure no slipperiness remains. For more specific advice on cleaning spills indoors, read about how to clean oil spill on floor.
Cleaning Oily Pans and Stovetops
Oil residue on pans and stovetops is a frequent problem. Burnt oil can stick stubbornly. Cleaning these surfaces needs good degreasing power. I always tackle these after cooking to prevent build-up.
- Allow to Cool: First, let the pan or stovetop cool down completely. Never clean hot surfaces with water or chemicals.
- Scrape Off Excess: For burnt-on oil, gently scrape off any loose, charred bits with a plastic scraper. Avoid metal scrapers on non-stick surfaces.
- Apply Dish Soap: Apply a generous amount of heavy-duty dish soap directly onto the oily or burnt areas. For pans, fill with a little warm water and soap. Let it soak for 15-30 minutes. The soap will start to break down the grease.
- Scrub Thoroughly: Use a non-abrasive scrubber or sponge for non-stick pans. For stainless steel pans, a tougher scrubber or even steel wool can be used carefully. Scrub the entire oily surface until clean. You can find detailed steps for this in articles on how to clean burnt oil from stainless steel pan.
- Rinse and Dry: Rinse the pan or stovetop thoroughly with warm water. Ensure no soapy residue remains. Dry immediately to prevent water spots.
- For Oven Spills: If oil spills inside the oven, especially during cooking, it can burn on. For fresh spills, wipe with a damp cloth immediately after the oven cools. For baked-on oil, use an oven cleaner or a paste of baking soda and water. Apply, let sit, then scrub. For stubborn oven oil residue, insights from articles like how to clean oil out of oven can be helpful.
Regular cleaning prevents the build-up of oil and grease. This keeps your kitchen looking good and operating safely.
Eco-Friendly Disposal of Oily Waste
Cleaning up spilled oil is only half the battle. Proper disposal of the oil-soaked materials is just as important. Improper disposal can harm the environment. It can contaminate water sources and soil. I always make sure to follow responsible disposal practices.
Proper Waste Segregation
You must separate oily waste from your regular trash. Oily rags, paper towels, and absorbent materials contain hazardous substances. They should not go into standard recycling bins or down the drain. This can clog pipes and harm wastewater treatment plants.
- Collect All Oily Materials: Gather all used absorbent materials, rags, and cleaning wipes. Put them into a heavy-duty, sealable plastic bag. Double-bagging provides extra security against leaks.
- Seal the Bags: Ensure the bags are tightly sealed. This prevents oil from leaking out and contaminating other waste or the environment.
- Do Not Mix: Do not mix oily waste with compost, yard waste, or general household trash destined for landfills. Different disposal methods are required for each type of waste.
- Used Oil Itself: If you have collected liquid oil (e.g., from a pan or a vehicle), pour it into a clean, sturdy container with a tight-fitting lid. Original oil containers work well. Do not mix different types of oil.
Local Recycling and Disposal Centers
Most communities have specific facilities for disposing of hazardous waste. Used motor oil is often accepted at these centers. They can also take oil-soaked absorbents.
- Contact Local Authorities: Check with your local waste management department or city council. Ask about household hazardous waste (HHW) collection sites or events. They provide information on where and when to drop off oily waste.
- Auto Parts Stores: Many auto parts stores accept used motor oil for recycling. Call ahead to confirm their policy and any quantity limits.
- Special Waste Events: Some communities hold special collection events a few times a year. These events allow residents to dispose of various hazardous materials, including oily waste, safely.
- Commercial Services: For very large spills or industrial settings, specialized waste disposal companies exist. They handle hazardous waste cleanup and disposal.
Never pour oil down drains, into storm sewers, or onto the ground. This contaminates water and soil. Responsible disposal protects our environment and community. My commitment is always to dispose of hazardous waste correctly.
Preventing Future Oil Spills
The best way to deal with an oil spill is to prevent it from happening in the first place. Proactive measures save time, money, and stress. A little planning goes a long way. I always believe in prevention over cure, especially when it comes to messy spills.
Regular Inspections and Maintenance
Regular checks of your equipment and containers can catch potential leaks before they become large spills. This is a simple but effective strategy.
- Check Vehicles: Inspect your car or truck regularly for oil leaks. Look for drips under the engine or around hoses. Address any signs of leaks immediately. A small drip today can become a large puddle tomorrow.
- Inspect Machinery: For garden equipment, generators, or other oil-powered tools, check seals and connections. Ensure all components are in good working order.
- Examine Containers: Store oil in sturdy containers with tight-fitting lids. Check these containers for cracks, rust, or weak spots. Replace damaged containers promptly.
- Monitor Hoses and Lines: For home heating oil tanks or industrial systems, routinely inspect hoses, pipes, and fittings. Look for any signs of wear, cracks, or loose connections that could lead to a leak.
- Keep Records: Maintain a schedule for maintenance and inspections. Document when you last checked equipment or replaced parts. This helps track potential issues.
Safe Storage Practices
How you store oil products also plays a big role in preventing spills. Proper storage minimizes risks.
- Designated Storage Area: Store oil products in a designated area. This area should be away from heat sources, direct sunlight, and flammable materials. A cool, dry place is ideal.
- Containment Trays: Place oil containers on secondary containment trays or drip pans. These catch any small leaks or drips before they hit the floor. This is especially important for frequently used oils or those stored for long periods.
- Label Clearly: Label all oil containers clearly with their contents and date of purchase. This prevents confusion and ensures you use the right product for the right task.
- Store on Stable Surfaces: Keep oil containers on sturdy, level shelves or surfaces. Avoid stacking them too high, which can cause instability and falls.
- Away from Drains: Never store oil containers near floor drains or storm sewers. A spill in such an area can lead to immediate environmental contamination.
- Use Proper Funnels: When transferring oil, always use a funnel. This prevents accidental splashes and drips outside the target container. Clean funnels thoroughly after use.
- Dispose of Old Oil Promptly: Do not let old or used oil sit around indefinitely. Dispose of it properly and promptly at a designated recycling center.
By integrating these preventive measures into your routine, you greatly reduce the chances of experiencing an oil spill. This saves you the trouble of cleaning up and protects your property and the environment.
FAQ Section
Q: What absorbs oil best?
A: Clay-based cat litter, sawdust, or commercial oil absorbent granules absorb oil very well. For small indoor spills, baking soda or cornstarch also works effectively. These materials draw the oil out of the surface. Always let the absorbent material sit for some time to maximize its effectiveness before sweeping it up.
Q: Can you pour oil down the drain?
A: No, you should never pour oil down any drain. This includes kitchen sinks, toilets, or storm drains. Oil can clog pipes, both in your home and in municipal sewer systems. It also pollutes water sources and harms aquatic life. Always dispose of oil properly at designated collection centers.
Q: How do you clean up a small oil spill without special tools?
A: For a small oil spill, you can use common household items. First, blot up liquid oil with paper towels or old rags. Then, sprinkle a generous amount of baking soda, cornstarch, or flour over the stain. Let it sit for 15-30 minutes to absorb. Sweep it up, then clean the area with dish soap and warm water.
Q: Is an oil spill dangerous?
A: Yes, oil spills can be dangerous. They create slip hazards, leading to falls and injuries. Some oils emit harmful fumes, especially in poorly ventilated areas. Contact with skin can cause irritation. Large spills can be an environmental hazard, harming soil, water, and wildlife. Always prioritize safety during cleanup.
Q: How long does it take for oil to evaporate?
A: How long oil takes to evaporate depends on the type of oil, temperature, and ventilation. Lighter oils like gasoline evaporate quickly, often within hours. Heavier oils like motor oil or cooking oil evaporate very slowly, sometimes taking days or even weeks to partially evaporate, leaving a greasy residue behind.
Q: Can vinegar clean oil?
A: White vinegar alone is not a strong degreaser for heavy oil spills. It is acidic and can help cut through some grease residue. For light oil films or as a final rinse, it can be useful. However, for significant oil spills or deep stains, you will need a stronger degreasing agent like dish soap or a commercial degreaser.
Conclusion
Cleaning up spilled oil effectively is a matter of quick action, proper tools, and safe practices. We have covered everything from immediate containment to eco-friendly disposal. No matter if it is a small kitchen mishap or a larger garage floor spill, you now have the knowledge to handle it. Remember to prioritize safety first, use the right absorbents, and apply suitable cleaning agents.
By following these steps, you not only clean up the mess but also protect your property and the environment. Prevention through regular maintenance and careful storage is always the best approach. Keep your cleaning kit stocked, and you will be ready for anything. I encourage you to tackle any future oil spills with confidence and responsibility.
- oil spill cleanup
- how to clean oil
- oil stains
- spill removal
- safety tips