· Kitchen Cleaning · 6 min read
How To Clean Walk Freezer?
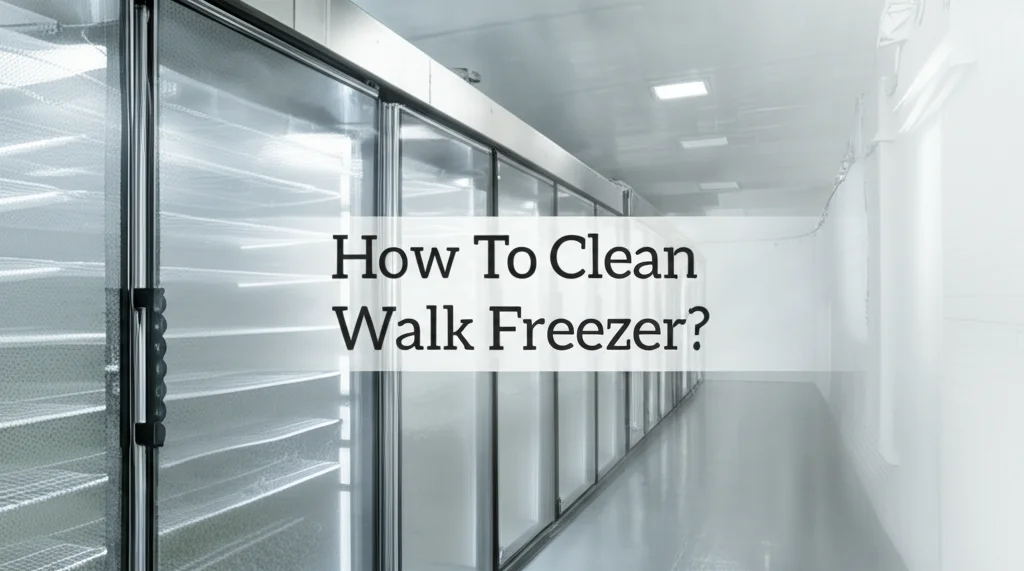
A Sparkling Clean Walk Freezer: Your Guide to Safety and Efficiency
Ever wonder how often you should really clean your walk-in freezer? It’s easy to overlook, but a clean walk-in freezer is crucial for food safety, preventing contamination, and maintaining optimal performance. A dirty freezer works harder, costing you money in energy bills. This article will walk you through a comprehensive guide on how to clean a walk-in freezer, ensuring a hygienic and efficient storage space. We’ll cover everything from preparation to detailed cleaning steps, and even preventative maintenance. Let’s get started and make your walk-in freezer a model of cleanliness!
Quick Answer: To clean a walk-in freezer, first turn it off and empty all contents. Remove shelves and drawers for separate cleaning. Wash surfaces with a mild detergent and warm water, rinse thoroughly, and sanitize. Finally, dry everything completely before restocking.
Takeaway:
- Regular cleaning prevents food contamination.
- Proper sanitation maintains food safety standards.
- A clean freezer operates more efficiently, saving energy.
Why Regular Walk Freezer Cleaning Matters
Maintaining a clean walk-in freezer isn’t just about appearances; it’s a vital part of food safety and operational efficiency. Foodborne illnesses can stem from contaminated surfaces, and a dirty freezer provides the perfect breeding ground for bacteria. Regular cleaning minimizes this risk, protecting your customers and your business. Beyond safety, ice buildup and debris force the freezer to work harder to maintain temperature, leading to increased energy consumption and potential equipment failure. A well-maintained freezer saves you money and extends its lifespan.
Preparing to Clean Your Walk-In Freezer
Before you start scrubbing, proper preparation is key to a smooth and effective cleaning process. First, schedule the cleaning during a slow period to minimize disruption. Next, turn off the walk-in freezer and allow the temperature to rise slightly – don’t completely thaw it, but enough to make cleaning easier. Remove all food items and store them in a temporary, refrigerated location to maintain their safety. Take out all removable parts like shelves, drawers, and floor mats. This allows for a more thorough cleaning of all surfaces.
Deep Cleaning the Interior Surfaces
Now for the main event: cleaning the interior of your walk-in freezer. Start by removing any loose debris, like ice chips or food particles, with a brush or vacuum. Next, prepare a cleaning solution of warm water and a mild detergent. Avoid harsh chemicals or abrasive cleaners, as these can damage the freezer’s interior. Using a clean cloth or sponge, wash all interior surfaces, including walls, ceilings, and floors. Pay special attention to areas prone to spills or buildup. Rinse thoroughly with clean water to remove any detergent residue.
Sanitizing for Food Safety
After cleaning, sanitizing is crucial to eliminate any remaining bacteria. A common sanitizing solution is a mixture of one tablespoon of bleach per gallon of water. Apply the solution to all interior surfaces, ensuring adequate contact time (usually 5-10 minutes). Allow the surfaces to air dry completely – do not wipe them down, as this can reintroduce contaminants. Proper sanitization is a non-negotiable step in maintaining food safety standards.
Cleaning Removable Parts: Shelves and Drawers
Don’t forget about the removable parts! Shelves and drawers often accumulate spills and debris, requiring dedicated cleaning. Wash these items in a sink with warm, soapy water. For stubborn stains, let them soak for a few minutes before scrubbing. Rinse thoroughly and sanitize using the same bleach solution as the interior surfaces. Ensure all parts are completely dry before returning them to the freezer. This prevents mold growth and maintains a hygienic storage environment.
Addressing the Freezer Door and Gaskets
The freezer door and its gaskets are often overlooked, but they play a critical role in maintaining temperature and preventing air leaks. Clean the door’s exterior with a mild detergent and warm water. Pay close attention to the handle, as it’s a high-touch area. For the gaskets, use a soft brush or cloth to remove any dirt or debris. Inspect the gaskets for damage, such as cracks or tears, and replace them if necessary. A properly sealed door is essential for energy efficiency and food preservation. You can find more information on maintaining appliances at https://www.beacleaner.com/how-to-clean-kitchen-mats/.
Maintaining a Clean Walk-In Freezer: Preventative Measures
Cleaning isn’t a one-time event; it’s an ongoing process. Implement these preventative measures to keep your walk-in freezer clean and efficient:
- Regularly check for spills and clean them immediately. Don’t let spills sit and harden, as they become much harder to remove.
- Use shelving liners to catch drips and spills. These liners are easy to remove and clean, protecting your shelves.
- Implement a FIFO (First In, First Out) system for food storage. This ensures older items are used first, reducing the risk of spoilage.
- Schedule regular deep cleanings (at least quarterly). Consistent cleaning prevents buildup and maintains optimal performance.
- Monitor the freezer’s temperature regularly. Ensure it’s maintaining the correct temperature for food safety.
- Consider using floor mats to trap dirt and debris. These mats can be easily removed and cleaned.
Frequently Asked Questions (FAQs)
Q: How often should I deep clean my walk-in freezer? A: You should deep clean your walk-in freezer at least quarterly, or more frequently if it experiences heavy use or spills. Regular cleaning prevents buildup and maintains food safety standards.
Q: Can I use harsh chemicals to clean my walk-in freezer? A: No, avoid harsh chemicals or abrasive cleaners, as they can damage the freezer’s interior surfaces. Stick to mild detergents and warm water.
Q: How long does it take to clean a walk-in freezer? A: The cleaning time varies depending on the size and condition of the freezer. A thorough cleaning can take anywhere from 2 to 6 hours.
Q: What’s the best way to remove ice buildup in my walk-in freezer? A: Avoid using sharp objects to chip away at ice, as this can damage the freezer. Instead, allow the freezer to warm up slightly and use a plastic scraper to remove the ice.
Q: Is it safe to use a steam cleaner in a walk-in freezer? A: While steam cleaning can be effective, it’s generally not recommended for walk-in freezers. The moisture can contribute to ice buildup and potentially damage electrical components. If you’re looking for a way to clean floors, you can check out https://www.beacleaner.com/how-to-clean-bathroom-floor-without-mop/.
Q: What should I do with the food while cleaning the freezer? A: Store all food items in a temporary, refrigerated location to maintain their safety. Ensure the temporary storage maintains the appropriate temperature for the food items.
Conclusion: A Clean Freezer is a Happy Freezer
Cleaning your walk-in freezer is an investment in food safety, energy efficiency, and the longevity of your equipment. By following these steps and implementing preventative measures, you can maintain a spotless and hygienic storage space. Remember, how to clean a walk-in freezer effectively is about more than just aesthetics – it’s about protecting your business and your customers. Schedule regular cleanings, stay proactive, and enjoy the peace of mind that comes with a well-maintained freezer. Don’t hesitate to seek professional cleaning services if you’re overwhelmed or need specialized assistance.