· Home Maintenance · 21 min read
How To Clean Windmill Ac Filter

Mastering Windmill AC Filter Cleaning for Better Air
Your Windmill AC unit works hard to keep your home comfortable. Over time, its filter collects dust, dirt, and allergens. A dirty filter blocks airflow and reduces efficiency. Knowing how to clean your Windmill AC filter is a simple step. This simple task ensures your unit runs well. It also keeps your indoor air clean and healthy.
This guide will show you how to clean your Windmill AC filter. We will cover why it matters, what tools you need, and a step-by-step cleaning process. You will learn about drying, reinstallation, and maintenance tips. By the end, you will feel confident keeping your Windmill AC in top shape. Get ready to enjoy fresher, cooler air.
Takeaway:
- Regularly clean your Windmill AC filter to improve air quality and unit efficiency.
- Unplug the unit before you start any cleaning.
- Use mild soap and lukewarm water for most filter types.
- Always let the filter dry completely before you put it back.
- Clean your filter every 2-4 weeks during heavy use.
To clean a Windmill AC filter, first unplug the unit for safety. Locate and remove the filter, typically a mesh screen behind the front panel. Rinse it under lukewarm water to remove loose debris, or vacuum gently. For stubborn dirt, use mild soap and water. Allow the filter to air dry completely before reinserting it into the AC unit.
Why Cleaning Your Windmill AC Filter Matters Greatly
A clean Windmill AC filter is very important for several reasons. It directly impacts your indoor air quality. It also affects the performance of your air conditioner. Many people do not realize how much a small filter does. I often tell my friends about the big difference it makes.
A dirty filter traps dust, pollen, pet dander, and other particles. When the filter gets full, these particles can re-enter your air. This means you breathe in more allergens. This is bad for anyone with allergies or asthma. Keeping the filter clean helps everyone breathe easier.
Beyond air quality, a clean filter helps your AC unit run better. A dirty filter blocks airflow. Your AC must work harder to pull air through it. This extra effort uses more electricity. It also puts more strain on the unit’s parts. This can lead to higher energy bills and a shorter AC lifespan.
Think about the money you can save. A clean filter allows air to flow freely. This helps your AC cool your room quickly and efficiently. You use less energy to reach your desired temperature. This saves you money on your electric bill each month. It also reduces wear on the unit itself.
A well-maintained filter also helps prevent more serious problems. A dirty filter can freeze coils. This reduces cooling and can damage your unit. It can also lead to mold growth inside the AC. Regular cleaning avoids these issues. It keeps your home comfortable and healthy.
Gathering Your Tools: What You Need to Clean Your Windmill AC Filter
Before you start cleaning your Windmill AC filter, gather your supplies. This makes the job easier. It also ensures you have everything you need. You likely have most of these items at home already. I always make sure I have my tools ready before I begin.
You do not need many special tools. A few basic household items will work well. The right tools help you do the job right. They also help you do it safely. This preparation step takes only a few minutes.
Here is a list of what you will need:
- Gloves: Disposable or reusable gloves protect your hands. AC filters can be quite dirty. They often hold dust, mold, and other allergens. Gloves keep your hands clean and safe from irritants.
- Vacuum Cleaner (with brush attachment): A vacuum is useful for initial dust removal. It can quickly pick up loose dirt. Use a soft brush attachment to avoid damage. This step is good for very dusty filters.
- Soft Brush or Cloth: A soft brush helps loosen stuck-on grime. A microfiber cloth works well for wiping surfaces. These are gentle on the filter material. You want to clean the filter, not damage it.
- Mild Dish Soap or All-Purpose Cleaner: Regular dish soap is usually fine. Choose one that is gentle and cuts grease. You can also use a mild all-purpose cleaner. Avoid harsh chemicals like bleach unless the manufacturer says it is okay. Harsh cleaners can damage the filter material or leave residue.
- Warm Water: Warm water helps loosen dirt and grime. It also helps rinse away soap residue. You can use a sink or a bathtub. Make sure the water is not too hot.
- Clean Towels or Drying Rack: You will need a way to dry the filter. Clean towels can absorb excess water. A drying rack allows air to circulate around the filter. This helps it dry completely.
Some Windmill AC models might have special filter types. Always check your user manual first. It will give specific cleaning instructions. The manual might suggest other tools or cleaning agents. Following the manual prevents damage. It also ensures proper maintenance.
Remember to keep your work area clean. Protect nearby surfaces from water drips. This makes cleanup easier. Having everything ready saves time. It also makes the cleaning process smooth.
Step-by-Step Guide: Safely Removing Your Windmill AC Filter
Removing your Windmill AC filter correctly is the first key step. Safety comes first. Always follow these instructions carefully. This ensures you do not harm yourself or the unit. I always double-check these steps before I start.
1. Power Down Your Windmill AC Unit
Before anything else, turn off your Windmill AC. Find the power button on the unit or its remote. Push it to turn the unit off. Do not just rely on the remote. Always take the next important safety step.
Unplug the AC unit from the wall outlet. This cuts all power to the unit. This is a critical safety measure. It prevents electric shock. It also stops the unit from accidentally turning on while you work. Never skip this step.
2. Locate the Filter Access Panel
Most Windmill AC units have a front panel. This panel usually covers the air intake area. The filter sits behind this panel. The exact location can vary by model. Look for latches or clips on the front of the unit.
Sometimes the access is on the side or top. Check your Windmill AC owner’s manual if you are unsure. The manual shows diagrams. It will pinpoint the filter’s exact location. It might also show specific removal steps.
3. Open the Access Panel
Carefully open the access panel. Some panels simply unclip and swing open. Others might slide off. Some might require a small screwdriver to release a screw. Be gentle as you open it. Do not force anything. Plastic parts can break easily.
Once open, you will see the filter. It often looks like a mesh screen. It might be white, gray, or black. You will likely see visible dust and debris on it. This confirms it is time for cleaning.
4. Gently Remove the Filter
The filter usually slides out of a slot. It might have small tabs or a frame. Pull or slide the filter straight out. Hold it by its edges to avoid touching the dirty surface too much. Be gentle.
Avoid bending or tearing the filter material. It is designed to be sturdy, but it can still be damaged. If you find multiple filters, remove each one carefully. Some units have a pre-filter and a main filter. Keep track of how they fit. This makes reinstallation easier later.
Place the removed filter on a clean surface. Do not let dust fall back into the AC unit. You are now ready to clean it. For deeper cleaning, you might also consider cleaning other parts of your AC unit like the coils. Learn how to clean coils on window ac unit.
Effective Cleaning Methods for Your Windmill AC Filter
Once you have the filter out, it is time to clean it. There are a few effective ways to clean your Windmill AC filter. The method you choose depends on how dirty the filter is. Always remember to be gentle with the filter material. I usually start with the simplest method and go from there.
1. Initial Dust Removal: Vacuuming
For filters with a lot of loose dust, start with a vacuum cleaner. Use a soft brush attachment on your vacuum. Gently run the attachment over both sides of the filter. This will pick up most of the surface dust. This step prevents a big mess when you rinse the filter. It also makes the water cleaning more effective.
Do not press too hard with the vacuum. You do not want to damage the filter mesh. This method is quick and easy. It is perfect for filters that are cleaned often. I find this quick vacuuming saves a lot of time.
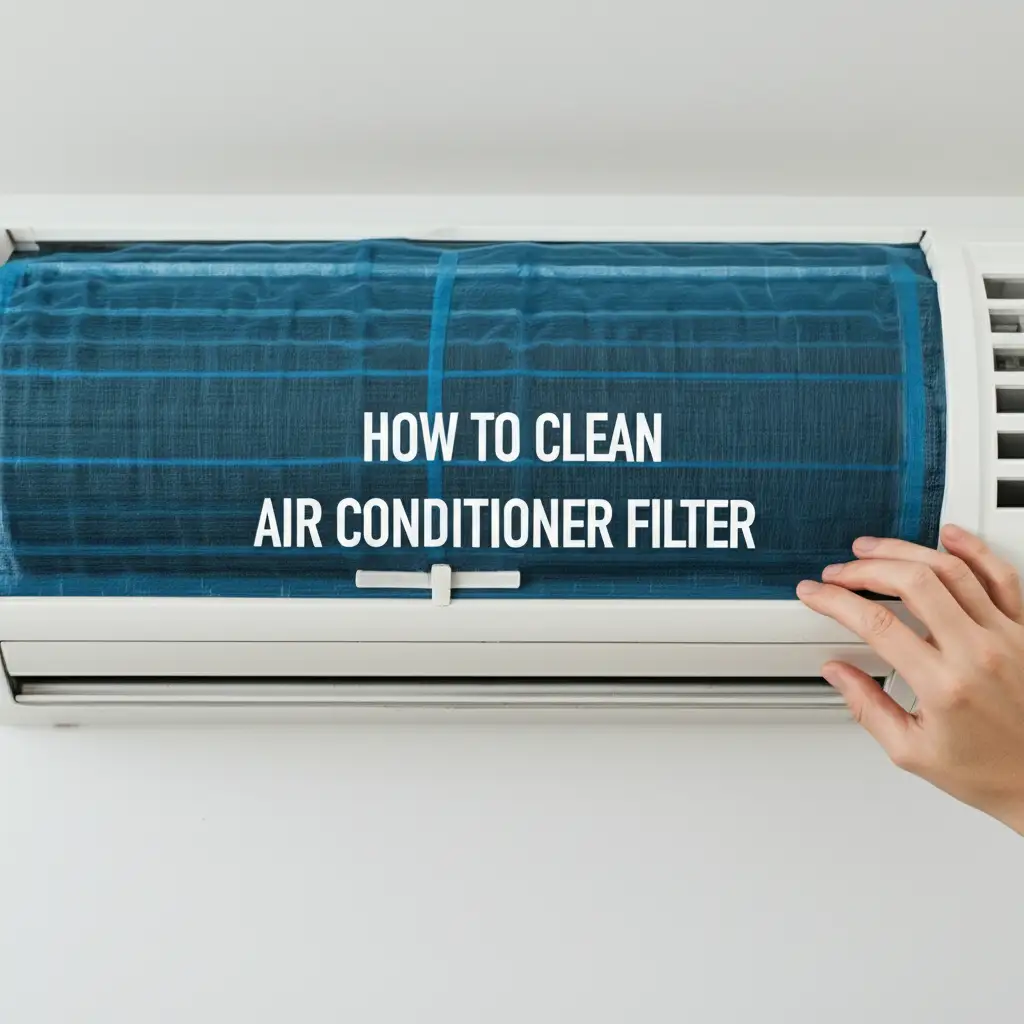
2. Rinsing with Water
Most Windmill AC filters are washable. Take the filter to a sink or a utility tub. Run lukewarm water over the filter. Start from the clean side and let the water flow through to the dirty side. This pushes the dirt out.
You will see the water turn cloudy with dust. Continue rinsing until the water runs clear. Use gentle water pressure. High pressure can damage the delicate filter mesh. This method works well for regularly maintained filters. It also helps remove most common airborne particles.
3. Deep Cleaning with Mild Soap
If your filter has stubborn grime, grease, or a lingering odor, use mild soap. Fill a basin with lukewarm water. Add a few drops of mild dish soap. Submerge the filter in the soapy water. Let it soak for 10-15 minutes. This helps loosen stuck-on dirt.
After soaking, gently scrub the filter with a soft brush or cloth. Work in small circular motions. Pay attention to heavily soiled areas. Once you finish scrubbing, rinse the filter thoroughly under clear lukewarm water. Make sure all soap residue is gone. Any soap left behind can attract more dirt. It can also create a film on the filter. If you see mold, special steps may be needed. You can learn how to clean mold from ac unit.
4. Handling Heavily Soiled Filters
For very heavily soiled filters, a slightly stronger approach might be needed. You can try a mix of white vinegar and water (50/50 ratio). This helps with odors and some mildew. Soak the filter in this solution for 30 minutes. Then rinse it completely with water. Always test a small area first to ensure no damage occurs.
Some filters, like carbon filters, are not washable. They are designed for replacement. Always check your Windmill AC manual. It tells you what type of filter you have. It also gives specific cleaning rules. If your AC is a window unit, these cleaning steps are very similar. You can find more information on how to clean window ac unit filter.
After cleaning, the most important step is drying. A wet filter can cause mold. It can also damage your AC unit. Do not rush this part.
Drying and Reinstallation: Ensuring Your Windmill AC Filter is Ready
Cleaning your Windmill AC filter is only half the job. Proper drying and reinstallation are just as important. A wet filter can cause mold growth inside your unit. It can also damage electrical components. Take your time with this step. I always make sure the filter is completely dry.
1. The Importance of Thorough Drying
Never put a wet or even damp filter back into your AC unit. Moisture trapped inside the unit creates a perfect breeding ground for mold and mildew. Mold spores can then spread through your home. This affects air quality and can cause health problems. A damp filter can also attract new dust and dirt more quickly.
It can also lead to rust on internal metal parts. This reduces the unit’s lifespan. Take extra precautions with your drying process. It helps maintain a healthy indoor environment. It also protects your AC unit.
2. Effective Drying Methods
After rinsing, gently shake off excess water from the filter. You can also pat it dry with a clean, lint-free towel. Do not rub too hard, as this can damage the mesh. The best way to dry the filter is by air.
Place the filter upright on a drying rack. You can also lean it against a wall. Make sure air can circulate around both sides. A well-ventilated area is ideal. Avoid direct sunlight as intense heat can warp some filter materials.
Drying time will vary. It depends on humidity and air circulation. It usually takes a few hours. In some cases, it can take overnight. Do not try to speed up the process with heat sources like hair dryers. High heat can melt or deform the filter. This makes it useless.
Wait until the filter is bone dry. Touch all parts of the filter to check for dampness. There should be no wet spots. This ensures no moisture enters your AC unit.
3. Reinstalling Your Windmill AC Filter
Once the filter is completely dry, you are ready to put it back. Refer to your owner’s manual if you are unsure. Remember the way you removed it. The filter typically slides back into its designated slot.
Ensure the filter is oriented correctly. There might be an “airflow” arrow on the filter. This arrow should point towards the AC unit’s fan. If there is no arrow, ensure the side that faced outwards during removal faces outwards during reinstallation. The filter should fit snugly. It should not be loose or wobbly.
Once the filter is in place, close the access panel. Make sure all latches or clips are secure. If you removed screws, put them back. Double-check that the panel is fully closed. This ensures proper airflow.
4. Restoring Power and Testing
Plug your Windmill AC unit back into the wall outlet. Turn the unit on. Listen for any unusual sounds. Check if the airflow feels strong and clean. You should notice an immediate improvement in cooling performance. The air should smell fresh.
If you clean your Windmill AC filter often, your unit will work better. This keeps your air clean. It also saves energy. This maintenance step is simple. It provides great benefits. You might also find it useful to learn how to clean your window ac unit without removing it.
Frequency and Best Practices for Windmill AC Filter Maintenance
Knowing how often to clean your Windmill AC filter is very important. Regular maintenance keeps your unit running well. It also maintains good air quality. I always advise people to set a cleaning schedule. This makes sure you do not forget this vital task.
How Often to Clean Your Windmill AC Filter
The general rule is to clean your Windmill AC filter every 2 to 4 weeks. This frequency works for most households. However, several factors can change this schedule. Consider these points:
- Usage: If your Windmill AC runs daily for many hours, clean the filter more often. Units in constant use gather dirt faster. During peak cooling seasons, I check my filter weekly.
- Pets: Homes with pets often have more pet hair and dander. These can quickly clog a filter. If you have furry friends, plan to clean your filter every 2 weeks. Sometimes even more often.
- Allergies: If anyone in your home has allergies or asthma, clean the filter more frequently. A clean filter removes more allergens from the air. This helps reduce symptoms. I know people who clean theirs every 10 days during allergy season.
- Air Quality: If you live in an area with high pollution or during wildfire season, your filter will get dirty faster. More outdoor dust and smoke will enter your home. You should check the filter more often.
- Construction/Renovation: Any home construction or renovation creates a lot of dust. This dust can quickly overwhelm an AC filter. Clean your filter right after any dusty project.
Even if your AC is not in heavy use, check the filter monthly. Dust settles even when the unit is off. A visual check can tell you a lot. If you see visible dirt, it is time to clean.
Signs Your Windmill AC Filter Needs Cleaning
Your Windmill AC unit might show signs it needs filter maintenance. Watch for these signals:
- Reduced Airflow: If the air coming from your AC feels weaker than usual, the filter might be blocked. A clogged filter restricts air movement.
- Higher Energy Bills: If your electricity bill goes up without changing your usage, a dirty filter could be the cause. The unit works harder and uses more power.
- Poor Cooling Performance: The room does not feel as cool as it should. The AC struggles to reach the set temperature. This is a common sign of poor airflow.
- Unpleasant Odors: A dirty filter can trap mold spores or mildew. When the AC runs, it can blow stale or musty odors into your room. This is a clear sign that cleaning is urgent.
- Visible Dirt: This is the most obvious sign. If you open the access panel and see a layer of dust, hair, or debris on the filter, it needs cleaning.
Best Practices for Ongoing Maintenance
- Mark Your Calendar: Set a reminder on your phone or calendar. This helps you remember to clean the filter regularly.
- Keep Spare Filters (if applicable): If your Windmill AC uses disposable filters, keep spares on hand. This makes replacements quick.
- Clean Surrounding Area: Wipe down the outside of your AC unit regularly. Dust on the exterior can also get pulled into the filter. For general air conditioner filter cleaning, these tips apply across many units. You can learn more about how to clean air conditioner filter.
- Professional Check: Even with regular filter cleaning, consider a professional AC check-up every few years. They can clean internal components you cannot reach.
By following these guidelines, you extend the life of your Windmill AC. You also ensure it runs efficiently. Most importantly, you enjoy cleaner, healthier air in your home.
Troubleshooting Common Windmill AC Filter Cleaning Issues
Sometimes, cleaning your Windmill AC filter might present challenges. You might encounter stubborn mold, persistent odors, or a damaged filter. Knowing how to handle these issues saves you time and effort. I have dealt with these problems myself. I can share what works.
Dealing with Mold on Your AC Filter
Mold is a common problem with AC units. It thrives in damp, dark places. If you find mold on your Windmill AC filter, do not panic. It needs careful handling. Mold can trigger allergies and respiratory issues.
- Isolation: First, put on gloves and a mask. Carefully remove the moldy filter. Place it directly into a sealed plastic bag. This prevents spores from spreading.
- Cleaning Solution: Mix a solution of one part white vinegar to one part water. White vinegar is a natural mold killer. It does not harm most filter materials. You can also use a dedicated mold cleaner designed for AC units. Avoid bleach on filters. Bleach can damage some materials. It can also create harmful fumes when mixed with other chemicals.
- Soaking and Scrubbing: Submerge the filter in the vinegar solution for 30 minutes to an hour. Use a soft brush to gently scrub away the mold. Focus on affected areas.
- Thorough Rinsing: Rinse the filter extensively under clear, running water. Ensure all traces of mold and cleaning solution are gone.
- Complete Drying: Dry the filter completely. This is crucial to prevent mold from returning. Place it in a well-ventilated area. Air dry it for several hours, or even overnight.
If mold is present on the filter, it is likely inside the unit too. You might need to clean the coils and drain pan inside your Windmill AC. For extensive mold issues, consider checking out our guide on how to clean mold from AC unit.
Addressing Persistent Odors After Cleaning
Even after cleaning, your Windmill AC might still have an odd smell. This often means the smell comes from another part of the unit.
- Musty Odor: A musty smell points to mold or mildew inside the unit. Check the drain pan for standing water. Check the evaporator coils for mold growth. These areas need cleaning.
- Chemical Odor: A chemical smell could mean refrigerant leaks. This is a serious issue. Call a professional HVAC technician immediately. Do not try to fix this yourself.
- Burning Smell: A burning smell is also serious. It could mean electrical problems or a motor issue. Turn off the unit and unplug it. Call a technician right away.
- Pet/Smoke Odor: If odors from pets or smoke cling to the filter material, a simple wash might not remove them. Try soaking the filter in a baking soda and water solution. Baking soda helps absorb odors. Rinse well afterward.
What to Do with a Damaged Filter
Sometimes, a filter might be damaged during removal or cleaning. It might have tears, holes, or bent frames.
- Minor Damage: Small tears might be fixable with strong, waterproof tape. Ensure the tape does not block airflow. This is a temporary fix.
- Significant Damage: If the filter has large tears, holes, or a broken frame, you must replace it. A damaged filter cannot properly trap particles. This allows dirt into your AC unit.
- Finding a Replacement: Check your Windmill AC manual for the exact filter size and type. You can usually find replacements online or at appliance stores. Use only the correct replacement filter. An incorrect filter can harm your unit.
Regular inspection prevents many of these issues. Catching problems early makes repairs easier. It also keeps your Windmill AC working efficiently.
Beyond the Filter: Other Windmill AC Maintenance Tips
Cleaning the filter is a big step, but it is just one part of AC maintenance. Taking care of other parts of your Windmill AC unit helps it last longer. It also ensures it runs efficiently. These extra steps are simple. They make a real difference. I try to do these regularly for my own units.
1. Cleaning the Coils
Your Windmill AC unit has two sets of coils: evaporator coils (inside) and condenser coils (outside). Both get dirty. Dirt on coils reduces the AC’s ability to cool. It makes the unit work harder.
- Evaporator Coils: These are behind the filter inside your unit. They get cold and collect moisture. Dust and mold can stick to them. Use a soft brush or a coil cleaner spray. You can find these at hardware stores. Gently clean the coils following product instructions. Make sure the unit is unplugged first.
- Condenser Coils: If your Windmill AC has an outdoor component or exposed coils, these also need cleaning. Leaves, dirt, and debris can stick to them. You can use a garden hose to gently spray them clean. Do not use high pressure. Always turn off the power to the outdoor unit first. For more detailed instructions, you can refer to our guide on how to clean coils on window ac unit.
2. Inspecting the Drain Pan and Drain Line
AC units produce condensation. This water collects in a drain pan. It then exits through a drain line.
- Check for Clogs: Over time, algae, mold, and sludge can build up in the drain pan and line. This causes water to back up. It can overflow and damage your floor or unit.
- Cleaning the Pan: If you can access it, wipe the drain pan clean. You can use a mixture of white vinegar and water.
- Clearing the Line: A clogged drain line can be tricky. Sometimes, a wet/dry vacuum can clear it. You can also pour a cup of distilled vinegar down the line to break up blockages. If you have a split AC, the drain pipe cleaning method is similar. Learn more on how to clean split ac drain pipe.
3. Cleaning the Exterior of the Unit
Dust and grime can build up on the outside casing of your Windmill AC.
- Wipe Down: Use a damp cloth to wipe down the exterior surfaces. This keeps the unit looking clean. It also prevents dirt from entering the unit’s internal parts.
- Clear Obstructions: Ensure no furniture, curtains, or plants block the airflow around the unit. Good airflow is essential for efficiency. This is especially true for window or portable units.
4. Checking Fan Blades and Blower Wheel
The fan blades and blower wheel move air through your AC. They can also accumulate dust and dirt.
- Visual Inspection: If you can safely access them (with the unit unplugged), check the fan blades and blower wheel.
- Gentle Cleaning: Use a soft brush or vacuum with a brush attachment to remove dust. Be very careful not to bend the blades. Dirty fan blades can reduce airflow and cause imbalance. This leads to noise.
By doing these extra maintenance steps, you ensure your Windmill AC works its best. It will cool your home more effectively. It will also use less energy. This saves you money. These steps protect your investment. They also provide cleaner air for your family.
FAQ Section
How often should I clean my Windmill AC filter?
You should clean your Windmill AC filter every 2 to 4 weeks during regular use. If you have pets, allergies, or live in a dusty area, clean it more often, perhaps every 10-14 days. Regular cleaning keeps the unit efficient and your air clean.
,
- Windmill AC
- AC filter cleaning
- air conditioner maintenance
- clean air
- home cooling
- HVAC care
- DIY cleaning