· Bathroom Care · 16 min read
How To Clean Acrylic Bathtub
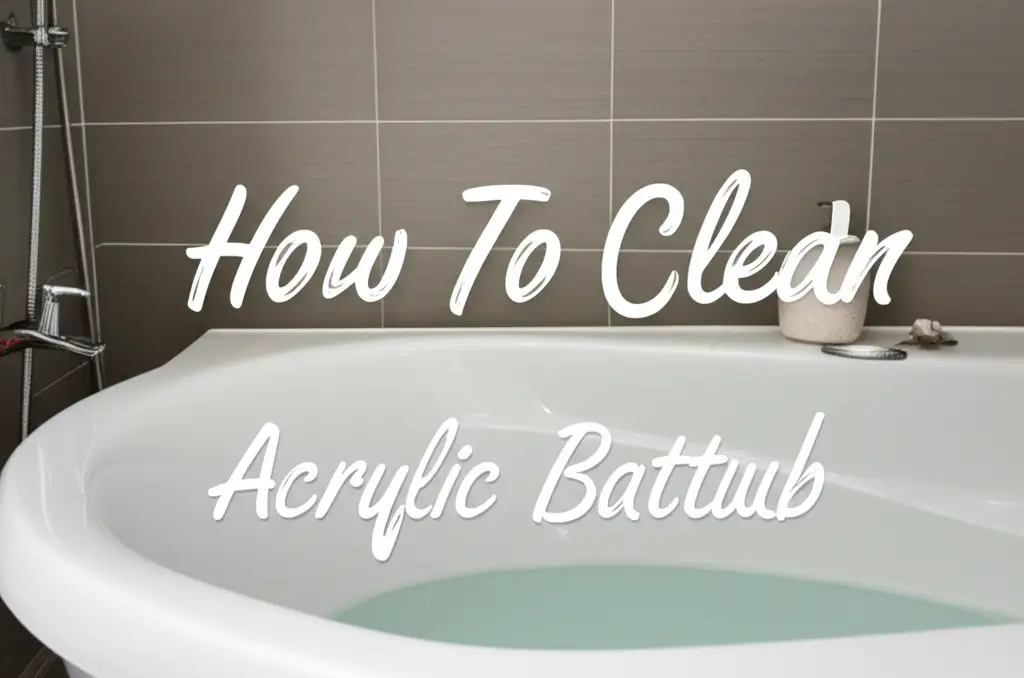
Clean Your Acrylic Bathtub: A Complete Guide
Acrylic bathtubs are a popular choice for many homes. They feel smooth, look sleek, and are lighter than traditional cast iron. However, these modern tubs need specific care to maintain their shine. Using the wrong products or techniques can quickly lead to scratches or dullness. My goal is to help you learn exactly how to clean acrylic bathtub surfaces without causing damage.
This article will guide you through the best methods for keeping your acrylic tub spotless. We will explore essential tools and safe cleaning agents. You will find step-by-step instructions for routine cleaning and tackle tough stains. We will also cover important tips for long-term maintenance and common mistakes to avoid. Get ready to transform your acrylic tub into a sparkling clean oasis.
Takeaway: Restore Your Acrylic Tub’s Sparkle
- Always use soft cloths or sponges; avoid abrasive scrubbers.
- Opt for mild, non-abrasive cleaners like dish soap, vinegar, or baking soda.
- Rinse your tub thoroughly after every cleaning session.
- Address stains quickly to prevent them from setting.
- Implement a regular cleaning schedule to maintain shine and prevent buildup.
To clean an acrylic bathtub, use soft cloths or sponges with non-abrasive cleaners. Mild dish soap, vinegar, or baking soda solutions work well for general cleaning. Always rinse thoroughly and avoid harsh chemicals or scrubbers to prevent scratching the surface.
Understanding Acrylic Tubs: Why Gentle Cleaning Matters
Acrylic bathtubs offer a sleek and modern look. This material is a type of plastic, molded into the familiar tub shape. Acrylic is known for being lightweight and warm to the touch. These features make it a comfortable and practical choice for many bathrooms.
Despite its benefits, acrylic has a softer surface than porcelain or cast iron. This means it can scratch easily. Abrasive cleaners or harsh scrubbing pads will leave marks. These scratches can then trap dirt and grime, making your tub look dull. Understanding this property is the first step in effective acrylic bathtub care. We want to clean without causing harm. Proper care ensures your tub keeps its shiny finish for years. It avoids the need for costly repairs or replacement.
Learning the right techniques protects your investment. You can keep your tub looking brand new. Many people struggle with keeping acrylic clean. They often use cleaners that are too harsh. This guide shows you the safe and effective ways. It focuses on gentle methods that deliver powerful results. Your acrylic tub deserves a gentle touch. This touch will preserve its beauty. You can extend the life of your tub with proper cleaning. You can also explore methods for how to clean acrylic without scratching surfaces. Many of these principles also apply to how to clean acrylic shower units. The key is always a non-abrasive approach.
Essential Tools and Safe Cleaning Agents for Your Acrylic Tub
Choosing the right tools and cleaning agents is crucial for acrylic bathtubs. You want to clean effectively without damaging the surface. I always recommend having a few key items on hand. These items will make your cleaning routine simple and safe. My personal favorites include soft cloths, sponges, and a spray bottle.
Soft cloths, such as microfiber towels, are excellent for wiping down surfaces. They absorb water and grime without leaving scratches. Sponges should be non-abrasive. Look for ones specifically designed for delicate surfaces. A spray bottle helps you apply cleaners evenly. This ensures full coverage and better results. It also lets you dilute stronger solutions.
When it comes to cleaning agents, natural and mild options are best.
- Dish Soap: Simple dish soap is a powerful degreaser. It cuts through body oils and light soap scum. Mix a few drops with warm water for a gentle, everyday cleaner.
- White Vinegar: This household staple is acidic. It dissolves hard water stains, mildew, and some soap scum. Create a 50/50 mixture with water in a spray bottle. Vinegar is also great for general bathroom cleaning, including how to clean shower with vinegar.
- Baking Soda: Baking soda is a mild abrasive and deodorizer. It works wonders on tougher stains. Make a paste with a little water for targeted stain removal. You can learn more about how to clean bathtub with baking soda for detailed steps.
- Specialized Acrylic Cleaners: Many brands offer cleaners specifically for acrylic. Read labels carefully. Ensure they are non-abrasive and safe for acrylic.
Avoid harsh chemical cleaners like acetone, ammonia-based products, or abrasive powders. These substances can dull or even melt the acrylic surface. Always test a new cleaner in an inconspicuous spot first. This helps ensure it will not cause any discoloration or damage.
Step-by-Step Guide to Daily and Weekly Acrylic Bathtub Cleaning
Keeping your acrylic bathtub clean does not have to be a big chore. Regular maintenance prevents grime buildup and stubborn stains. I follow a simple two-tier approach: a quick daily wipe-down and a more thorough weekly cleaning. This schedule keeps my tub sparkling with minimal effort. It also ensures I know exactly how to clean acrylic bathtub efficiently.
Daily Rinse and Wipe-Down
This quick step takes less than a minute. It is vital for preventing soap scum and hard water deposits.
- Rinse After Use: After showering or bathing, immediately rinse the entire tub. Use the showerhead or a cup to wash away soap residue and hair. Make sure water reaches all surfaces, including the sides.
- Wipe Dry: Grab a soft cloth, like a microfiber towel. Quickly wipe down the tub’s surface. This removes any lingering moisture. Drying prevents water spots and mineral buildup. This simple habit keeps your tub looking fresh daily. It reduces the need for heavy scrubbing later.
Weekly Deep Clean
A weekly cleaning session addresses minor buildup and keeps the tub disinfected.
- Clear the Tub: Remove all bath toys, bottles, and accessories from the tub. This gives you clear access to all surfaces.
- Rinse Thoroughly: Give the tub a good rinse with warm water. This helps loosen any surface dirt.
- Apply Cleaner:
- For general cleaning, I mix a few drops of mild dish soap into a spray bottle filled with warm water.
- For light hard water or soap scum, use a 50/50 white vinegar and water solution. Spray the entire surface of the tub. Let it sit for 5-10 minutes. This dwell time allows the cleaner to break down grime.
- Gentle Scrub: Use a soft sponge or cloth to gently scrub the tub’s surface. Focus on areas with visible grime. Do not use abrasive scrub pads or brushes. These will scratch the acrylic. Work in small sections, wiping away loosened dirt.
- Rinse Again: Rinse the tub completely with warm water. Ensure all cleaner residue is gone. Any leftover soap or vinegar can attract more dirt.
- Dry and Polish: Wipe the tub dry with a clean, soft cloth. For extra shine, you can buff the surface. This step leaves your tub gleaming. Following these steps helps maintain a pristine acrylic surface.
Tackling Common Stains: Soap Scum, Hard Water, and Mildew
Even with regular cleaning, some stains can appear in your acrylic tub. Soap scum, hard water deposits, and mildew are common culprits. Each type of stain requires a specific approach to remove it effectively and safely. Knowing how to clean acrylic bathtub for these specific issues makes a big difference.
Battling Soap Scum
Soap scum appears as a cloudy, greasy film. It builds up from the fats in soap and minerals in water.
- Vinegar Power: Fill a spray bottle with undiluted white vinegar. Spray a generous amount over the soap scum.
- Soak Time: Let the vinegar sit for 15-30 minutes. For tough buildup, you can let it sit longer.
- Gentle Wipe: Use a soft sponge or microfiber cloth to wipe away the scum. The vinegar helps break it down.
- Rinse: Rinse the tub thoroughly with water.
- Baking Soda Boost: For stubborn soap scum, make a paste with baking soda and a little water. Apply it to the affected area. Gently rub with a soft cloth. Then rinse well.
Removing Hard Water Stains
Hard water leaves behind mineral deposits, often seen as white or chalky spots. These are common in areas with high mineral content in water.
- Vinegar Soak: Saturate paper towels with white vinegar. Lay them directly over the hard water stains.
- Dwell Time: Let the vinegar-soaked towels sit for at least 30 minutes, or up to a few hours for severe stains.
- Scrub Gently: Remove the towels. Use a soft sponge or cloth to gently scrub the stains. The vinegar dissolves the mineral deposits.
- Rinse Clean: Rinse the tub completely. Ensure no vinegar residue remains.
- Lemon Juice Alternative: For light hard water stains, lemon juice can also work. Its acidity helps break down minerals. Apply, let sit, and rinse. This method is similar to how to clean bathtub without scrubbing as the acidic solution does most of the work.
Eliminating Mildew and Mold
Mildew often appears as black or pinkish spots in damp areas. It thrives in humid bathroom environments. It is important to tackle mildew quickly. This prevents it from spreading.
- Baking Soda Paste: Create a thick paste using baking soda and a small amount of water. Apply this paste directly to the mildew spots.
- Let it Work: Let the paste sit for 10-15 minutes. Baking soda helps absorb moisture and lift the mildew.
- Light Scrub: Gently scrub the area with a soft brush or sponge.
- Rinse Thoroughly: Rinse the tub to wash away the mildew and paste.
- Vinegar Spray: Follow up with a spray of undiluted white vinegar on the cleaned area. This acts as a natural disinfectant and helps prevent mildew regrowth. You can also explore strategies for how to clean mold in shower which are very similar.
- Bleach Caution (Use Only if Necessary): For very stubborn mildew, a highly diluted bleach solution (1 part bleach to 10 parts water) can be used. Apply with a cloth, let sit for a few minutes, then rinse immediately and thoroughly. Never mix bleach with vinegar. Ensure good ventilation. Only use bleach as a last resort on acrylic and always test first.
Always ensure the tub is completely dry after treating any stain. Proper ventilation helps prevent future mildew growth.
Deep Cleaning Your Acrylic Bathtub and Drain
A routine cleaning keeps your acrylic tub looking good, but sometimes it needs a deeper clean. Deep cleaning helps remove stubborn grime that builds up over time. It addresses areas often missed during daily or weekly washes. This includes the drain area and, if present, bathtub jets. Knowing how to clean acrylic bathtub thoroughly ensures a truly pristine result.
When to Deep Clean
I recommend a deep clean for your acrylic tub once a month or every few weeks. This frequency depends on how often the tub is used and how quickly dirt accumulates. You will know it is time when you notice a dullness that regular cleaning cannot fix. Stubborn rings, yellowing, or slow drains are also signs.
Comprehensive Deep Cleaning Steps
- Initial Rinse and Prep: Start by rinsing the entire tub with hot water. This warms the surface and helps loosen any initial grime. Remove all items from the tub.
- All-Purpose Acrylic Cleaner Application: Choose a non-abrasive, acrylic-safe cleaner. You can use a dedicated bathtub cleaner or make your own solution. My go-to is a mix of warm water, a generous amount of mild dish soap, and about a cup of white vinegar.
- Spray or pour the solution evenly over all surfaces of the tub.
- For extra cleaning power, you can sprinkle a layer of baking soda over the wet surface. The baking soda acts as a gentle scrubber and helps lift dirt.
- Dwell Time for Grime: Let the cleaning solution sit for 15-30 minutes. This allows the cleaner to penetrate and break down tough soap scum, hard water stains, and body oils.
- Systematic Scrubbing: Use a soft-bristled brush or a non-abrasive sponge. Systematically scrub the entire tub. Pay extra attention to the waterline, corners, and around fixtures. Work in small sections. Apply gentle pressure. Remember, acrylic scratches easily.
- Targeting Tough Spots:
- For very stubborn spots, make a paste of baking soda and a few drops of hydrogen peroxide. Apply it directly to the stain. Let it sit for 15 minutes. Then gently scrub and rinse.
- Yellowing in acrylic tubs can sometimes be brightened this way.
- Thorough Rinse: Rinse the tub completely with clean, warm water. Ensure all cleaner residue is washed away. Use a handheld showerhead if you have one for a complete rinse.
- Dry and Polish: Wipe the tub dry with a clean microfiber cloth. This prevents new water spots and boosts the shine. For a professional gleam, you can use a small amount of car wax designed for clear coats. Apply it sparingly and buff it off. This creates a protective layer.
Cleaning the Bathtub Drain
The drain often accumulates hair, soap, and grime, leading to slow drainage. This is a crucial part of deep cleaning. You can learn more about how to clean bathtub drain effectively.
- Remove Drain Cover: If possible, remove the drain cover. This allows better access.
- Clear Debris: Use needle-nose pliers or a drain snake tool to remove any hair or large debris.
- Baking Soda and Vinegar: Pour 1/2 cup of baking soda down the drain. Follow it with 1/2 cup of white vinegar.
- Fizz and Wait: Cover the drain. Let the mixture fizz for 15-30 minutes. This reaction helps break down grease and grime.
- Hot Water Flush: Flush the drain with a kettle of hot (but not boiling) water. Boiling water can warp acrylic.
- Repeat if Necessary: For very stubborn clogs, you may need to repeat the process.
Cleaning Bathtub Jets (If Applicable)
If your acrylic tub has jets, they need special attention. They can harbor biofilm and grime. You can find detailed steps on how to clean bathtub jets for comprehensive care.
- Fill Tub: Fill the tub with hot water. The water level should be a few inches above the highest jets.
- Add Cleaner: Add 1/2 cup of dishwasher detergent and 2 cups of white vinegar to the water. Some people use bleach, but vinegar is safer for acrylic and plumbing.
- Run Jets: Turn on the jets for 15-20 minutes. This circulates the cleaning solution through the system.
- Drain and Rinse: Drain the tub. Refill with clean, cool water. Run the jets again for 5-10 minutes to rinse the system thoroughly.
- Wipe Down: Wipe the jet nozzles and tub interior with a clean cloth.
By incorporating these deep cleaning steps, you ensure every part of your acrylic bathtub is hygienic and sparkling.
Preventing Damage and Maintaining Your Acrylic Tub’s Luster
Keeping your acrylic bathtub in top condition involves more than just cleaning. Prevention is key to maintaining its beautiful luster and preventing damage. A few simple habits can extend the life and beauty of your tub significantly. I always make sure to follow these tips to protect my own acrylic surfaces. This makes the answer to how to clean acrylic bathtub much easier in the long run.
Rinse After Every Use
This is the most fundamental step. After every shower or bath, take a minute to rinse the tub thoroughly. Use the showerhead or a pitcher to wash away all soap, shampoo, and body oil residues. These residues are what lead to soap scum and dullness over time. Immediate rinsing prevents buildup from hardening.
Dry the Tub Regularly
After rinsing, wipe down the tub’s surface with a soft towel or squeegee. Drying prevents water spots and mineral deposits, especially in areas with hard water. Moisture also encourages mold and mildew growth. A dry surface stays cleaner longer. This simple act reduces the frequency of deep cleaning sessions.
Use Soft Bath Mats
If you use a bath mat for safety, choose one with a smooth, non-abrasive backing. Mats with suction cups can sometimes trap moisture. This leads to discoloration or mildew underneath. Ensure you lift and dry the mat after each use. Store it outside the tub to allow the tub surface to air dry completely.
Protect Against Scratches
- Avoid Abrasive Tools: Never use steel wool, rough brushes, or abrasive sponges on acrylic. These will scratch the surface. Always opt for soft cloths or non-abrasive scrubbing pads.
- Be Mindful of Products: Do not place heavy, rough, or sharp objects directly on the tub surface. Heavy shampoo bottles or metal razors can cause chips or scratches. Consider using a shower caddy or shelf for these items.
- Test New Products: If trying a new cleaner, always test it on an inconspicuous area first. This ensures it does not cause discoloration or damage the acrylic finish.
Address Stains Promptly
Do not let stains sit. The longer a stain remains, the harder it is to remove. If you spill something colored, like hair dye or bath bomb residue, clean it up immediately. Quick action prevents the stain from setting into the acrylic. This makes cleaning much easier later.
Polish for Extra Shine
For an extra boost of shine and protection, you can periodically polish your acrylic tub. Use a car wax designed for clear coats or a specific acrylic polish. Apply a thin layer with a soft cloth. Buff it gently until it shines. This creates a protective barrier. It also makes future cleaning simpler. This step is usually done once or twice a year.
By adopting these preventative measures, you minimize damage. You also maximize the natural beauty of your acrylic bathtub. It stays sparkling clean with less effort.
What to Strictly Avoid When Cleaning an Acrylic Bathtub
While knowing how to clean acrylic bathtub surfaces effectively is important, understanding what not to use is equally critical. Acrylic is a durable material, but it is also susceptible to certain types of damage. Using the wrong cleaners or tools can lead to permanent dullness, discoloration, or even structural damage. I emphasize avoiding these items to protect your investment.
Harsh Abrasive Cleaners
- Scouring Powders: Products like Comet or Ajax contain abrasive particles. These particles will create tiny scratches on the smooth acrylic surface. Over time, these scratches accumulate. They make the tub look dull and prone to trapping dirt.
- Abrasive Pastes or Creams: Even some “soft scrub” cleaners can be too harsh for acrylic. Always check the label. Ensure it says “safe for acrylic” or “non-abrasive.”
- Steel Wool or Rough Brushes: Never use scrubbing pads made of steel wool, copper, or any rough-textured material. Likewise, stiff-bristled brushes will scratch acrylic. Stick to soft cloths, sponges, or acrylic-safe brushes.
Strong Chemical Solvents
- Acetone or Nail Polish Remover: These products contain solvents that can dissolve or soften acrylic. Even a small spill can cause permanent damage, leaving a milky, warped, or sticky residue.
- Ammonia-Based Cleaners: Ammonia can strip the protective finish off acrylic. It can also cause discoloration or cloudiness. Check the ingredient list of glass cleaners or all-purpose cleaners. Many contain ammonia.
- Bleach (Undiluted or Frequent Use): While highly diluted bleach can be used as a last resort for severe mold, frequent or undiluted use can cause yellowing and degrade the acrylic over time. Always dilute bleach heavily and rinse thoroughly if you must use it. Never mix bleach with other cleaners like vinegar, as this creates dangerous fumes.
- Strong Drain Cleaners: Caustic drain cleaners that contain lye or sulfuric acid can damage acrylic if left in contact with the surface. These chemicals are designed to eat through organic matter, and they can also eat through your tub’s finish. For clogs, opt for enzymatic drain cleaners or a drain snake.
Unsuitable Cleaning Techniques
- **Hot Boiling Water
- acrylic bathtub
- bathtub cleaning
- stain removal