· HVAC Maintenance · 21 min read
How To Clean Hvac Unit
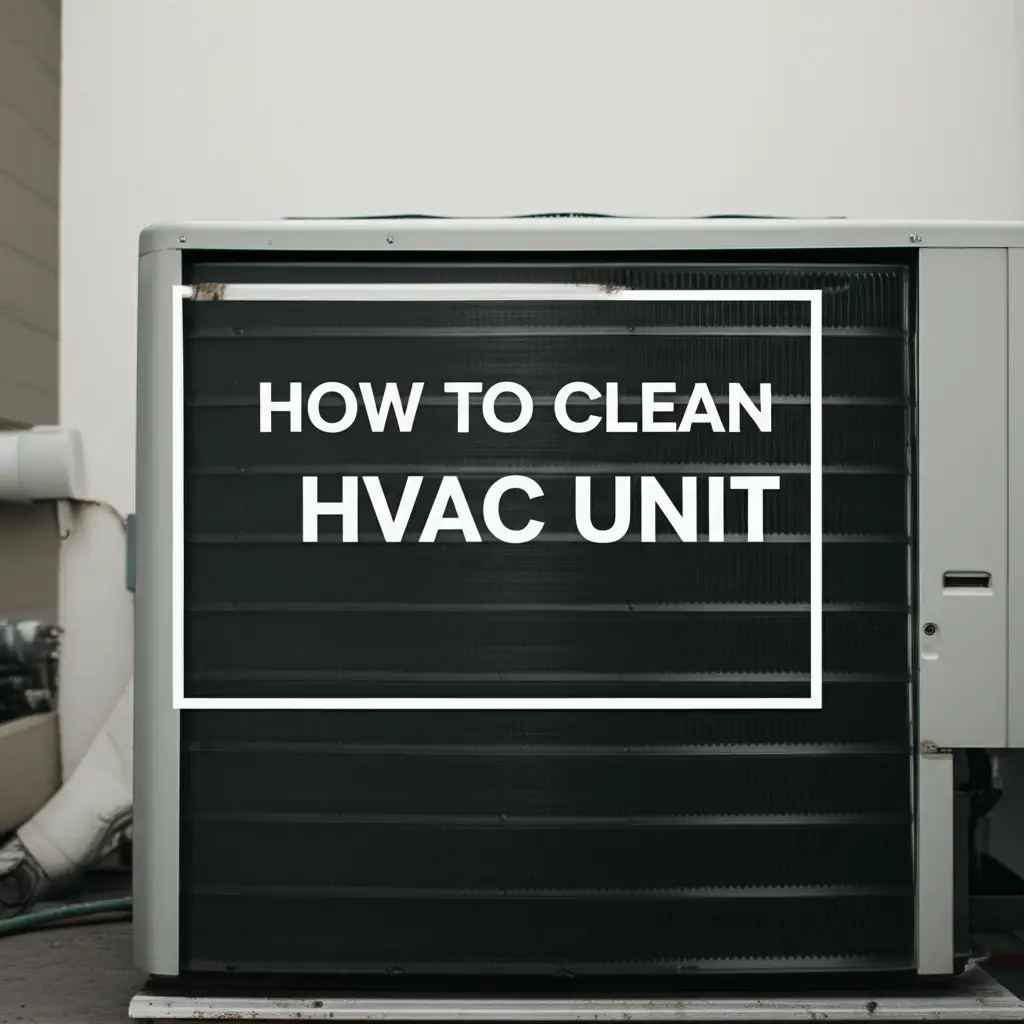
Optimize Your Home: How To Clean HVAC Unit for Peak Performance
Your home’s heating, ventilation, and air conditioning (HVAC) unit works hard all year. It keeps your family warm in winter and cool in summer. Over time, dust, dirt, and debris build up inside the system. This buildup reduces efficiency and affects the air you breathe. Knowing how to clean your HVAC unit is important. Regular cleaning improves air quality, lowers energy bills, and extends the life of your equipment. This guide provides clear, step-by-step instructions. We cover essential tools and safety tips. You will learn how to clean both indoor and outdoor components. Get ready to make your home more comfortable and save money.
Takeaway
Keeping your HVAC unit clean is vital for home comfort and efficiency.
- Regular cleaning prevents dirt buildup.
- A clean system lowers energy consumption.
- It improves indoor air quality.
- You extend the lifespan of your HVAC unit.
- Safety is important before you start any cleaning.
Main Query Answer
To clean your HVAC unit, you must first turn off power. Then, clean the air filter, indoor coils, drain pan, and outdoor condenser coils. Ensure the drain line is clear and remove debris from around the outdoor unit.
Why HVAC Cleaning Is Essential for Your Home
Cleaning your HVAC unit is not just about keeping things tidy. It directly impacts your health and your wallet. A dirty HVAC system works harder than it should. This leads to higher energy bills. It also wears out components faster. I know I want my money to go further. This is why I always make time for this maintenance.
Dirty HVAC systems can also spread dust, allergens, and mold spores throughout your home. This makes the air quality poor. Poor air quality can trigger allergies or respiratory issues. Regular cleaning helps remove these harmful particles. It ensures you breathe cleaner air. You want a healthy environment for your family. A clean HVAC system helps achieve this goal.
Think of your HVAC unit as the lungs of your home. If your lungs are dirty, they cannot work well. The same is true for your HVAC system. A clean system runs more efficiently. It cools and heats your home better. It also lasts longer. This saves you money on costly repairs or early replacement. You are protecting your investment in your home.
Many people overlook HVAC maintenance. They wait until there is a problem. Preventative cleaning can stop problems before they start. It identifies small issues before they become big, expensive ones. Cleaning your HVAC unit regularly means fewer breakdowns. It provides consistent comfort. You will notice the difference in your energy bills. You will also feel it in the air you breathe.
Gather Your Tools and Prioritize Safety First
Before you start any cleaning, gather all necessary tools. Having everything ready makes the job easier and faster. Safety is the most important step. Always turn off the power to your HVAC unit before you touch anything. Find the circuit breaker for your unit. Turn it off completely. This prevents accidental startup. It protects you from electrical shock. Never skip this critical step.
You will need a few basic cleaning supplies. A vacuum cleaner with a hose attachment is essential. You will use it to remove dust and debris. A soft brush works well for coils. You also need a fin comb. This tool straightens bent fins on the condenser unit. A spray bottle filled with a gentle coil cleaner or mild detergent solution is also helpful. Always read product labels for instructions.
Wear appropriate safety gear. Gloves protect your hands from dirt and cleaning solutions. A dust mask or respirator prevents you from inhaling dust and mold spores. Safety glasses protect your eyes from debris. Cleaning HVAC units can be a dirty job. Protection makes it safer and more comfortable. I always put on my gloves first.
Check your HVAC unit’s manual for specific instructions. Some units have unique parts or cleaning recommendations. The manual provides details for your model. It often includes diagrams. This helps you locate different components. Understanding your specific unit is key to effective cleaning. This preparation makes the cleaning process smooth. It helps ensure your safety throughout the task.
Essential Tools for HVAC Cleaning:
- Screwdriver set: To open access panels.
- Vacuum cleaner with hose attachments: For dust and debris removal.
- Soft brush: To clean coils gently.
- Fin comb: To straighten bent condenser fins.
- Coil cleaner (specific for HVAC): Helps dissolve grime on coils.
- Spray bottle: For applying cleaning solutions.
- Bucket and wet/dry vac: For cleaning drain pans and lines.
- Garden hose with spray nozzle: For outdoor unit cleaning.
Safety Precautions:
- Turn off power: Locate the main circuit breaker for the HVAC unit and shut it off. Confirm power is off before proceeding.
- Wear protective gear: Use gloves, a dust mask, and safety glasses.
- Read manual: Refer to your HVAC unit’s owner’s manual for model-specific instructions.
- Work carefully: Avoid touching sharp edges on coils or metal components.
Cleaning the Indoor Unit: Air Handler and Furnace
The indoor unit, often called the air handler or furnace, houses key components. This includes the evaporator coil, blower motor, and drain pan. Cleaning these parts improves efficiency. It also prevents mold growth. First, confirm the power is off at the thermostat and the circuit breaker. Remove the access panel from your indoor unit. Use a screwdriver if needed.
Locate the evaporator coil. This coil gets very cold to cool your home’s air. Over time, dust and dirt stick to its surface. Use a soft brush to gently remove loose debris from the coil fins. Then, use a vacuum cleaner with a brush attachment. Carefully vacuum the coil surface. For stubborn dirt, use a coil cleaner. Spray the cleaner on the coil. Let it sit according to product directions. The cleaner often drips into the drain pan. This is normal. Cleaning your AC unit inside helps its function greatly.
Next, find the blower motor and fan. These components move air throughout your home. Dust accumulates heavily on the fan blades. Use your vacuum cleaner with a brush attachment. Carefully clean each blade. You can also use a soft cloth to wipe them down. Be gentle. Do not bend the blades. A clean blower moves air more efficiently. This reduces strain on the motor.
Inspect the drain pan located under the evaporator coil. This pan collects condensation. It can become a breeding ground for mold and algae. If you see standing water or slime, clean it. Use a wet/dry vacuum to remove any water. Wipe the pan clean with a cloth soaked in a mild bleach solution (1 part bleach to 16 parts water). This kills mold. Flush the pan with clean water afterwards. Ensure the water drains properly. Cleaning mold from an AC unit is important for air quality. This comprehensive cleaning keeps your indoor unit running well. It provides clean air for your home.
Step-by-Step Indoor Unit Cleaning:
- Turn off power: Shut off the HVAC unit at the thermostat and the main circuit breaker.
- Access indoor unit: Remove the access panel on your furnace or air handler.
- Clean evaporator coil:
- Gently brush off loose dust from the coil fins with a soft brush.
- Vacuum the coil surface with a brush attachment.
- Apply a specialized coil cleaner spray, following manufacturer instructions. Let it drip into the drain pan.
- Clean blower motor and fan:
- Locate the blower assembly.
- Use a vacuum and brush attachment to clean dust from the blower fan blades.
- Wipe down blades with a soft, damp cloth if needed. Avoid bending blades.
- Clean drain pan:
- Inspect the drain pan for standing water, slime, or mold.
- Remove standing water using a wet/dry vacuum or towels.
- Clean the pan with a cloth and a mixture of mild detergent and water, or a dilute bleach solution (1:16 bleach to water).
- Rinse the pan with clean water.
Cleaning the Outdoor Unit: Condenser Coils and Fins
The outdoor unit, or condenser, also needs regular cleaning. It houses the condenser coil, fan, and compressor. This part sheds heat from your home to the outside air. Dirt, leaves, grass clippings, and debris can clog its coils. This reduces the unit’s ability to release heat. It makes your system less efficient. I make sure to clean mine at least once a year.
First, turn off power to the outdoor unit. This means finding the disconnect switch near the unit and flipping it off. It often looks like a box attached to your house. Use a broom or your hands to clear away large debris. Remove leaves, grass, and trash from around the unit. Ensure there is at least two feet of clear space around all sides. This allows for proper airflow.
Next, clean the condenser coils. These are the metal fins that wrap around the unit. Use a garden hose with a spray nozzle. Spray water from the inside of the coil outward. This pushes dirt out. Avoid spraying directly into the electrical components. For stubborn dirt, apply a coil cleaner. Follow the product instructions. Let it sit, then rinse thoroughly. You can also clean the outside AC unit with a water hose.
Inspect the condenser fins. They can become bent or flattened. This restricts airflow. Use a fin comb to carefully straighten any bent fins. Gently slide the comb through the fins. Do not apply too much pressure. Bent fins can reduce efficiency significantly. Finally, check the fan blades inside the unit. If accessible and safe, wipe them clean with a cloth. Always ensure the power is off before touching any internal parts. Cleaning your outside AC unit completes the outdoor maintenance. This care ensures your HVAC system works effectively.
Outdoor Unit Cleaning Steps:
- Turn off power: Locate the outdoor disconnect switch near the unit and turn it off.
- Clear surrounding area: Remove any leaves, grass clippings, weeds, or debris within a two-foot radius around the unit.
- Remove outer cover/grille: Unscrew and carefully lift off the protective grille or cover to expose the coils.
- Clean condenser coils:
- Use a garden hose to spray water through the coil fins from the inside out. This pushes dirt away.
- Apply a specialized coil cleaner if coils are very dirty. Follow the product’s dwell time and rinse thoroughly.
- Avoid spraying water directly into the electrical box or fan motor.
- Straighten fins: Use a fin comb to carefully straighten any bent aluminum fins.
- Clean fan blades: If accessible and safe, wipe down the fan blades inside the unit with a damp cloth.
- Reassemble: Replace the outer cover/grille.
Maintaining the HVAC Drain Line and Pan
The condensate drain line is a vital part of your HVAC system. It carries water away from the indoor unit’s drain pan. This water is condensation from the cooling process. If the drain line gets clogged, water can back up into the drain pan. This leads to overflows. It can cause water damage. It also creates a perfect environment for mold and mildew. I had a clogged drain line once, and it caused a terrible mess.
Regularly check the drain pan and line. Look for standing water or slimy buildup. You can usually find the drain line as a PVC pipe extending from your indoor unit. It often runs outdoors or connects to a plumbing drain. To prevent clogs, flush the line. Pour one cup of distilled vinegar down the drain line access point. This access point is often a T-shaped vent with a cap.
The vinegar helps kill algae and mold. It breaks down minor clogs. Let the vinegar sit for about 30 minutes. Then, flush it with a cup of plain water. This pushes the vinegar and any loosened debris through the line. You can repeat this process every few months. This keeps the line clear. It prevents future clogs.
If the line is already severely clogged, you may need to use a wet/dry vacuum. Attach the vacuum to the end of the drain line outdoors. Seal the connection tightly with tape or a rag. Turn on the vacuum. This creates suction. It can pull out the clog. Be careful when doing this. Cleaning your HVAC drain line is a crucial step. It prevents water damage. It also maintains good indoor air quality. This simple maintenance step protects your home from costly issues.
Drain Line and Pan Cleaning Steps:
- Locate drain pan and line: Find the drain pan under the indoor evaporator coil and follow the PVC drain line.
- Inspect for clogs: Look for standing water in the pan or visible blockages in the line access point.
- Clear immediate blockages: If the pan has standing water, use a wet/dry vac to remove it.
- Flush with vinegar:
- Locate the drain line’s access point (often a T-shaped PVC cap). Remove the cap.
- Pour one cup of distilled white vinegar into the drain line.
- Let the vinegar sit for 30 minutes to kill mold and algae.
- Follow with one cup of clean water to flush the line.
- Address severe clogs (if necessary):
- Attach a wet/dry vacuum to the outdoor end of the drain line.
- Ensure a tight seal around the connection using tape or a rag.
- Turn on the vacuum for a few minutes to suck out the clog.
- Replace cap: Put the access cap back on the drain line.
Air Filters and Ductwork: Keeping Air Flowing Freely
Your HVAC air filter is the first line of defense. It traps dust, pollen, pet dander, and other airborne particles. A dirty filter restricts airflow. This makes your HVAC system work harder. It reduces efficiency. It also pushes dirty air back into your home. I always check my filter once a month. This small step makes a big difference.
You should change or clean your HVAC air filter regularly. How often depends on factors like:
- Pet ownership: More pets mean more fur and dander.
- Allergies: People with allergies benefit from more frequent changes.
- Air quality: Living in a dusty area requires more frequent changes.
- Filter type: Some filters are washable, others are disposable.
Disposable filters need replacement every 1-3 months. Check your filter’s packaging for specific recommendations. To change it, locate the filter slot in your air handler or return air vent. Note the arrow indicating airflow direction. Slide out the old filter. Insert a new, clean filter. Make sure the arrow points in the direction of airflow towards the unit.
For washable filters, remove it and rinse it thoroughly with water. Use a mild detergent if needed. Allow the filter to dry completely before reinserting it. A damp filter can promote mold growth. Never run your HVAC unit without a filter. This allows dirt and debris to enter the system. It can damage coils and other components.
Ductwork cleaning is a more complex task. Ducts carry air from your HVAC unit to different rooms. Over time, dust, allergens, and even pests can accumulate inside. While DIY duct cleaning is possible for minor surface dust near vents, deep cleaning requires professional tools. For a thorough duct cleaning, I recommend calling a certified HVAC technician. They have specialized equipment to reach all parts of your duct system. This ensures truly clean air throughout your home. Regular filter changes reduce the need for frequent duct cleaning. They protect your family’s health.
Air Filter Maintenance:
- Check monthly: Inspect your air filter every month.
- Replace disposable filters: Change disposable filters every 1-3 months, or more often if you have pets or allergies.
- Clean washable filters: If you have a washable filter, rinse it with water and mild detergent. Let it dry completely before reinstallation.
- Correct installation: Ensure the new or cleaned filter is installed with the airflow arrow pointing towards the HVAC unit.
Ductwork Considerations:
- Professional cleaning: For deep ductwork cleaning, hire a certified HVAC professional. They use specialized equipment for thorough cleaning.
- Surface cleaning: You can vacuum visible dust from return air vents.
Common HVAC Problems and Troubleshooting Tips
Even with regular cleaning, HVAC units can sometimes face issues. Knowing some common problems helps you identify when to call a professional. One frequent problem is inadequate cooling or heating. This often points to restricted airflow or refrigerant issues. A dirty filter is a common cause of restricted airflow. I always check the filter first.
Another common issue is strange noises coming from the unit. Hissing sounds might indicate a refrigerant leak. Grinding or squealing noises often suggest a problem with the motor bearings. Clicking sounds before startup could mean an electrical issue. Any unusual noise should prompt an investigation. Do not ignore strange sounds. They often signal a developing problem.
Water leaks can also occur. This is usually due to a clogged condensate drain line or a cracked drain pan. We discussed cleaning the drain line earlier. If the pan itself is cracked, it requires replacement. Water leaks can cause significant damage. Address them quickly. Look for puddles around the indoor unit or water stains on ceilings.
Electrical problems can shut down your unit. Check the circuit breaker if your unit stops working. A tripped breaker is a simple fix. If it trips repeatedly, there is a deeper electrical problem. Do not try to fix complex electrical issues yourself. It is dangerous. Always call a qualified electrician or HVAC technician.
Understanding these common problems helps you troubleshoot effectively. It also helps you decide when it is time to call for help. Sometimes, a simple cleaning is all that is needed. Other times, a professional is required. Being informed saves you time and money. It also keeps your HVAC system running smoothly.
Troubleshooting HVAC Issues:
- Poor cooling/heating:
- Check air filter: A dirty filter is the most common cause. Replace or clean it.
- Inspect outdoor unit: Ensure it is free of debris and coils are clean.
- Thermostat settings: Verify the thermostat is set correctly.
- Strange noises:
- Hissing: May indicate a refrigerant leak. Call a professional.
- Grinding/Squealing: Could be worn motor bearings. Call a professional.
- Clicking: Can be an electrical issue. Check breaker, then call a pro.
- Water leaks:
- Check drain line: Ensure the condensate drain line is clear and not clogged.
- Inspect drain pan: Look for cracks or damage.
- Clear ice on coils: If coils are freezing, call a professional.
- Unit not turning on:
- Check circuit breaker: Reset the breaker if it has tripped.
- Thermostat battery: Replace batteries if the thermostat is digital.
- Disconnect switch: Ensure the outdoor unit’s disconnect switch is on.
When to Call a Professional HVAC Technician
While many HVAC cleaning and maintenance tasks are DIY-friendly, some jobs require a professional. Knowing when to call a technician ensures your safety. It also protects your expensive equipment. I clean my own unit regularly. But I also know when to get help. This balance saves me money and prevents big problems.
You should call a professional if you suspect a refrigerant leak. Refrigerant is a chemical that helps cool your home. It can be harmful if not handled properly. Signs of a leak include:
- Hissing sounds from the unit.
- Ice buildup on the evaporator coil.
- Your unit runs constantly but does not cool well.
- Increased energy bills without a change in usage.
Only certified technicians can handle refrigerant safely. They have the right tools and training. They can detect leaks. They can repair them and recharge the system. Do not attempt to add refrigerant yourself. It is dangerous and illegal without proper certification.
Complex electrical issues also require professional help. If your circuit breaker repeatedly trips, there is an underlying electrical fault. This needs diagnosis by a qualified electrician or HVAC technician. Tampering with electrical components without expertise can lead to serious injury or further damage. It is simply not worth the risk.
Major component failures, such as a broken compressor or blower motor, also need a pro. These parts are expensive and complex to replace. A technician can diagnose the exact problem. They can order the correct parts. They install them safely and correctly. This ensures your system works as intended.
Annual professional tune-ups are also highly recommended. Technicians perform comprehensive checks. They clean parts you cannot easily reach. They calibrate thermostats and check electrical connections. They can identify wear and tear before it causes a breakdown. This preventative service extends your HVAC unit’s life. It ensures peak performance. It often pays for itself in energy savings and avoided repairs.
When to Contact a Professional:
- Refrigerant leaks: If you hear hissing or see ice on coils.
- Persistent electrical problems: If the breaker repeatedly trips.
- Major component failure: Compressor or blower motor issues.
- No cooling/heating after DIY checks: When basic troubleshooting does not fix the issue.
- Strange, persistent noises: Grinding, squealing, or persistent banging sounds.
- Annual tune-up: For a thorough inspection, cleaning of internal parts, and performance check.
Maximizing HVAC Efficiency and Longevity
Regular HVAC cleaning is a cornerstone of efficiency. It also prolongs your system’s life. But there are other steps you can take. These steps further boost performance. They help you save even more on energy costs. I always try to squeeze out every bit of efficiency. It is good for my wallet and the planet.
Consider upgrading your air filter. High-efficiency particulate air (HEPA) filters capture smaller particles. They offer better indoor air quality. However, some HEPA filters restrict airflow more. Ensure your HVAC system can handle a higher MERV rating filter. Check your system’s specifications or consult a technician. A filter too restrictive can strain your blower motor.
Invest in a smart thermostat. These thermostats learn your habits. They optimize temperature settings. Some models allow remote control via your smartphone. You can adjust temperatures from anywhere. This prevents unnecessary heating or cooling when you are away. Smart thermostats also provide energy usage reports. These reports help you identify areas for savings. I love being able to control my home’s temperature from my phone.
Ensure your home is properly insulated. Good insulation keeps conditioned air inside. It prevents outdoor air from seeping in. Check your attic, walls, and windows for drafts. Seal any gaps or cracks. This reduces the workload on your HVAC system. It helps maintain a comfortable indoor temperature. Proper insulation is a hidden hero of energy efficiency.
Schedule annual professional HVAC maintenance. A technician performs a deeper clean. They check refrigerant levels, electrical connections, and moving parts. They identify potential issues before they become expensive problems. This routine check-up extends the lifespan of your unit. It ensures it runs at peak efficiency. Think of it as a yearly health check-up for your HVAC. These combined efforts keep your home comfortable and your energy bills low. They also ensure your HVAC unit serves you for many years.
Tips for Enhanced HVAC Efficiency:
- Upgrade air filter: Use a higher MERV rated filter if your system supports it for better air quality.
- Install a smart thermostat: Program schedules, use remote control, and monitor energy usage.
- Improve home insulation: Seal drafts around windows, doors, and ensure attic insulation is sufficient.
- Professional tune-ups: Schedule annual maintenance with a certified HVAC technician.
- Strategic landscaping: Plant trees or shrubs to shade the outdoor condenser unit from direct sunlight. Ensure they do not block airflow.
- Close vents in unused rooms: Direct conditioned air only where it is needed.
FAQs About Cleaning HVAC Units
How often should I clean my HVAC unit?
You should clean your HVAC unit at least once a year. This includes both the indoor and outdoor components. Change or clean your air filter every 1-3 months. More frequent cleaning may be needed if you have pets, allergies, or live in a dusty area.
What happens if I don’t clean my HVAC unit?
If you do not clean your HVAC unit, dirt and debris build up. This reduces efficiency, leading to higher energy bills. It can also cause poor indoor air quality, spreading allergens and mold. Component failures become more likely, leading to costly repairs or premature replacement.
Can I clean my HVAC unit myself, or do I need a professional?
You can perform many basic cleaning tasks yourself, like cleaning filters, outdoor coils, and drain lines. However, complex tasks like refrigerant handling, deep duct cleaning, or major component repairs require a professional HVAC technician. Annual professional tune-ups are also highly recommended.
What are the benefits of a clean HVAC system?
A clean HVAC system offers many benefits. It provides better indoor air quality. It lowers your energy bills due to improved efficiency. It also extends the lifespan of your unit. This means fewer breakdowns and consistent home comfort.
How do I clean mold from my HVAC unit?
To clean mold, first turn off the power. For accessible areas like drain pans, use a dilute bleach solution (1 part bleach to 16 parts water) and wipe clean. For coils, use an approved HVAC coil cleaner designed to kill mold. For mold deep within ducts or on evaporator coils, consider professional help.
What tools do I need to clean my HVAC unit?
You will need a screwdriver, vacuum cleaner with attachments, a soft brush, a fin comb, HVAC coil cleaner, a spray bottle, a bucket, and a garden hose. Always wear gloves, a dust mask, and safety glasses for protection.
Conclusion: Breathe Easier with a Clean HVAC System
Keeping your HVAC unit clean is a smart investment in your home and your health. We explored how to clean your HVAC unit step-by-step. You learned about cleaning the indoor air handler and furnace. You also learned how to maintain the outdoor condenser unit. We covered essential tasks like clearing drain lines and changing air filters. Taking these steps yourself improves efficiency and air quality.
Remember to prioritize safety. Always turn off power before you start any work. Use the right tools and protective gear. While many cleaning tasks are manageable for a DIY enthusiast, some situations require professional expertise. Do not hesitate to call a certified technician for complex issues or annual tune-ups. This proactive approach saves you money and trouble.
A clean HVAC system works harder for you. It uses less energy. It keeps your home comfortable
- HVAC cleaning
- air conditioner maintenance
- furnace cleaning
- DIY home maintenance
- indoor air quality