· Kitchen Cleaning · 13 min read
How To Clean Metal Handles On Kitchen Cabinets

How to Clean Metal Handles on Kitchen Cabinets: Ultimate Guide
Kitchen cabinet handles endure constant touching, food splatter, and grease buildup, making them one of the most frequently soiled items in your kitchen. Despite their small size, these metal handles can significantly impact your kitchen’s overall appearance and hygiene.
Whether you have brushed stainless steel, chrome, brass, or another metal finish, proper cleaning techniques are essential to maintain their shine and functionality. In this comprehensive guide, we’ll explore effective methods to clean metal handles on kitchen cabinets, using both commercial products and natural solutions you likely already have at home.
Key Takeaways:
- Different metal finishes require specific cleaning approaches
- Everyday household items like vinegar and baking soda make excellent cleaners
- Regular maintenance prevents buildup and extends hardware life
- Harsh chemicals can damage certain metal finishes
Quick Answer: To clean metal handles on kitchen cabinets, wipe with a microfiber cloth dampened with mild soap and water, then rinse and dry thoroughly. For stubborn grime, use appropriate cleaners based on your specific metal type, like vinegar solution for stainless steel or specialized brass cleaner for brass handles.
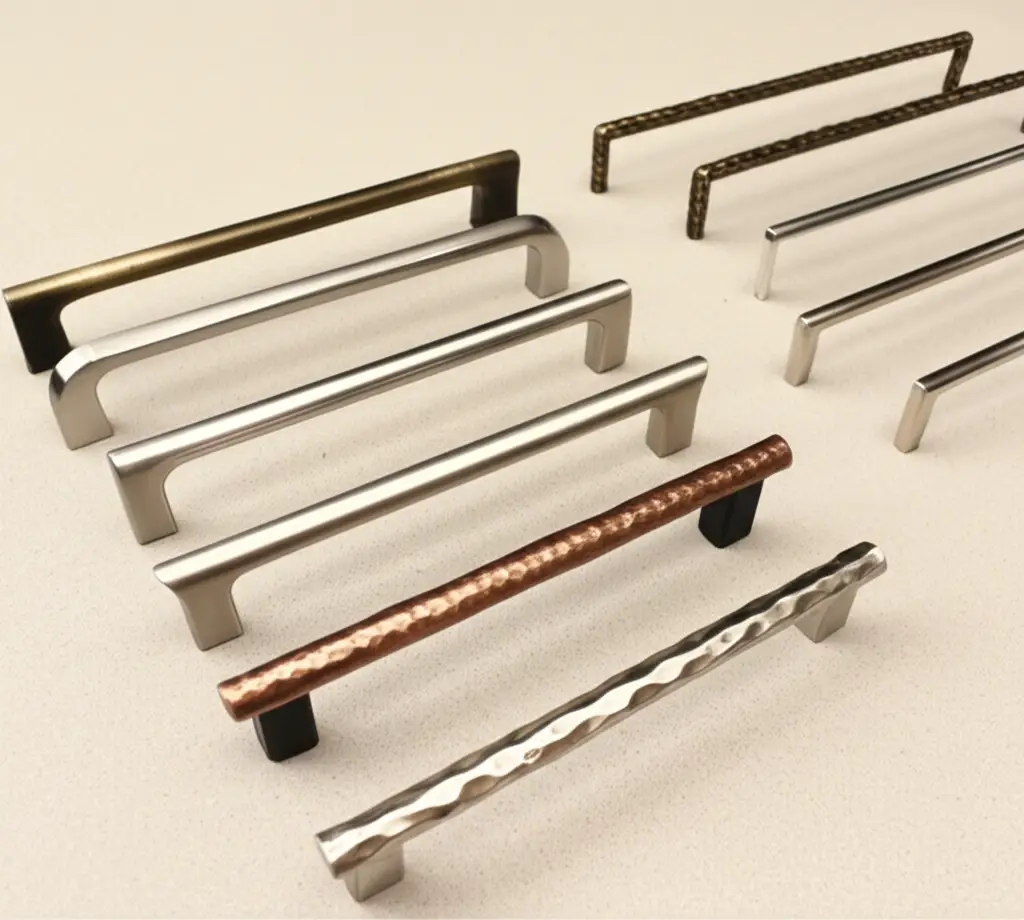
Understanding Different Types of Metal Hardware
Kitchen cabinet hardware comes in various metal types, each requiring specific cleaning approaches. Identifying your handle material is the crucial first step in effective cleaning. Stainless steel handles are popular for their durability and resistance to corrosion, while brass offers classic warmth but can tarnish over time.
Chrome delivers a mirror-like shine but shows fingerprints easily, and brushed nickel provides a sophisticated matte finish that hides fingerprints well.
The finish of your handles also matters significantly. Polished surfaces require different care than brushed or matte finishes. For instance, abrasive cleaners may scratch polished chrome but might be suitable for textured finishes. Similarly, acidic solutions like vinegar work well on stainless steel but can damage brass or copper.
Before applying any cleaning solution to your entire hardware collection, test it on an inconspicuous area first. This precaution helps prevent potential damage to your kitchen’s aesthetic appeal. Remember that manufacturer recommendations should always be your primary reference point for cleaning guidance.
Daily Maintenance for Metal Cabinet Handles
Establishing a routine cleaning schedule prevents buildup and maintains your hardware’s appearance with minimal effort. For daily maintenance, simply wiping handles with a soft microfiber cloth can remove fingerprints and light soil before they become stubborn problems. This quick habit, taking only seconds per handle, pays dividends in long-term appearance.
For weekly cleaning, a gentle solution of warm water and mild dish soap works wonders on most metal handles. Dampen a soft cloth with the solution, wipe each handle thoroughly, rinse with clean water, and dry immediately to prevent water spots or potential corrosion. This approach is safe for nearly all metal finishes and removes common kitchen contaminants like cooking oils and food residue.
Consider these practical tips for maintaining your cabinet hardware:
- Keep microfiber cloths dedicated solely to hardware cleaning
- Address spills and splatters immediately before they dry and harden
- Apply a light coat of mineral oil to certain metals (like stainless steel) monthly to repel fingerprints
- Use cotton swabs to reach tight crevices and ornate details
Regular maintenance not only keeps your kitchen looking its best but also helps prevent mold from developing in hidden areas, particularly in humid kitchens where moisture can collect around hardware.
Cleaning Metal Handles with Vinegar
Vinegar stands as one of the most versatile natural cleaners for metal cabinet hardware, particularly effective on stainless steel and chrome. Its mild acidity cuts through grease, removes fingerprints, and restores shine without harsh chemicals. For a basic cleaning solution, mix equal parts white vinegar and water in a spray bottle.
For typical cleaning, spray the solution onto a microfiber cloth rather than directly onto the hardware to prevent dripping into crevices. Wipe the handles thoroughly, paying special attention to grooves and crevices where dirt accumulates. After cleaning, rinse with a clean, damp cloth and dry completely to prevent water spots.
For stubborn grime buildup, create a more potent solution:
- Mix one part white vinegar with one part hot water
- Add a drop of dish soap for extra grease-cutting power
- Apply with a soft-bristled toothbrush for detailed areas
- Work in small circular motions on problem spots
- Rinse thoroughly and dry immediately
Important caution: While vinegar works excellently on many metals, avoid using it on brass, copper, or bronze as it can damage these surfaces. Always test your solution on an inconspicuous area first, and never leave vinegar solution sitting on metal surfaces for extended periods.
Some homeowners also find success combining vinegar with other natural ingredients. For example, adding a few drops of essential oils like lemon or tea tree to your vinegar solution can provide antimicrobial benefits and a pleasant scent that counteracts vinegar’s distinctive smell, similar to how cleaners work on vinyl flooring.
Baking Soda Solutions for Tough Grime
When regular cleaning methods fail to remove stubborn grime from metal handles, baking soda offers a gentle yet effective abrasive solution. This pantry staple works particularly well on textured handles where dirt becomes embedded in small crevices. For a basic baking soda paste, mix three parts baking soda with one part water until it forms a consistency similar to toothpaste.
Apply the paste using these steps:
- Remove the handles from cabinets if possible for thorough cleaning
- Apply the baking soda paste with a soft toothbrush or cloth
- Gently scrub in circular motions, focusing on problem areas
- Allow the paste to sit for 10-15 minutes on extremely dirty surfaces
- Rinse thoroughly with warm water
- Dry completely with a soft cloth to prevent water spots
For extremely stubborn buildup, especially on handles with intricate designs, create a more powerful solution by combining baking soda with other household ingredients. Mix one tablespoon baking soda with one tablespoon salt and enough white vinegar to create a paste. This combination provides extra cleaning power for problem areas.
After cleaning with baking soda, apply a small amount of mineral oil to stainless steel or chrome handles to help repel fingerprints and maintain shine. This final step creates a protective barrier that makes future cleaning easier. Like with any cleaner, avoid using baking soda on delicate metals or finishes that might scratch easily.

Professional Products for Specific Metal Types
While household solutions work well for regular maintenance, some situations call for specialized commercial cleaners designed for specific metal types. These products contain formulations tailored to particular finishes, offering optimal results without damage.
For stainless steel handles, products like Bar Keepers Friend, Weiman Stainless Steel Cleaner, or Method Steel for Real provide excellent results. These cleaners remove fingerprints and water spots while often leaving a protective coating that repels future marks. Apply according to manufacturer directions, typically using a soft cloth and working in the direction of the metal grain.
Brass and copper hardware benefit from dedicated metal polishes like Brasso, Wright’s Brass Polish, or Ketchup (yes, the condiment works due to its acidic properties). These formulations remove tarnish while protecting the metal’s natural patina. Apply a small amount with a soft cloth, rub gently, and buff to a shine.
For chrome handles, glass cleaners like Windex work surprisingly well for regular maintenance. For deeper cleaning, products like Quicksilver Chrome and Stainless Steel Cleaner restore mirror-like shine. Apply with a microfiber cloth, working in small circles, then buff dry.
When selecting commercial products, consider these factors:
- Environmental impact and safety concerns
- Fragrance sensitivity for household members
- Need for additional protective coatings
- Compatibility with other metals in your kitchen
Always follow manufacturer directions exactly, and store cleaning products safely away from food preparation areas. These specialized cleaners can transform badly neglected hardware but should be used judiciously as part of a comprehensive cleaning strategy that includes regular maintenance of your entire kitchen.
Removing and Deep Cleaning Cabinet Hardware
Sometimes, surface cleaning isn’t enough, particularly for handles with years of built-up grime or those in high-traffic areas. In these cases, removing hardware for deep cleaning proves most effective. This approach allows for thorough cleaning of both the handles and the cabinet surface beneath them.
Before removing hardware, gather these supplies:
- Small container or labeled bags for screws
- Appropriate screwdriver
- Camera or smartphone to document hardware placement
- Soft cleaning cloths
- Old toothbrush or small detailing brush
- Appropriate cleaning solution for your metal type
Follow these steps for removal and cleaning:
- Take a photo of hardware placement to aid reassembly
- Remove screws carefully, storing them in labeled containers
- Create a gentle cleaning bath in a plastic container using warm water and mild dish soap
- Soak hardware for 15-30 minutes (avoid soaking brass or bronze)
- Scrub gently with a soft-bristled brush, focusing on crevices
- Rinse thoroughly and dry completely before reinstallation
For handles with particularly stubborn buildup, create a more intensive solution by dissolving 1/4 cup baking soda in 1 quart warm water. This solution works particularly well for handles with intricate designs where grime becomes trapped. After soaking, rinse thoroughly and dry completely before reinstalling.
During hardware removal, take the opportunity to clean cabinet surfaces where dirt accumulates around handle mounting points. A solution of warm water and mild soap typically works well for this purpose. Consider applying a small amount of furniture wax to wooden cabinets around hardware mounting points to protect the finish and make future cleaning easier.
Preventing Tarnish and Maintaining Shine
Maintaining the appearance of your metal cabinet handles requires less effort than restoring neglected hardware. With the right preventative measures, you can significantly extend the time between deep cleanings and preserve your hardware’s finish.
Apply these preventative strategies:
Regular wiping: Develop a habit of quickly wiping handles with a microfiber cloth during routine kitchen cleanup to remove fingerprints and cooking residue before they can cause damage.
Protective coatings: Consider applying a thin layer of appropriate protectant based on your metal type. For example, mineral oil works well on stainless steel, while specialized brass lacquer can protect brass hardware from tarnishing.
Humidity control: Excessive moisture accelerates tarnishing and corrosion. Use a dehumidifier in particularly humid kitchens, and ensure adequate ventilation during cooking.
Handling awareness: Make family members aware that certain hand products like lotions and sanitizers can damage metal finishes over time. Consider keeping handles clean by touching them with the back of your hand when possible.
Seasonal deep cleaning: Schedule quarterly deep cleaning sessions to address any beginning signs of tarnish or corrosion before they become significant problems.
For stainless steel handles specifically, wiping with olive oil on a soft cloth can create a protective barrier that reduces fingerprints. Apply sparingly and buff thoroughly to avoid a greasy feel. This technique works similarly to how professionals maintain stainless steel refrigerator handles, keeping them looking new longer.
[Image: Kitchen cabinet with gleaming metal handles after cleaning and protection treatments. Alt text: “Shiny metal cabinet handles after proper cleaning and protective treatment”]
Common Mistakes to Avoid When Cleaning Metal Handles
Even with the best intentions, some cleaning approaches can damage your cabinet hardware. Avoiding these common mistakes will help preserve your handles’ appearance and functionality for years to come.
Abrasive Cleaners and Tools
One of the most damaging mistakes is using abrasive cleaners or tools on delicate metal finishes. Steel wool, harsh scouring pads, and abrasive powders can create microscopic scratches that dull finish and create areas where dirt can accumulate. Instead, opt for soft cloths, microfiber materials, and non-abrasive cleaning solutions appropriate for your specific metal type.
Mixing Cleaning Chemicals
Never mix cleaning chemicals, particularly bleach with ammonia or vinegar, as these combinations can create toxic gases. Stick with single-solution approaches or properly diluted commercial products designed specifically for your hardware type.
Insufficient Drying
Leaving handles wet after cleaning invites water spots and potential corrosion. Always thoroughly dry hardware with a soft, absorbent cloth immediately after cleaning. Pay particular attention to crevices and joints where moisture can collect.
Using Harsh Chemicals
Avoid using bleach, ammonia, or industrial degreasers on metal handles, as these can damage protective finishes and cause discoloration. Even natural alternatives like lemon juice can be too acidic for certain metals like brass and bronze.
Neglecting Regular Maintenance
Perhaps the biggest mistake is waiting until handles are visibly dirty before cleaning. Regular maintenance prevents buildup that requires harsh cleaning methods later. Integrate quick handle wipe-downs into your regular kitchen cleaning routine to maintain appearance with minimal effort.
FAQ: Metal Cabinet Handle Cleaning
How do you clean dirty metal handles?
For regular cleaning, wipe metal handles with a cloth dampened with mild soap and warm water. For stubborn dirt, use a solution appropriate for your specific metal type—vinegar works well for stainless steel, while specialized brass cleaner is best for brass handles. Always rinse and dry thoroughly after cleaning.
What is the best cleaner for metal handles?
The best cleaner depends on your handle material. For stainless steel, a 50/50 vinegar-water solution works excellently. Chrome handles respond well to glass cleaners. Brass requires dedicated brass cleaners or a paste of salt, flour, and vinegar. Always test cleaners on an inconspicuous area first.
How to clean stainless steel kitchen door handles?
Clean stainless steel handles by wiping with a microfiber cloth dampened with mild soap and water for daily maintenance. For deeper cleaning, use a 50/50 vinegar-water solution, wiping in the direction of the grain. Rinse thoroughly and dry completely to prevent water spots. Apply a small amount of mineral oil to create a protective, fingerprint-resistant finish.
How do you clean old metal hardware?
For old metal hardware, remove from cabinets if possible and soak in warm soapy water for 30 minutes. Gently scrub with a soft-bristled brush, rinse thoroughly, and dry completely. For tarnished brass or copper, use a paste of equal parts salt, flour, and vinegar, apply to the surface, let sit for an hour, then rinse and buff dry.
What is the best cleaner for dirty metal?
Bar Keepers Friend is excellent for most metals, including stainless steel, brass, and chrome. For natural alternatives, baking soda paste works well on most metals. Always match your cleaner to your specific metal type to avoid damage, and test on an inconspicuous area first.
How to clean cabinet hardware before painting?
To clean cabinet hardware before painting, remove all pieces and soak in a solution of TSP (trisodium phosphate) and warm water. Scrub with a soft brush, rinse thoroughly, and let dry completely. Sand lightly if needed, and ensure all soap residue is removed before applying primer and paint for the best adhesion.
Conclusion
Maintaining clean metal handles on kitchen cabinets significantly enhances your kitchen’s overall appearance while ensuring a hygienic cooking environment. By understanding your specific hardware material and applying the appropriate cleaning techniques, you can restore shine and extend the life of your cabinet hardware without damaging delicate finishes.
Regular maintenance prevents the buildup of fingerprints, grease, and grime that can become challenging to remove later. A simple routine of quick daily wipes and deeper weekly cleaning will keep your handles looking their best with minimal effort. When deeper cleaning becomes necessary, choosing the right products and techniques for your specific metal type ensures optimal results.
Remember that gentle, appropriate cleaning approaches will always yield better long-term results than harsh chemicals or abrasive tools. By following the guidelines in this comprehensive guide, your kitchen cabinet handles will remain an attractive, functional element of your kitchen design for years to come. For more helpful cleaning tips, check out our guide on how to clean kitchen cabinet hardware for additional insights.