· Electronics Maintenance · 13 min read
How To Clean Projector Lens
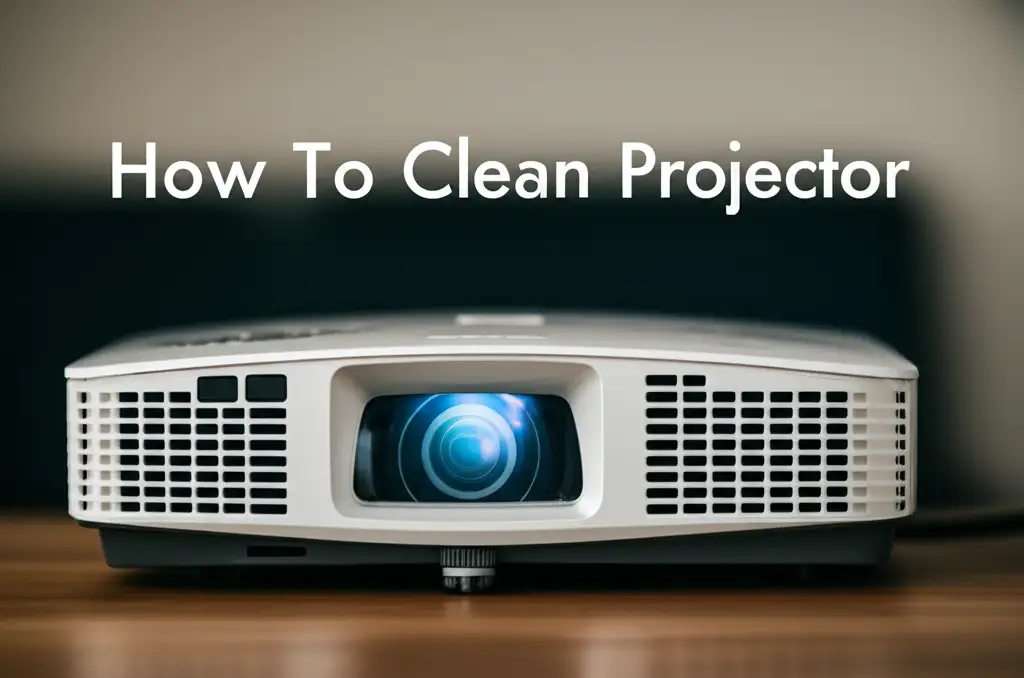
Achieve Clear Images: How To Clean Projector Lens Safely
Have you noticed blurry images or spots on your projector screen? A dirty projector lens is a common cause. Dust, fingerprints, and smudges gather on the lens surface. This build-up harms your viewing experience. Cleaning your projector lens is a simple task, but it requires care. You must use the right methods and tools. Improper cleaning can damage the delicate lens coating. This article explains how to clean your projector lens correctly. We cover essential tools, step-by-step instructions, and vital maintenance tips. You will learn to restore clear images and extend your projector’s life.
Takeaway:
- Use specific lens cleaning tools like an air blower and microfiber cloth.
- Always start with dry cleaning to remove loose dust.
- Apply lens cleaning solution sparingly to a cloth, not directly to the lens.
- Avoid harsh chemicals, abrasive materials, or excessive pressure.
- Clean the lens regularly to maintain image quality.
Cleaning a projector lens involves gentle removal of dust and smudges. First, use an air blower to clear loose particles. Then, a soft lens brush can help. For stubborn marks, lightly dampen a clean microfiber lens cloth with a specialized optical cleaning solution. Wipe the lens in a circular motion from the center outwards.
Why Your Projector Lens Needs Regular Cleaning
Your projector lens gathers dust, fingerprints, and other debris over time. This happens during normal use. Dust particles float in the air and land on surfaces. The projector’s fan can also pull dust onto the lens. Fingerprints occur when you handle the projector. They leave oily smudges on the glass. These contaminants reduce the quality of your projected image.
A dirty lens causes several problems. Images appear dull or blurry. You might see dark spots or streaks on the screen. These visual defects distract from your movie, presentation, or gaming session. A clean lens ensures sharp, bright, and true-to-life images. Regular cleaning maintains optical clarity. This is important for optimal projector performance. It also helps preserve the lens coating.
The lens coating is a thin, delicate layer on the glass. It reduces glare and improves light transmission. Scratches or damage to this coating can permanently impair image quality. Preventing build-up of dirt reduces the need for harsh cleaning. This protects the lens and its coating. Regular maintenance extends the projector’s lifespan. It keeps your device working well for years.
Neglecting lens cleaning can lead to more serious issues. Accumulated dust can sometimes lead to overheating if it gets inside the projector. While this article focuses on the lens, overall projector cleanliness supports system health. A clean lens means you get the best possible picture every time. It is a simple step for big returns. Always prioritize gentle methods to protect your valuable equipment.
Essential Tools for Safe Projector Lens Cleaning
Using the correct tools is crucial when you clean a projector lens. Standard household cleaners can damage the delicate lens surface. You need specific items designed for optical cleaning. These tools ensure safe and effective dust and smudge removal. Proper preparation prevents accidental scratches or chemical damage. Get these items ready before you start cleaning.
First, you need a can of compressed air or a hand-held air blower. These tools remove loose dust. Compressed air should be held upright to prevent propellant release. A hand blower, also called a “rocket blower,” is a safer choice. It pushes out clean air without chemicals. You can use it many times. This is the first step in cleaning any delicate lens. It lifts particles without touching the surface.
Second, acquire a soft lens brush. This brush removes dust that the air blower did not get. It has very fine, soft bristles. These bristles will not scratch the lens. Avoid using regular paint brushes or cloths. Their fibers can be too coarse. Use the brush gently in a sweeping motion. This lifts any remaining dry debris.
Third, obtain microfiber lens cloths. These cloths are different from regular cleaning cloths. They are lint-free and very soft. They absorb oils and moisture without scratching. Use a fresh, clean cloth for each cleaning session. You can wash and reuse these cloths. Ensure they are free from dirt or fabric softener residue. This prevents streaks. For similar delicate lens care, you can learn how to clean a Wii lens.
Finally, you need a specialized optical lens cleaning solution. This solution is alcohol-free and ammonia-free. It evaporates quickly and leaves no residue. Never use window cleaner, soap, or harsh chemicals. These can strip the lens coating or leave permanent marks. Apply the solution to the microfiber cloth, not directly to the lens. This prevents liquid from seeping into the projector. You can find these solutions at camera stores or electronics shops.
Step-by-Step Guide to Dry Cleaning Projector Lenses
Dry cleaning is the first and most important step for your projector lens. This process removes loose dust and debris. It helps prevent scratches that can occur if you rub particles into the lens. Always begin with dry cleaning before considering any wet methods. This protects the delicate surface of your projector lens.
Start by powering off your projector. Unplug the power cord. Allow the projector to cool down completely. A warm lens can attract more dust. Working with a cool projector also protects you from heat. Ensure you have good lighting. You need to see all dust particles clearly.
Take your air blower or compressed air can. Hold the air blower about six inches from the lens. Squeeze the bulb of the blower repeatedly. This sends gentle bursts of air across the lens surface. If using compressed air, hold the can upright. Use short bursts, not a continuous spray. Avoid tilting the can. Tilting can release propellant, which may leave a residue. Aim to blow dust off the lens, not into the projector’s internal components.
Next, use your soft lens brush. Gently brush the lens in a light, circular motion. Start from the center and move outwards. This sweeps any remaining dust particles away. Do not press hard. The goal is to lift dust, not scrub it. Inspect the brush first. Make sure it is clean and free of dirt. A dirty brush can introduce new scratches.
After brushing, use the air blower again. This removes any dust loosened by the brush. Check the lens carefully under good light. Look for any remaining dry particles. Repeat the air blowing and brushing steps if needed. Most dust will come off with these dry methods. Only proceed to wet cleaning if smudges or fingerprints remain. Dry cleaning prevents damage and keeps your projector lens clear. This method is fundamental for all lens care, including when you need to clean a Ring camera lens.
Step-by-Step Guide to Wet Cleaning Projector Lenses
Wet cleaning is necessary when dry cleaning does not remove all marks. You will use this method for smudges, fingerprints, or stubborn dirt. Always perform wet cleaning after dry cleaning. This prevents rubbing abrasive particles into the lens. Proper technique is vital to avoid damage to your delicate projector lens.
Gather your specialized optical lens cleaning solution and a clean microfiber lens cloth. Make sure the cloth is lint-free and soft. Never spray solution directly onto the projector lens. Liquid can seep into the projector. This could damage internal electronics. Instead, apply one or two drops of the cleaning solution to a corner of the microfiber cloth. The cloth should be damp, not wet.
Hold the projector lens firmly, but do not touch the glass. Gently wipe the lens surface with the dampened part of the cloth. Use a light, circular motion. Start at the center of the lens and move outwards to the edges. Apply minimal pressure. The goal is to lift smudges, not to scrub them. Wipe slowly and deliberately. This helps to remove marks effectively.
Once you have wiped the entire lens surface, immediately use a dry, clean section of the microfiber cloth. Gently wipe the lens again in the same circular motion. This step removes any remaining moisture or streaks. The lens should look clear and dry. Do not use paper towels or tissues. These materials can scratch the lens or leave fibers behind.
Inspect the lens under good light after cleaning. Look for any remaining smudges or streaks. If marks persist, repeat the wet cleaning process. Use a fresh, clean section of the cloth. Be patient and gentle. Over-cleaning or excessive pressure can harm the lens coating. When finished, ensure the lens is completely dry before using the projector again. This method restores optimal image clarity.
Common Mistakes to Avoid When Cleaning Projector Lenses
Cleaning a projector lens requires specific precautions. Many common cleaning habits can severely damage your projector’s delicate lens. Avoiding these mistakes ensures the longevity and performance of your device. Always prioritize caution and use proper tools. Improper cleaning is often worse than no cleaning at all.
One major mistake is using abrasive materials. Never use paper towels, tissues, rough cloths, or your shirt. These items contain wood fibers or coarse textures. They will scratch the anti-reflective coating on your lens. Scratches are permanent and will degrade image quality. Always use a dedicated microfiber lens cloth. These cloths are designed to be lint-free and extremely soft.
Another common error is applying cleaning solution directly to the lens. Spraying liquid onto the lens can cause it to seep into the projector body. This can damage internal electronics or leave residue inside the optical path. Always apply lens cleaning solution to the microfiber cloth first. Then, gently wipe the lens. This controls the amount of liquid on the lens surface.
Using incorrect cleaning solutions is also a significant problem. Avoid household cleaners like window cleaner, dish soap, or all-purpose sprays. These products contain ammonia, alcohol, or other harsh chemicals. These chemicals can strip the lens coating. They can also leave stubborn residues or cause discoloration. Only use specialized optical lens cleaning solutions. These solutions are formulated to be safe for delicate coatings.
Applying excessive pressure while wiping is harmful. Scrubbing or pushing hard can scratch the lens. It can also dislodge the lens element within its housing. Use a very light touch. The goal is to gently lift dirt, not to force it off. Let the specialized cloth and solution do the work. Remember, the lens is fragile.
Finally, ignoring the dry cleaning step is a mistake. Directly wiping a dusty lens with a wet cloth grinds particles into the surface. This causes scratches. Always use an air blower and lens brush first. Remove all loose dust before any wet cleaning. Following these guidelines helps you maintain a pristine projector lens. This protects your investment and ensures clear viewing.
Maintaining Projector Lens Clarity and Lifespan
Keeping your projector lens clean goes beyond occasional deep cleaning. Regular maintenance practices extend its lifespan. It also ensures consistent optical clarity. Proactive care prevents dirt buildup and reduces the need for frequent intensive cleaning. This saves you time and protects your investment.
First, keep the lens cap on when the projector is not in use. This simple habit protects the lens from dust and accidental touches. A lens cap acts as a physical barrier. It prevents particles from settling on the surface. Always put the cap back on immediately after you finish using the projector. This is a very effective preventative measure.
Second, store your projector properly. If you move the projector often, use a protective case. This guards against impacts and reduces dust exposure. When storing long-term, choose a clean, dry, dust-free environment. High humidity can encourage mold growth, while excessive dust requires more cleaning. Proper storage is key for any electronic device with delicate components.
Third, handle the projector carefully. Always pick up the projector by its body. Avoid touching the lens with your fingers. Fingerprints leave oily residues that attract more dust. They also create smudges that blur images. If you must adjust the lens, hold it by its outer ring, not the glass. Clean hands reduce the chances of transferring oils or dirt.
Fourth, clean the surrounding environment. A dusty room contributes to a dusty projector lens. Regularly clean the room where your projector operates. Dust surfaces, vacuum carpets, and consider an air purifier. Reducing airborne particles directly lessens dust accumulation on your lens. A cleaner environment means less frequent lens cleaning.
Finally, follow a routine cleaning schedule. Even with preventative measures, some dust will accumulate. Perform a dry cleaning of your lens every few weeks or months. This depends on your usage and environment. Only wet clean when smudges become noticeable. Consistent, gentle care prevents major cleaning challenges. These practices keep your projector lens clear and extend its usable life.
Troubleshooting Post-Cleaning Issues and Professional Help
Sometimes, even after careful cleaning, you might notice issues with your projector image. Understanding common post-cleaning problems helps you identify solutions. Knowing when to seek professional help is also important. Your projector lens is a precision optical component. It demands proper care and sometimes expert attention.
If you still see streaks or smudges, your microfiber cloth might have residual oils. Or, you used too much cleaning solution. Re-clean the lens with a fresh, dry microfiber cloth. Make sure the cloth is completely clean and lint-free. You might need a new cloth if your current one is contaminated. Apply less solution next time.
Persistent dark spots might not be on the lens surface. These spots could be dust inside the projector. Dust can accumulate on internal optical elements like the DLP chip or LCD panels. Lens cleaning will not fix these internal issues. Do not attempt to open the projector yourself unless you are highly skilled. Opening the casing can void your warranty. It also exposes delicate components.
Scratches on the lens are permanent. If you caused scratches during cleaning, there is no easy fix. These marks will show up in the projected image. Minor scratches might be tolerable. Major scratches may require lens replacement. This is usually an expensive repair. This is why gentle cleaning practices are so important.
If your image remains blurry, check the projector’s focus settings. A dirty lens can cause blur, but an out-of-focus setting is also common. Adjust the focus ring or remote control focus. Ensure the projector is at the correct distance from the screen. Sometimes, the problem is not a dirty lens but a focus adjustment need.
When problems persist, or you suspect internal dust, seek professional service. A qualified technician can safely open your projector. They can clean internal components without damaging them. This service is often called “internal cleaning” or “optical block cleaning.” It can restore image quality for complex issues. Professionals have specialized tools and knowledge. Attempting these repairs yourself can worsen the problem. Consider professional help a worthwhile investment for serious issues.
Conclusion
A clean projector lens is essential for clear, crisp images. We have discussed the reasons why your lens gets dirty. We explored the specific tools needed for safe cleaning. You learned a step-by-step process for both dry and wet cleaning methods. We also highlighted common mistakes to avoid. Proper maintenance extends your projector’s life. Following these steps helps you protect your investment.
Remember to always start with dry cleaning using an air blower and soft brush. This removes loose dust. Only then proceed to wet cleaning with a specialized solution and microfiber cloth. Be gentle. Avoid harsh chemicals or abrasive materials. Regular care, like using a lens cap and cleaning your room, prevents future build-up. This keeps your projector lens in top condition. By committing to these simple practices, you ensure stunning visuals for years to come. Take action today to clean your projector lens and enjoy a superior viewing experience.
- projector maintenance
- lens cleaning
- optical clarity
- image quality