· Home Maintenance · 17 min read
How To Clean Vinyl Window Frames
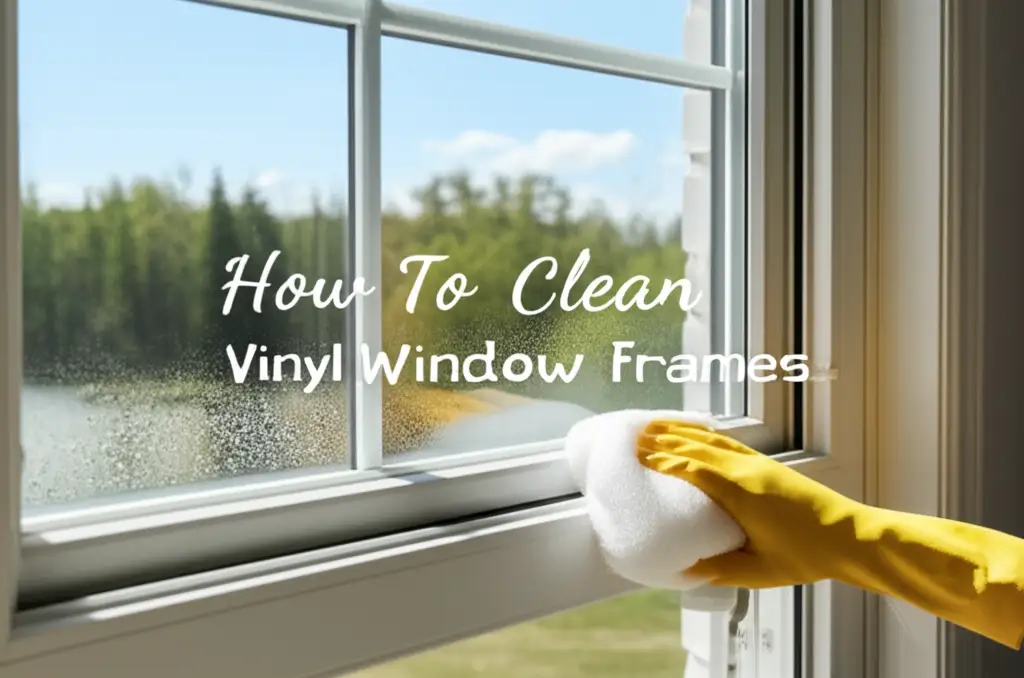
Clean Vinyl Window Frames: A Complete Guide
Keeping your home looking its best often involves small tasks that make a big difference. One important task is learning how to clean vinyl window frames. These frames can collect dirt, grime, and even mold over time. This makes your windows look old and dingy. Dirty frames also impact your home’s curb appeal. I find that regular cleaning keeps them looking fresh. It also helps them last longer.
This guide will show you simple ways to clean your vinyl window frames. We will cover basic cleaning for light dirt. We will also discuss how to handle tough stains, mold, and yellowing. You will learn about the right tools and cleaning solutions to use. We will also share tips for maintaining your frames. This helps them stay clean year-round. Get ready to transform your windows and brighten your home.
Takeaway
- Use mild soap and water for routine vinyl window frame cleaning.
- Apply baking soda or vinegar paste for tougher stains and grime.
- Address mold with specific cleaners or a diluted bleach solution.
- Restore yellowed frames with specialized products or a vinegar-baking soda paste.
- Clean window tracks thoroughly to prevent dirt buildup and ensure smooth operation.
- Regular maintenance prevents severe dirt and extends frame life.
To clean vinyl window frames, first remove loose dirt. Then, wash surfaces with a mild soap and water solution. For stubborn stains, use a gentle abrasive paste of baking soda and water. Rinse frames well with clean water. Finally, wipe them dry to prevent water spots and keep them looking bright.
Why Clean Your Vinyl Window Frames?
Vinyl window frames are popular in many homes. They are durable and need little care. However, they are not completely maintenance-free. Over time, these frames gather dirt, dust, and pollen. Rain can leave streaks and spots. Sunlight can cause some frames to yellow. Mold and mildew can grow in damp areas, especially on north-facing windows or those in humid climates. Cleaning your vinyl window frames is important for several reasons.
First, clean frames improve your home’s appearance. Bright, clean frames make your windows sparkle. This enhances your home’s curb appeal. It makes a good first impression. Second, cleaning protects the material. Dirt and grime can wear down the vinyl finish. Mold can cause discoloration that is hard to remove later. Regular cleaning prevents this damage. It helps your frames last longer. Third, clean frames contribute to a healthier home environment. Mold spores can impact air quality. Removing them makes your home safer for everyone. Finally, clean frames allow your windows to operate smoothly. Dirt buildup in tracks can make it hard to open and close windows. A good cleaning routine solves this problem. I always feel better when my windows are clean and move easily.
Preparing for a Spotless Clean: Gathering Your Tools
Before you start cleaning your vinyl window frames, gathering the right tools and supplies is crucial. Having everything ready saves time. It also makes the cleaning process much easier. You do not want to stop in the middle to search for a missing item. The good news is that most supplies are common household items. You likely have many of them already.
First, you will need a bucket. This is for mixing your cleaning solutions. Next, grab a few soft cloths or sponges. Microfiber cloths work very well. They are gentle on the vinyl. They also absorb dirt effectively. Avoid using abrasive scrubbers or steel wool. These can scratch or damage the vinyl surface. A soft-bristled brush is useful for scrubbing stubborn spots. It also helps clean intricate frame details. For higher windows, a sturdy step ladder or extension pole with a cleaning attachment might be necessary. Safety is important when working at heights.
For cleaning solutions, start with mild dish soap and warm water. This combination works for most light dirt. For tougher stains, you might need white vinegar or baking soda. These are natural and effective cleaners. For mold and mildew, you will need a dedicated mold cleaner or a bleach solution. Remember to wear rubber gloves. This protects your hands from cleaning agents. Finally, have a source of clean water for rinsing. A garden hose with a spray nozzle is ideal for exterior frames. For interior frames, a spray bottle filled with water works well. Having everything prepared ensures a smooth and efficient cleaning job.
Basic Cleaning for Light Dirt and Grime
For most routine cleaning, a simple approach works best. Your vinyl window frames can accumulate light dirt and dust. This happens from everyday exposure to the elements. A quick wash can restore their clean appearance. This method is gentle on the vinyl. It is also environmentally friendly. It is the first step I take when my frames look a little dull.
Start by removing any loose dirt or cobwebs. You can use a soft brush or a vacuum cleaner with a brush attachment for this. This prevents scratching the surface when you wipe it down. Once the loose debris is gone, prepare your cleaning solution. Mix a few drops of mild dish soap into a bucket of warm water. You want a soapy solution, but not one that is overly sudsy. Too much soap can leave a residue.
Dip a soft cloth or sponge into the soapy water. Wring out the excess water. The cloth should be damp, not dripping wet. Begin wiping down the vinyl frames. Start from the top and work your way down. This helps prevent streaks. Pay attention to corners and crevices where dirt likes to hide. For slightly stubborn spots, you can apply a bit more pressure. After cleaning, rinse the frames thoroughly with clean water. You can use a hose for exterior frames or a clean, damp cloth for interior ones. Make sure no soap residue remains. Finally, dry the frames with a clean, dry cloth to prevent water spots. This simple routine keeps your frames looking great.
Tackling Stubborn Stains and Heavy Grime on Vinyl Frames
Sometimes, basic cleaning is not enough. Vinyl window frames can develop stubborn stains or heavy grime. This can be from prolonged exposure to pollution, rust, or even tree sap. When faced with these tougher challenges, you need a slightly stronger approach. The good news is that you do not always need harsh chemicals. Many effective solutions use common household items. I have found these methods work well without damaging the vinyl.
One excellent option is a paste made from baking soda and water. Baking soda is a gentle abrasive. It can lift many types of stains. Mix about half a cup of baking soda with a few tablespoons of water. Stir it until you form a thick paste. Apply this paste directly to the stained areas. Let it sit for about 10-15 minutes. This gives the baking soda time to work on the grime. Then, gently scrub the area with a soft-bristled brush or a non-abrasive sponge. You will see the stain start to lift. Rinse the area thoroughly with clean water. Make sure all the paste is gone.
Another powerful solution for grime is white vinegar. Vinegar is acidic. It helps break down dirt and hard water stains. Mix equal parts white vinegar and water in a spray bottle. Spray the solution directly onto the dirty vinyl frames. Let it sit for a few minutes. Then, wipe with a clean cloth. For really tough spots, you can apply undiluted vinegar directly to the stain. Let it sit for a bit longer. Then scrub gently. Rinse well afterwards. For issues with vinyl surfaces in other areas, such as sunrooms, similar principles of mild cleaning apply to ensure longevity and appearance. You can find more tips on how to clean vinyl windows in sunrooms if you have those types of installations. Both baking soda and vinegar are safe for vinyl. They offer strong cleaning power. This combination makes them my go-to for persistent frame stains.
Removing Mold and Mildew from Vinyl Window Frames
Mold and mildew are common problems on vinyl window frames. They often appear in damp, shaded areas. These fungi look like black or green spots. They are not only unsightly. They can also cause health issues for some people. It is important to address mold quickly. Ignoring it can lead to deeper stains and a larger problem. Cleaning mold off window sills is a related task, and the methods are often quite similar.
First, prepare your work area. Put on rubber gloves. You might also want to wear safety glasses. This protects your eyes from splashes. Ensure good ventilation. Open nearby windows if possible. For light mold, a simple solution of water and white vinegar can be effective. Mix equal parts vinegar and water in a spray bottle. Spray the moldy areas generously. Let the solution sit for about 15-30 minutes. Vinegar acts as a natural disinfectant. It kills many types of mold. After waiting, scrub the area with a soft brush or cloth. The mold should come off easily. Rinse thoroughly with clean water.
For more severe mold growth, you might need a stronger solution. A diluted bleach solution works well. Mix one part bleach with ten parts water in a bucket. For example, use one cup of bleach with ten cups of water. Apply this solution to the moldy frames using a sponge or cloth. Let it sit for 10-15 minutes. The bleach will kill the mold and lighten the stains. Be very careful with bleach. Do not let it touch other surfaces. It can cause discoloration. After the waiting period, scrub gently. Then, rinse the frames completely with clean water. Make sure no bleach residue remains. This prevents damage to the vinyl. For persistent mold on specific window components, refer to guides on how to clean mold off window sills. Always test strong solutions in an inconspicuous area first. This ensures they do not damage your specific vinyl.
Restoring Yellowed Vinyl Window Frames
Over time, some vinyl window frames can develop a yellowish tint. This happens because of exposure to sunlight and environmental pollutants. The plastic undergoes a process called oxidation. It breaks down and changes color. Yellowing makes your windows look old and worn out. It is a common complaint among homeowners. While complete restoration to brand-new white might be challenging, you can significantly improve the appearance. I have found a few methods that really make a difference.
One common remedy uses a paste of baking soda and hydrogen peroxide. Hydrogen peroxide is a mild bleaching agent. It helps to whiten surfaces. Mix about half a cup of baking soda with enough 3% hydrogen peroxide to form a thick paste. Apply this paste generously over the yellowed areas of your vinyl frames. Ensure the entire discolored surface is covered. Let the paste sit for an extended period. This means at least 30 minutes, or even a few hours for severe yellowing. You can even cover it with plastic wrap to keep it moist.
After the waiting period, gently scrub the paste into the vinyl with a soft brush or sponge. You should see the yellowing start to fade. Rinse the frames thoroughly with clean water. Make sure all the paste is removed. Repeat this process if the yellowing persists. Another approach involves using a Magic Eraser. This tool is effective at removing scuffs and light discoloration. Dampen a Magic Eraser and gently rub the yellowed areas. Be careful not to scrub too hard. This can abrade the vinyl surface. Specialized vinyl restorer products are also available. These products are formulated to reverse oxidation. Follow the product’s instructions carefully for best results. They often involve a cleaning step followed by a restorative application. Regular cleaning helps prevent severe yellowing in the first place.
Deep Cleaning Vinyl Window Tracks
Window tracks are often overlooked during cleaning. They are crucial for your window’s function. These narrow channels collect an incredible amount of dirt, dust, dead insects, and debris. This buildup can make opening and closing your windows difficult. It can also be a breeding ground for mold and mildew. A thorough cleaning of the tracks is essential. It ensures smooth operation. It also improves overall cleanliness. I always feel a sense of satisfaction after cleaning these often-neglected areas.
First, open the window as wide as possible. This gives you full access to the tracks. Use a vacuum cleaner with a crevice tool attachment. Vacuum up all the loose dirt, dust, and debris from the tracks. This is the most important first step. Do not skip it. It prevents you from turning dry dirt into muddy paste later. If you do not have a vacuum crevice tool, a stiff brush can help loosen the dirt. You can then sweep it out.
After vacuuming, you will need to tackle the stuck-on grime. Mix warm water with a few drops of mild dish soap. Pour a small amount of this solution into the tracks. Let it sit for about 5-10 minutes. This helps loosen the stubborn dirt. For reaching into tight corners, use an old toothbrush, a cotton swab, or even a butter knife wrapped in a cloth. Scrub the inside of the tracks thoroughly. Pay close attention to the corners. This is where most dirt accumulates. Once you have scrubbed all areas, use a clean, damp cloth to wipe out the loosened dirt and soapy residue. You may need to rinse and wipe several times. Ensure all dirt is gone. Finally, dry the tracks completely with a clean cloth. This prevents new mold growth. Applying a small amount of silicone spray lubricant to the tracks can help ensure smooth window operation.
Maintaining Clean Vinyl Frames: Tips for Lasting Shine
Cleaning your vinyl window frames once is a great start. However, maintaining that clean look requires ongoing effort. Regular maintenance prevents heavy buildup of dirt, grime, and mold. It saves you time and effort in the long run. It also extends the life of your vinyl frames. Think of it as a little bit of care often. This is better than a big, difficult job later. I make these tips part of my routine. They keep my windows looking good with minimal fuss.
First, establish a regular cleaning schedule. For most homes, a quick wipe-down every 2-3 months is sufficient. If you live in a dusty area, near construction, or in a place with high humidity, you might need to clean more often. During these routine cleans, a simple soap and water solution is usually enough. Focus on removing surface dirt before it bakes onto the vinyl. This prevents the need for more intensive cleaning later.
Second, address specific issues promptly. If you notice a patch of mold forming, clean it immediately. Do not wait for it to spread. The same goes for bird droppings or tree sap. These can become difficult to remove if left to dry. A quick spot clean with the appropriate solution saves you a lot of trouble. Third, inspect your frames regularly. Look for any signs of wear or damage. Check the caulking around the frames. Good caulking prevents moisture from getting behind the frames. This helps prevent mold growth. Fourth, ensure proper drainage. Make sure the weep holes in your window frames are clear. These small holes allow water to drain out of the frame. If they are blocked, water can pool and cause issues. You can clear them with a small wire or paperclip. Following these simple maintenance tips will keep your vinyl window frames looking their best for years to come.
Common Mistakes to Avoid When Cleaning Vinyl Window Frames
Cleaning vinyl window frames seems straightforward. However, some common mistakes can damage the vinyl. These errors can leave streaks or even shorten the lifespan of your frames. Knowing what to avoid is as important as knowing what to do. I have learned these lessons over time. Avoiding these pitfalls makes your cleaning efforts more effective and safer.
First, avoid using abrasive cleaners or tools. This includes scouring powders, steel wool, or rough scrub brushes. Vinyl surfaces can scratch easily. Scratches not only look bad. They can also trap dirt more readily. Stick to soft cloths, sponges, and soft-bristled brushes. Your vinyl will thank you.
Second, never use harsh chemical cleaners. Products containing acetone, paint thinner, or strong solvents can dissolve or discolor vinyl. They can leave permanent damage. Always check the label of any cleaner. Ensure it is safe for vinyl surfaces. For tougher stains, stick to tested safe solutions like baking soda, vinegar, or dedicated vinyl cleaners. For effective cleaning solutions, consider natural options like those discussed in how to clean with vinegar and baking soda.
Third, avoid using pressure washers on vinyl window frames. While pressure washers are great for cleaning larger vinyl surfaces like siding, they are too powerful for window frames. The high pressure can force water behind the frames. This can damage insulation or cause mold growth inside your walls. It can also damage the seals around your windows. For cleaning vinyl siding, a pressure washer can be effective, as detailed in how to clean vinyl siding with a pressure washer. However, for frames, manual scrubbing is always safer. Fourth, do not clean in direct, hot sunlight. The cleaning solution can dry too quickly. This leaves streaks and water spots. It also makes the cleaning process harder. Choose a cloudy day or work on the shaded side of your house. Finally, do not forget to rinse thoroughly. Any leftover soap or cleaning solution can attract more dirt. It can also leave unsightly residues. A good, clean rinse is essential for a streak-free finish.
FAQ Section
How often should I clean my vinyl window frames?
You should clean your vinyl window frames at least two to four times a year. This depends on your local environment. If you live in a dusty area, near construction, or in a humid climate, more frequent cleaning may be necessary. Regular cleaning prevents buildup. It also keeps your frames looking good.
What is the best homemade cleaner for vinyl window frames?
A mild solution of warm water and a few drops of dish soap is excellent for general cleaning. For tougher stains, a paste made from baking soda and water or a spray solution of equal parts white vinegar and water works very well. These options are effective and safe for vinyl.
Can I use a Magic Eraser on vinyl window frames?
Yes, you can use a Magic Eraser on vinyl window frames. It is effective for removing scuffs, light dirt, and some discoloration. Always dampen the Magic Eraser before use. Rub gently to avoid scratching the vinyl surface. It is a great tool for spot cleaning.
How do I remove black mold from my white vinyl window frames?
For black mold, mix one part bleach with ten parts water. Apply this solution carefully with a sponge or cloth. Let it sit for 10-15 minutes. Scrub gently, then rinse thoroughly with clean water. For a non-bleach option, a strong solution of white vinegar can also work.
What causes vinyl window frames to turn yellow?
Vinyl window frames can turn yellow due to oxidation from prolonged exposure to sunlight and UV rays. Environmental pollutants can also contribute to this discoloration. This process breaks down the plastic over time. It gives it a yellowish tint.
Is it safe to use a pressure washer on vinyl window frames?
No, it is not safe to use a pressure washer on vinyl window frames. The high pressure can damage the frame seals. It can also force water behind the frame. This can lead to moisture damage or mold growth inside your walls. Always clean frames by hand.
Conclusion
Keeping your vinyl window frames clean is a simple yet impactful task for any home. We have explored effective ways to clean vinyl window frames, from basic washing to tackling stubborn stains, mold, and even yellowing. You now know the right tools and solutions to use for each challenge. We also covered the importance of deep cleaning window tracks. These steps ensure your windows not only look great but also function smoothly.
Remember, consistent effort is key. Regular cleaning prevents major issues. It extends the life of your frames. By avoiding common mistakes like harsh chemicals or abrasive tools, you protect your investment. A clean home feels better. It also looks more inviting. Take these tips and apply them to your home. You will enjoy sparkling clean vinyl window frames that enhance your home’s beauty. Get ready to transform your windows and boost your home’s curb appeal today.
- vinyl cleaning
- window frames
- home cleaning
- DIY cleaning
- mold removal