· Tech Cleaning · 15 min read
How To Clean Magic Keyboard - Your Ultimate Guide

How To Clean Magic Keyboard: Your Ultimate Guide
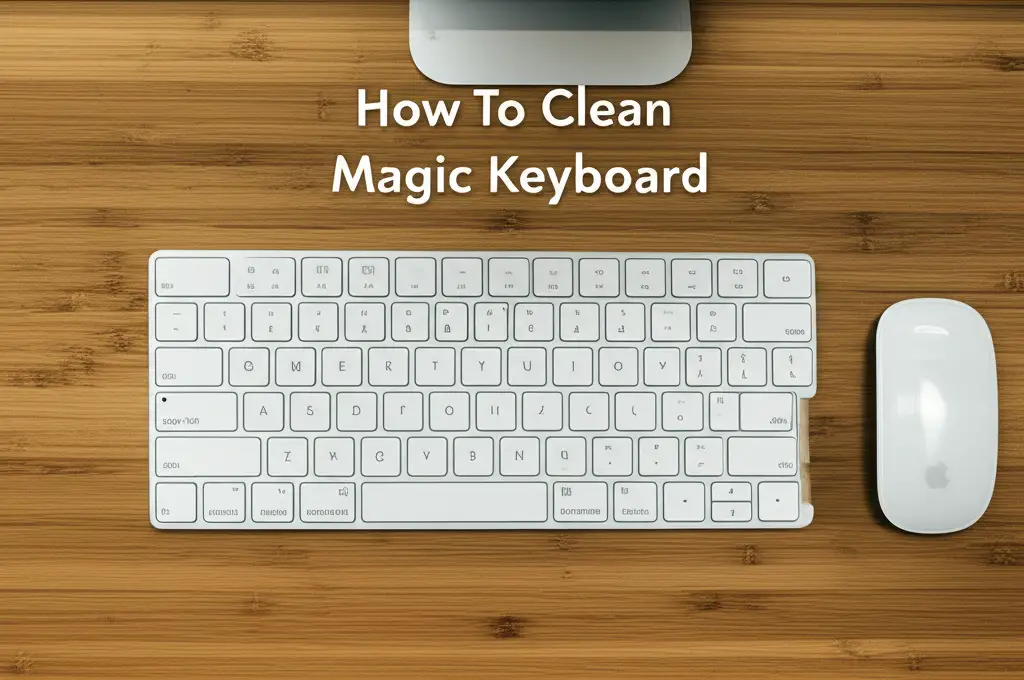
Your Apple Magic Keyboard is an important part of your daily digital life. Over time, crumbs, dust, and grime collect between and under the keys. This buildup not only looks bad but also affects performance. Knowing how to clean Magic Keyboard correctly ensures it stays responsive and hygienic.
I understand the value of keeping your tech clean. A dirty keyboard can spread germs and make typing feel sluggish. This comprehensive guide will show you everything. We will cover the tools you need and step-by-step cleaning methods. You will learn basic surface cleaning and deep cleaning for stubborn dirt. We will also discuss preventing future grime. Keep your Magic Keyboard in top condition.
Takeaway:
- Regularly clean your Magic Keyboard to prevent dirt buildup and maintain performance.
- Use specific, gentle tools like compressed air, microfiber cloths, and isopropyl alcohol.
- Always disconnect or power off your keyboard before starting any cleaning process.
- Address spills immediately with a careful, targeted approach to prevent damage.
- Implement preventive habits to keep your keyboard clean longer.
You can clean your Magic Keyboard effectively using a few simple tools. Power it off first. Use compressed air to remove loose debris. Wipe surfaces with a microfiber cloth slightly dampened with isopropyl alcohol. This process removes grime and disinfects without causing damage.
Why Your Magic Keyboard Needs Regular Cleaning
Your Magic Keyboard faces daily challenges. Dust, food crumbs, skin oils, and unseen germs accumulate quickly. This buildup affects both its appearance and how it works. Regular cleaning stops dirt from getting trapped under keys. It prevents sticky keys and ensures a smooth typing experience.
Dirty keyboards can also be a health concern. They harbor bacteria and viruses. These germs transfer from your hands to your face or food. Cleaning improves your personal hygiene. It makes your workspace safer. A clean keyboard also just feels better to use.
Think about the lifespan of your device. Dirt and debris can wear down internal components over time. Dust can clog the key mechanisms. This leads to keys that stick or do not register presses. Keeping your Magic Keyboard clean extends its functional life. It helps you avoid expensive repairs or replacements. Maintaining its pristine look also preserves its resale value. Regular maintenance protects your investment.
Essential Tools for Cleaning a Magic Keyboard
Having the right tools makes cleaning your Magic Keyboard easy and safe. Using harsh chemicals or abrasive materials can damage your keyboard. Always choose gentle, effective products. I always gather my supplies before I start. This saves time and ensures I have everything on hand.
First, you need a can of compressed air. This is vital for blowing out loose debris. Make sure it has a thin straw attachment. This allows you to direct the airflow precisely. Hold the can upright to prevent propellant from spraying out.
Next, a microfiber cloth is essential. These cloths are soft and non-abrasive. They pick up dust and grime without scratching surfaces. Use a clean, lint-free cloth. You might need a few different ones for different stages of cleaning.
Isopropyl alcohol (70% or 90%) is the recommended cleaning solution. It evaporates quickly. It does not leave residue. It also disinfects surfaces effectively. Avoid stronger alcohols or household cleaners. They can strip the finish or damage internal components. Use it sparingly, only dampening your cloth.
Finally, gather some cotton swabs and a soft-bristled brush. Cotton swabs are perfect for reaching tight spots between keys. A soft brush, like a clean paintbrush or a dedicated keyboard brush, helps loosen stubborn dust before using compressed air. These tools ensure thorough cleaning. You can reach every corner and crevice.
Step-by-Step Guide: Basic Surface Cleaning
A basic surface clean should be part of your regular routine. This keeps your Magic Keyboard looking good. It prevents major grime buildup. This method is quick and effective for everyday dust and light spills. Follow these steps carefully to protect your device.
1. Power Off and Disconnect
Before doing anything, turn off your Magic Keyboard. If it is a wireless model, turn off its power switch. If it is wired, unplug it from your computer. This prevents accidental key presses. It also protects the device from electrical shorts. Safety is always my top priority when cleaning electronics.
2. Invert and Shake
Hold your Magic Keyboard upside down over a trash can. Gently shake it. This simple action helps dislodge crumbs, dust, and other loose debris. You might be surprised by what falls out! Give it a few good shakes from different angles. This helps gravity do its job.
3. Use Compressed Air
Now, grab your can of compressed air. Attach the narrow straw. Hold the can upright to prevent liquid propellant discharge. Spray the air in short bursts across the keyboard surface. Angle the straw to blow air between and under the keys. Work your way across the entire keyboard. Pay extra attention to the edges of the keys. This pushes out remaining dust and particles. Compressed air is very effective for getting rid of hidden debris. It helps you clean keyboard without removing keys, which is safer for delicate mechanisms. For more tips on general keyboard care, consider reading our guide on how to clean an Apple keyboard.
4. Wipe Down Surfaces
Lightly dampen a clean microfiber cloth with isopropyl alcohol. Do not spray alcohol directly onto the keyboard. Gently wipe the surface of each keycap. Clean the areas around the keys. This removes finger oils, smudges, and light dirt. The alcohol evaporates quickly. This leaves no residue. Use a dry part of the cloth for any streaks. You can also use a cotton swab for tight corners. This basic cleaning will make your keyboard look almost new again.
Deep Cleaning Your Magic Keyboard for Stubborn Grime
Sometimes, basic cleaning is not enough. You might have sticky keys. Or you might see noticeable grime buildup. This calls for a more thorough deep cleaning process. This method tackles tougher issues like spills or ingrained dirt. Proceed with extra care during these steps.
1. Identify Problem Areas
Look closely at your Magic Keyboard. Find any keys that feel sticky or look discolored. Note areas where liquid might have spilled. This focused approach saves you time. It ensures you address the most problematic spots first. Sometimes, sticky keys need extra attention.
2. Prepare Isopropyl Alcohol Solution
Again, use 70% or 90% isopropyl alcohol. It is effective for dissolving oils and sugars. It evaporates quickly. This minimizes moisture exposure. Dampen a cotton swab or the corner of a microfiber cloth. Do not saturate it. Just make it damp enough to wipe surfaces. This precision helps you manage the cleaning.
3. Cleaning Sticky Keys and Between Gaps
For sticky keys, gently scrub the sides and top of the keycap with an alcohol-dampened cotton swab. Work around the edges where dirt collects. You can also carefully use a damp cotton swab to clean the tiny gaps between keys. Be gentle. Avoid forcing anything. This helps break down stubborn residue. If your keyboard has greasy residue from snacks or spills, these methods are crucial. For specific advice on similar issues, check our guide on how to clean a greasy keyboard. This helps remove the sticky film.
4. Addressing Liquid Spills (Caution!)
If you have a liquid spill, act fast. Immediately power off and disconnect your keyboard. Turn it upside down to drain any excess liquid. Use absorbent paper towels to blot the visible spill. Do not rub. Then, use a microfiber cloth lightly dampened with isopropyl alcohol. Carefully wipe down the affected areas. Isopropyl alcohol helps dry out moisture. It also cleans residue. If the spill was large, or your keyboard still malfunctions, professional repair might be necessary. For more information on dealing with serious spills, see our article on how to clean a laptop keyboard after a spill.
5. Cleaning Keycaps (if removable)
Magic Keyboard keycaps are generally not designed for easy removal. Removing them risks damaging the delicate butterfly or scissor switch mechanism underneath. Apple advises against removing them for cleaning. If you must remove a keycap due to extreme stickiness, proceed with extreme caution. Use a plastic pry tool. Gently lift from one corner. Watch for the small clips. However, I strongly recommend avoiding keycap removal unless absolutely necessary. For detailed information on cleaning individual keys without removal, refer to our article on how to clean keys on keyboard. Most deep cleaning can be achieved without this risky step.
Special Considerations for Different Magic Keyboard Models
Apple offers a few versions of the Magic Keyboard. While the general cleaning principles remain the same, some models have unique features. These features require slight adjustments to your cleaning approach. Understanding these differences ensures you clean your specific model safely.
Magic Keyboard with Numeric Keypad
This model is larger. It has a dedicated numeric keypad on the right side. The cleaning process for the keys themselves is identical. However, you will have more surface area to clean. This means you will use more compressed air. You will also use more alcohol-dampened microfiber cloth. Pay attention to the space between the main keyboard and the numeric pad. Dust and crumbs often settle here. Ensure you wipe down all the keys. Do not miss any spots.
Magic Keyboard with Touch ID
The Magic Keyboard with Touch ID has a fingerprint sensor integrated into the power button. This area needs special care. When cleaning this button, use a very lightly dampened microfiber cloth. Do not use excessive liquid. Do not use abrasive materials. The Touch ID sensor is sensitive. Harsh cleaning can damage its functionality. A gentle wipe is usually enough to keep it clean. Avoid spraying anything directly onto it. This is similar to how you would clean a MacBook Pro keyboard, which also features Touch ID.
Material Differences
Most Magic Keyboards feature an aluminum top case and plastic keycaps. The cleaning methods described work well for these materials. If your keyboard has any unique textures or finishes, test your cleaning method on a small, inconspicuous area first. This ensures no discoloration or damage occurs. Always use lint-free cloths. Avoid paper towels. Paper towels can leave small fibers behind. These fibers can get stuck in the keyboard mechanisms. This might require additional cleaning efforts later.
Regardless of the model, consistency is key. Regular light cleaning is better than infrequent, intense cleaning. This approach keeps your Magic Keyboard in pristine condition. It performs optimally for years to come.
Preventing Future Buildup and Maintaining Keyboard Health
The best way to keep your Magic Keyboard clean is to prevent it from getting dirty in the first place. Simple habits can significantly reduce the need for deep cleaning. I always find prevention easier than cure. Adopting these practices will extend your keyboard’s life and hygiene.
Regular Light Cleaning
Make light cleaning a routine. A quick wipe-down with a dry microfiber cloth every few days prevents dust accumulation. Use a can of compressed air weekly or bi-weekly. Give your keyboard a quick blast. This removes surface dust before it settles deeply. This quick maintenance takes only a minute or two. It makes a big difference in the long run.
Mindful Eating and Drinking
Food crumbs and liquid spills are major culprits for a dirty keyboard. Avoid eating or drinking directly over your Magic Keyboard. If you must, use extreme caution. Keep snacks and beverages a safe distance away. Consider using a desk mat. A desk mat can catch stray crumbs. This small change reduces the risk of food particles falling between keys.
Using Keyboard Covers
Some people use keyboard covers. These are thin silicone or TPU covers that fit over the keys. They protect against spills, dust, and crumbs. A keyboard cover can be a great barrier. It keeps your keys clean. Make sure the cover is designed for your specific Magic Keyboard model. This ensures a proper fit. It also ensures it does not hinder typing. For more on protecting your input devices, you might want to read our article on how to clean a keyboard cover.
Proper Storage
When not in use, protect your keyboard. If you carry your Magic Keyboard in a bag, put it in a protective sleeve or case. This prevents dust and debris from entering. It also protects against scratches. If it stays on your desk, covering it with a cloth when not in use can prevent dust from settling. Simple storage habits keep your keyboard looking new. These habits are especially useful for keeping your iPad keyboard clean if it often travels with your device.
By following these preventive measures, you can dramatically reduce the dirt and grime your Magic Keyboard collects. This saves you time and effort on deep cleaning. It also maintains your keyboard’s performance and appearance.
Troubleshooting Common Cleaning Issues
Even with careful cleaning, you might encounter issues. Sometimes, a key still feels sticky. Or, you notice a problem after cleaning. Knowing how to troubleshoot these common problems helps you resolve them quickly. Do not panic if something seems wrong.
Key Still Feels Sticky After Cleaning
If a key remains sticky after deep cleaning, residue might still be present. This often happens with sugary drinks.
- Repeat Alcohol Application: Gently re-dampen a cotton swab with isopropyl alcohol. Focus on the specific sticky key. Work around its edges. Press the key repeatedly as you clean. This helps the alcohol penetrate.
- Patience: Sometimes, it takes a few applications. The residue needs to dissolve.
- Avoid Force: Do not try to force the key. This can damage the mechanism.
- Check for Debris: Use compressed air again. Make sure no stubborn particle is trapped.
Key Stops Working or Becomes Loose
This is less common after cleaning. If it happens, it might indicate damage.
- Re-seat Keycap (if applicable): If you removed a keycap, ensure it is properly re-seated. Listen for the clicks. This means it is locked in place.
- Inspect for Damage: Look closely at the key mechanism. Do you see any broken plastic pieces? Is anything bent?
- Test Connectivity: If it is a wireless keyboard, ensure it is paired correctly. Check its battery level.
- Restart Device: Sometimes, a simple computer restart resolves connectivity issues.
Streaks or Residue Left Behind
Streaks usually mean too much liquid was used. Or, the cloth was not clean.
- Use a Dry Microfiber Cloth: Wipe the surface again with a clean, dry microfiber cloth. Buff gently.
- Less Alcohol: For future cleaning, use less isopropyl alcohol. Ensure your cloth is only damp, not wet.
- Lint-Free Cloth: Always use a high-quality, lint-free microfiber cloth. Avoid old or dirty cloths.
When to Seek Professional Help
Some problems are beyond home cleaning.
- Major Spills: If a large amount of liquid spilled, especially sugary or acidic liquids, and the keyboard is malfunctioning, professional repair is best.
- Physical Damage: If keys are broken, or the keyboard is bent, professional service might be needed.
- Persistent Malfunctions: If cleaning does not resolve performance issues, consult Apple Support. They can provide repair options or advice.
It is important to know your limits. Attempting repairs beyond your skill can cause more damage. A clean keyboard should work perfectly. If it does not, get expert help.
Conclusion
Keeping your Magic Keyboard clean is simple. It is a vital task for its longevity and your hygiene. We have covered everything from basic dust removal to tackling stubborn grime. You now know the right tools to use. You understand safe techniques. Remember, a little prevention goes a long way.
Regular light cleaning stops dirt from building up. Mindful habits prevent major spills. If you follow this guide, your Magic Keyboard will look great. It will also perform flawlessly. A clean keyboard makes your entire computing experience more pleasant and efficient. Take pride in maintaining your valuable Apple device. Your fingers and your wallet will thank you for it. Keep cleaning, and enjoy your pristine Magic Keyboard!
FAQ Section
Can I use water to clean my Magic Keyboard?
No, avoid using plain water to clean your Magic Keyboard. Water can seep into the sensitive electronics. It causes corrosion or short circuits. Always use a very lightly dampened microfiber cloth with isopropyl alcohol instead. Alcohol evaporates quickly. This makes it safer for electronics.
How often should I clean my Magic Keyboard?
Aim for a basic surface clean weekly. This removes daily dust and oils. Perform a deeper clean monthly or every few months. This depends on how much you use it. It also depends on your environment. If you eat near your keyboard, clean it more often.
Is it safe to remove Magic Keyboard keycaps?
Apple generally discourages removing Magic Keyboard keycaps. The mechanisms underneath are delicate. They are prone to breaking. Most cleaning can be done without removing keycaps. If you must remove one, do so with extreme caution. Use a thin plastic pry tool. Be aware that you risk damage.
What if I spill liquid on my Magic Keyboard?
Act immediately if you spill liquid. Power off and disconnect the keyboard at once. Turn it upside down to drain excess liquid. Gently blot the area with absorbent paper towels. Use a microfiber cloth lightly dampened with isopropyl alcohol. Carefully wipe the affected area. If the keyboard still malfunctions, seek professional help.
Can I use compressed air on my Magic Keyboard?
Yes, compressed air is one of the best tools for cleaning your Magic Keyboard. Use it in short bursts. Hold the can upright. This prevents propellant from spraying liquid onto the keyboard. Blow air between and under the keys. It effectively dislodges crumbs and dust.
Why are my keys sticky after cleaning?
Sticky keys after cleaning often mean residual sugar or grime remains. This is common after liquid spills. Re-clean the sticky keys with a cotton swab. Dampen it with isopropyl alcohol. Gently scrub around the key. Press the key repeatedly. This helps dissolve and remove the sticky substance.
- Magic Keyboard Cleaning
- Apple Keyboard Care
- Keyboard Maintenance
- Wireless Keyboard Cleaning
- Tech Hygiene


