· Tech Maintenance · 11 min read
How To Clean Greasy Keyboard

Easily Clean Your Greasy Keyboard for a Fresh Start
Is your keyboard feeling sticky? Do keys shine with an unwanted gloss? A greasy keyboard makes typing unpleasant. It also harbors germs and dust. Learning how to clean greasy keyboard surfaces is important for comfort and health. This guide will show you simple, effective ways to restore your keyboard. We will cover basic wiping, deep cleaning, and prevention tips. You will have a clean, sanitary typing experience.
Takeaway
- Gather Tools First: Have isopropyl alcohol, microfiber cloths, cotton swabs, and compressed air ready.
- Safety Is Key: Always unplug your keyboard before cleaning.
- Surface Cleaning: Use damp cloths with alcohol to wipe down keycaps and the frame.
- Deep Cleaning: Remove keycaps for thorough cleaning of switches and the board underneath.
- Prevent Future Grease: Wash hands often, avoid eating near your keyboard, and clean regularly.
To clean a greasy keyboard, unplug it first. Then, gently wipe down the keys and surface with a microfiber cloth dampened with isopropyl alcohol (70% or higher). Use cotton swabs for tight spots. For deep grease, remove keycaps and clean beneath them with compressed air and alcohol.
Understanding Greasy Keyboards: Causes and Concerns
Keyboards get greasy from everyday use. Our fingers transfer natural oils. Food particles and drinks can also spill. Dust then sticks to these oily spots. This mixture creates a sticky, greasy film.
This buildup is not just an aesthetic problem. A greasy keyboard can cause keys to stick. It reduces typing speed and comfort. More importantly, keyboards can become breeding grounds for bacteria. Studies show keyboards often carry more germs than a toilet seat. Cleaning is a health measure. A clean keyboard also lasts longer. It performs better. Regular cleaning removes harmful particles. This protects internal components. It keeps your device working well.
Essential Tools and Preparations for Cleaning Greasy Keyboard
Before you start cleaning, you need the right tools. Gathering everything beforehand saves time. It ensures you clean safely and effectively. You will need a few basic items. These items help break down grease and lift dirt.
First, you need isopropyl alcohol. Use a concentration of 70% or higher. It evaporates quickly. This minimizes moisture damage to electronics. Next, get several clean microfiber cloths. These cloths are soft. They will not scratch your keyboard. They also pick up dirt well. Cotton swabs are good for small spaces. Compressed air cans help blow away loose debris. A keycap puller is helpful if you plan a deep clean. Small brushes, like a soft toothbrush, can also help. Always unplug your keyboard before cleaning. If it is a laptop, turn it off. This prevents accidental key presses. It protects you from electrical shock. Keep liquids away from internal components. Do not spray cleaners directly onto the keyboard.
Required Cleaning Supplies:
- Isopropyl alcohol (70% or higher)
- Clean microfiber cloths
- Cotton swabs
- Compressed air can
- Keycap puller (optional, for deep cleaning)
- Small soft brush (e.g., old toothbrush)
Safety Steps:
- Unplug the keyboard from your computer.
- For laptops, shut down the device completely.
- Avoid spraying liquids directly onto the keyboard. Apply to cloth first.
- Let the keyboard dry completely before plugging it back in.
Step-by-Step Guide: Cleaning Surface Grease from Your Keyboard
Cleaning surface grease is the first step. This method is quick. It removes most visible grime. It makes your keyboard feel much better. You do not need to remove any keys for this part.
Start by unplugging your keyboard. Turn your keyboard upside down. Gently shake it. This helps dislodge any loose crumbs or dust. Use your compressed air can. Spray it across the key gaps. This blows out more debris. Next, take a microfiber cloth. Dampen it slightly with isopropyl alcohol. Wipe down each keycap. Clean the spaces between the keys. Use a cotton swab for tight corners. The alcohol cuts through grease. It evaporates fast. Do not oversaturate the cloth. Moisture is harmful to electronics. Work in small sections. This ensures thorough cleaning. Repeat the process until all visible grease is gone. Let the keyboard air dry completely. This takes only a few minutes. Your keyboard will look and feel cleaner. This basic cleaning is good for regular maintenance. It prevents heavy buildup. It keeps your typing experience pleasant.
Deep Cleaning Your Keyboard: Tackling Stubborn Grease and Grime
Sometimes, surface cleaning is not enough. Grease can seep under the keycaps. This needs a deeper clean. Deep cleaning removes old, stubborn grime. It makes your keyboard truly spotless. This process involves removing the keycaps. It exposes the keyboard’s internal plate and switches.
First, take a picture of your keyboard. This helps you remember where each key goes. Then, use a keycap puller to remove each keycap. Gently pry them off. Place them in a bowl. You can clean these keycaps separately. Fill a bowl with warm, soapy water. Add a small amount of dish soap. Soak the keycaps for a few minutes. For mechanical keyboards, you may also need to clean the switches themselves. Find detailed guidance on how to clean keyboard switches for specific methods.
While the keycaps soak, clean the keyboard base. Use compressed air again. Blow out any debris stuck under the removed keycaps. Dip a cotton swab in isopropyl alcohol. Carefully clean around each switch. Wipe down the entire exposed base plate. Pay extra attention to sticky areas. Let the base air dry fully. Take your keycaps out of the soapy water. Rinse them thoroughly under clean water. Make sure no soap residue remains. Let them air dry completely on a towel. They must be bone-dry before reattaching. If you are cleaning individual keys, you might find more tips on how to clean keys on keyboard. Once everything is dry, carefully reattach each keycap. Refer to your picture if needed. This deep clean restores your keyboard to a near-new condition.
Cleaning Specific Keyboard Types: Laptop, Mechanical, and More
Different keyboard types require specific cleaning approaches. A laptop keyboard is built differently than a standalone mechanical keyboard. Knowing these differences helps you clean safely. It also ensures effectiveness.
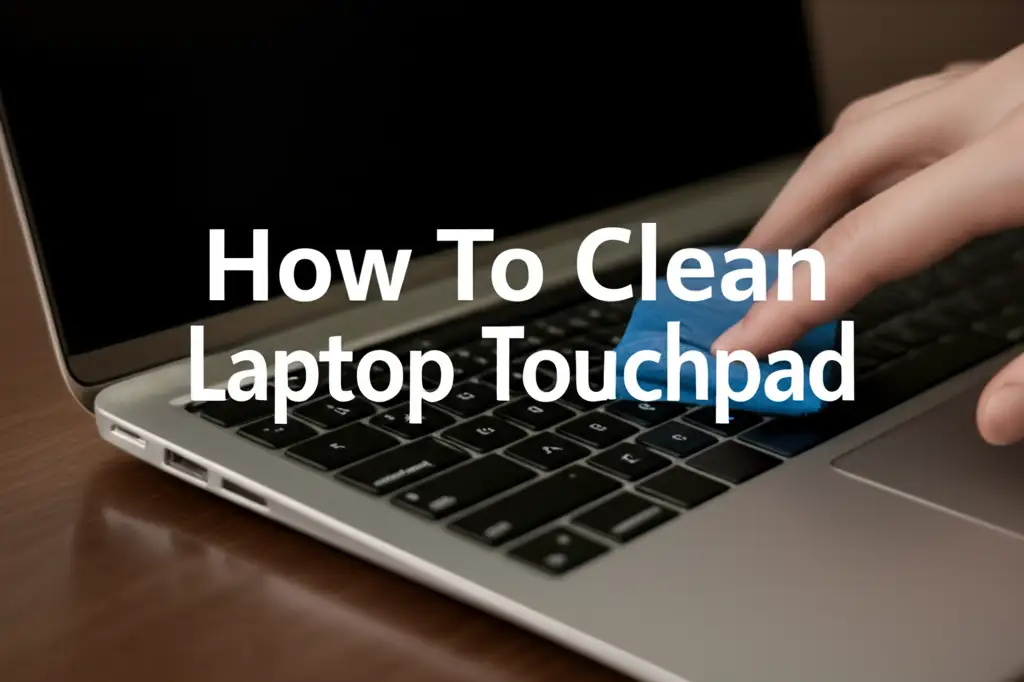
Cleaning a Greasy Laptop Keyboard
Laptop keyboards are usually non-removable. This means you cannot take off the keycaps easily. Cleaning a laptop keyboard focuses on surface grime. Always turn off and unplug your laptop first. Use compressed air. Blow air across the keys at an angle. This removes loose dirt. Dampen a microfiber cloth with isopropyl alcohol. Wipe each keycap gently. Pay attention to the trackpad and palm rest too. Use cotton swabs for tight spots. For serious spills, learn more about how to clean laptop keyboard after spill. If you have a specific model, like a MacBook Pro, there are specialized guides for how to clean macbook pro keyboard. Surface Pro keyboards also have their unique considerations; refer to how to clean surface pro keyboard for those specific devices. For general laptop care, check how to clean laptop keyboard.
Cleaning a Greasy Mechanical Keyboard
Mechanical keyboards are robust. They often have removable keycaps. This makes deep cleaning easier. Follow the deep cleaning steps mentioned earlier. Remove keycaps. Soak them in warm, soapy water. Clean the switches and plate with alcohol and cotton swabs. Specific brands like Logitech might have particular cleaning needs. You can find information on how to clean logitech keyboard. Always dry everything completely before reassembling.
Cleaning a Greasy Membrane Keyboard
Membrane keyboards are common. They usually do not have removable keycaps. For these, focus on surface cleaning. Use compressed air. Wipe down the keys with an alcohol-dampened cloth. Cotton swabs help clean around key edges. If you need to clean without removing keys, guides like how to clean keyboard without removing keys are useful. This method is effective for maintaining hygiene. It keeps the keyboard functional.
Cleaning Keyboard Under Keys: Tackling Hidden Grime
Grease and debris often hide under the keys. This unseen grime affects performance. It also contributes to odor and germ buildup. Cleaning under the keys provides a complete refresh. This process requires keycap removal.
Once you remove the keycaps, you will see the keyboard’s base plate. This area collects a lot of dust and crumbs. Use a can of compressed air. Hold it upright. Blast air across the exposed plate. Work in short bursts. This forces out loose debris. For sticky residue, use isopropyl alcohol. Dip a cotton swab or the corner of a microfiber cloth into the alcohol. Carefully wipe around each switch stem. Do not let liquid drip into the switch housing. Alcohol helps dissolve stubborn grease. It evaporates quickly. For very sticky spots, you might need to gently scrape with a non-abrasive tool, like a plastic toothpick. Be careful not to damage anything. If you have a Mac keyboard, specific instructions might apply for cleaning under keys, such as those found at how to clean mac keyboard under keys. After cleaning, let the entire keyboard base air dry completely. Ensure there is no moisture left. Then, carefully replace all keycaps. This method ensures your keyboard is clean inside and out. It prevents future stickiness. It improves the feel of your keys.
Prevention and Regular Maintenance for a Clean Keyboard
A clean keyboard starts with good habits. Prevention is easier than deep cleaning. Simple practices keep grease and grime away. They ensure your keyboard stays sanitary.
First, wash your hands before using your computer. This removes oils and dirt. It prevents their transfer to the keys. Second, avoid eating over your keyboard. Crumbs and food residue are major causes of grime. If you must eat, do so away from your desk. Third, use a keyboard cover. These clear silicone covers protect against spills and dust. They are easy to remove and wash. Fourth, clean your keyboard regularly. A quick weekly wipe-down can prevent buildup. Use a microfiber cloth with a small amount of alcohol. This routine removes fresh grease before it hardens. You can also use compressed air daily. A quick blast gets rid of dust. These small actions make a big difference. They extend your keyboard’s life. They also maintain a pleasant typing experience. Remember, a clean workspace promotes better health. It also boosts productivity.
Key Prevention Tips:
- Wash hands before use.
- Avoid eating or drinking near the keyboard.
- Use a keyboard cover.
- Store your keyboard properly when not in use.
Routine Maintenance Schedule:
- Daily: A quick blast with compressed air.
- Weekly: Wipe down keycaps and surfaces with an alcohol-dampened cloth.
- Monthly: Perform a light deep clean, if possible, for your keyboard type.
- Quarterly/Bi-annually: Full deep clean with keycap removal if your keyboard allows.
Frequently Asked Questions About Cleaning Greasy Keyboards
Q1: What is the best cleaner for a greasy keyboard?
A1: Isopropyl alcohol (70% or higher) is the best choice. It is effective at dissolving grease and oil. It also evaporates quickly, reducing the risk of moisture damage to electronics. Always apply it to a cloth or swab first, not directly to the keyboard. This helps control moisture.
Q2: Can I use water to clean my keyboard?
A2: Avoid using plain water to clean your keyboard, especially directly. Water can cause short circuits and damage electronic components. Small amounts of water mixed with soap can be used for soaking removable keycaps. Ensure these keycaps are completely dry before putting them back on the keyboard.
Q3: How often should I clean my greasy keyboard?
A3: For light grease, a weekly surface wipe with isopropyl alcohol is good. If you eat near your keyboard or use it heavily, a light surface clean every few days might be needed. A deep clean, where you remove keycaps, is recommended every few months or when significant grime builds up.
Q4: Will cleaning my keyboard damage it?
A4: Cleaning your keyboard correctly will not damage it. Using too much liquid, harsh chemicals like bleach, or abrasive materials can cause damage. Always unplug the keyboard first. Use the recommended tools and cleaners. Be gentle when removing and replacing keycaps to prevent damage to the switches.
Q5: Can I put my keycaps in the dishwasher?
A5: No, do not put keycaps in a dishwasher. The high heat can warp the plastic. Harsh detergents can damage the keycap surface or legends. Soaking them in warm, soapy water and then air-drying them is the safest and most effective method for cleaning individual keycaps.
Q6: How do I remove sticky residue that won’t come off?
A6: For stubborn sticky residue, use undiluted isopropyl alcohol (90% or higher). Apply it to a cotton swab or microfiber cloth. Rub the area gently but firmly. For very persistent spots, a plastic toothpick or a soft brush can help gently dislodge the residue after the alcohol has softened it.
Conclusion
A greasy keyboard is more than just unsightly; it is a hub for germs and can impact your typing experience. Learning how to clean greasy keyboard surfaces effectively can transform your workspace and improve your health. We explored essential tools, from isopropyl alcohol to microfiber cloths, and walked through both surface and deep cleaning methods. You now know how to tackle grime on various keyboard types, including laptops and mechanical keyboards.
Regular maintenance and good habits are key to a lasting clean. By washing your hands, avoiding food near your keyboard, and performing routine cleanings, you prevent significant buildup. A clean keyboard provides a more pleasant and hygienic experience. Take action today. Give your keyboard the cleaning it deserves. Enjoy the feel of clean keys beneath your fingertips.
- keyboard cleaning
- remove grease
- tech hygiene